-
Posted on: 07 Jan 2026
-
Unlock seamless entertainment with our comprehensive guide to programming your Dish Network remote to your TV. Discover the simplest methods to achieve effortless control, ensuring you can navigate channels, adjust volume, and manage your viewing experience with unparalleled ease. This guide is designed to be your ultimate resource.
Introduction: Why Program Your Dish Remote?
In the fast-paced digital age of 2025-26, convenience is paramount. The ability to effortlessly control your home entertainment system significantly enhances your viewing experience. Programming your Dish Network remote to your TV eliminates the clutter of multiple remotes and streamlines your interaction with your devices. This process, often perceived as complex, is actually quite straightforward when you understand the available methods. By mastering this skill, you gain immediate access to intuitive control over your television, ensuring that switching between channels, adjusting volume, and accessing smart features becomes a seamless part of your daily routine. This guide will demystify the process, offering clear, step-by-step instructions for achieving complete command over your entertainment setup.
Understanding Your Dish Network Remote
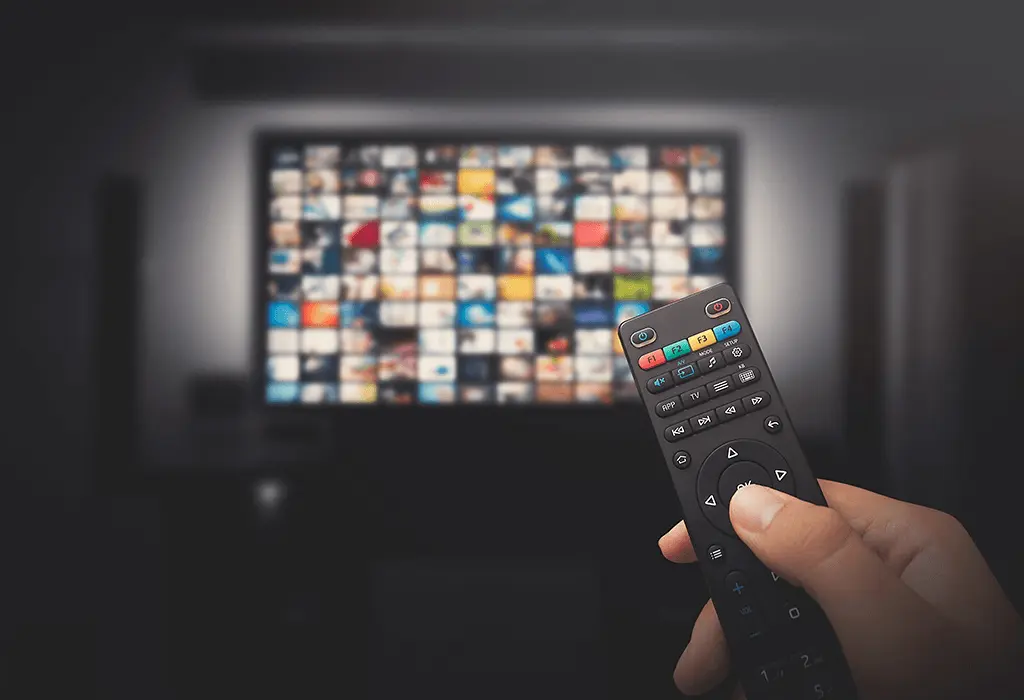
Dish Network offers a variety of remote control models, each with unique features and programming capabilities. However, the fundamental principles of programming them to control your television remain largely consistent. At its core, a universal remote like those provided by Dish works by sending infrared (IR) signals to your devices. These signals are essentially coded commands that your TV, soundbar, or other electronics recognize. When you program your Dish remote, you are essentially teaching it the correct codes for your specific TV model so that it can communicate effectively.
Most Dish remotes feature a combination of buttons for channel selection, volume control, power, menu navigation, and input switching. Some advanced models also include dedicated buttons for streaming services or voice command functionality. The programming process typically involves putting the remote into a "learning" or "programming" mode, then either allowing it to scan through a database of codes or manually entering a specific code associated with your TV's brand and model.
Understanding the layout of your remote is the first step. Familiarize yourself with:
- Mode Buttons: These buttons (often labeled TV, SAT, AUX, DVD, etc.) allow you to select which device your remote is currently controlling.
- Navigation Pad: The directional arrows and "OK" or "Enter" button for menu navigation.
- Volume and Channel Rockers: For quick adjustments.
- Power Button: To turn devices on and off.
- Setup/Program Button: This is crucial for initiating the programming sequence.
The technology behind these remotes has evolved. While older models relied solely on IR, newer ones might incorporate Bluetooth or radio frequency (RF) for enhanced functionality, especially for voice commands. However, for basic TV control, IR remains the standard. The key to successful programming lies in identifying the correct codes or utilizing the remote's built-in auto-search feature.
Common Dish Network Remote Models
Dish Network has released several generations of remotes, each with subtle differences. Knowing your model can sometimes streamline the programming process, especially if you need to find specific instructions or codes. While the exact model number is often found on the back of the remote, here are some of the most prevalent types you might encounter in 2025-26:
- Dish 50.1, 50.5, 52.1, 54.0 Series Remotes: These are common, general-purpose remotes that are highly capable of universal programming. They typically feature an auto-search function and support direct code entry.
- Voice Remotes (e.g., XR11, XR15): These remotes are designed for enhanced user experience, often incorporating voice command capabilities. While they can control your TV, their programming might involve an initial pairing process with the Hopper or Wally receiver, followed by standard TV programming.
- Basic Remotes: Simpler models might have fewer features but still offer robust TV control capabilities through code entry or auto-search.
Regardless of the specific model, the core programming logic remains similar. The primary difference often lies in the button layout and the exact sequence of button presses required to enter programming mode. For instance, a voice remote might require you to press and hold the "microphone" button during setup, while older models might use a dedicated "Setup" button.
It's always a good idea to consult the user manual that came with your specific Dish Network receiver or remote. If you no longer have it, Dish Network's official website often provides downloadable manuals for all their equipment. Searching for your receiver model (e.g., "Hopper 3 manual") will usually lead you to the correct documentation.
Programming Methods: A Quick Overview
Dish Network remotes offer several primary methods for programming them to control your television. Each method has its advantages, and the best approach often depends on the information you have available and your personal preference. Understanding these methods upfront will help you choose the most efficient path to achieving effortless control.
Here's a breakdown of the most common programming techniques:
Method Description Best For Pros Cons Auto Code Search The remote cycles through a list of codes until it finds one that operates your TV. When you don't know your TV's exact code. No need for a code list; works with many brands. Can be time-consuming. Direct Code Entry You manually enter a specific 3- or 4-digit code for your TV brand. When you have the correct code for your TV brand. Fastest method if the code is known. Requires finding the correct code list. Learning Functionality The Dish remote "learns" commands directly from your original TV remote. When other methods fail or for specific, hard-to-program functions. Can program any function your original remote can send. Requires both remotes to be functional and close by. Understanding these methods is key. The most common and often easiest method for beginners is the Auto Code Search. However, if you can find a reliable code list for your TV brand, Direct Code Entry is significantly faster. The Learning Functionality is a powerful backup when other methods prove elusive.
Method 1: The Auto Code Search (Most Common)
The Auto Code Search is the most widely used and often the most successful method for programming your Dish Network remote to your TV, especially if you don't have a specific code list. This process involves putting your remote into a special search mode, where it systematically sends different codes to your TV. You then stop the search when your TV responds (e.g., turns off, changes volume). This method is particularly effective for popular TV brands and even many lesser-known ones, as Dish Network maintains an extensive database of codes within its remotes.
Step-by-Step Guide to Auto Code Search
Before you begin, ensure your TV is powered on and that you have a clear line of sight between your Dish remote and the TV. You will also need your original TV remote handy, as you'll use it to confirm the programming once the Dish remote is working.
- Put the Dish Remote in Programming Mode:
- Press and hold the [SAT] button (or the button corresponding to your receiver, usually SAT) and the [OK] button simultaneously.
- Hold them down until the red light on the remote flashes twice, then stays lit. This indicates the remote is ready to receive commands.
- Initiate the Code Search:
- Press and hold the [TV] button (to tell the remote you want to program the TV).
- Press and hold the [POWER] button.
- While still holding the [POWER] button, press the [SAT] button repeatedly. Each press sends a new code.
- Continue pressing [SAT] until your TV turns off. This might take several minutes, as the remote cycles through hundreds of codes. Be patient!
- Press and hold the [TV] button and the [OK] button until the red light flashes twice.
- Press the [POWER] button.
- Press the [CH ^] (Channel Up) button repeatedly. Each press sends a new code.
- Stop when the TV turns off.
- Lock In the Code:
- As soon as your TV turns off, release the [POWER] button.
- Press the [TV] button once to lock in the code.
- The red light should flash twice to confirm the code has been accepted.
- Test the Remote:
- Turn your TV back on using the [POWER] button on your Dish remote.
- Test other functions like volume control (using the [VOL +/-] buttons), channel changing (using [CH ^/v]), and menu navigation.
- If it Doesn't Work:
- If the remote doesn't control all functions, or if the code didn't work correctly, repeat the process from Step 1. You may need to try slightly different timing or button presses depending on your specific remote model. Sometimes, you might need to press the [SAT] button more rapidly or slowly.
Important Considerations for Auto Code Search:
- Patience is Key: This process can take anywhere from 5 to 30 minutes, depending on how far down the code list your TV's code is.
- Line of Sight: Ensure no obstructions between the remote and the TV's IR sensor.
- Battery Strength: Weak batteries can sometimes interfere with the programming process. Ensure your remote has fresh batteries.
- Specific Model Variations: While the general steps are similar, the exact button combinations might differ slightly between Dish remote models. Referencing your specific remote's manual is always recommended if available.
By following these steps carefully, you should be able to program your Dish remote to control your TV effectively using the auto code search method.
Method 2: Direct Code Entry (Faster if You Have the Code)
The Direct Code Entry method is significantly faster than the auto code search, provided you can find the correct 3- or 4-digit code for your television brand. Dish Network remotes have a built-in library of codes for thousands of TV models from various manufacturers. If you know your TV's brand (e.g., Samsung, LG, Sony, Vizio), you can often find these codes online or in your Dish remote's manual. This method is ideal for users who prefer a more direct and less time-consuming approach.
Finding Your TV's Code
Before attempting direct code entry, you need to obtain the appropriate code. Here's how:
- Dish Network Website: The most reliable source is Dish Network's official support website. They usually have a searchable database of remote codes.
- Remote Manual: Your Dish remote's user manual will likely contain a list of codes organized by TV brand.
- Online Code Lists: Many third-party websites compile universal remote codes. However, always prioritize official sources for accuracy. Search terms like "Dish Network remote codes for [Your TV Brand]" can be helpful.
Example Code List Snippet (Illustrative - Actual codes vary):
TV Brand 3-Digit Codes 4-Digit Codes Samsung 001, 015, 029 1072, 1079, 1156 LG 003, 017, 028 1017, 1046, 1106 Sony 004, 018, 027 1004, 1031, 1047 Vizio 017, 029 1174, 1185, 1207 Note: The codes listed above are for illustrative purposes only. Always use the codes provided by Dish Network or your remote's manual for your specific model.
Step-by-Step Guide to Direct Code Entry
- Ensure TV is On: Make sure your television is powered on.
- Put the Dish Remote in Programming Mode:
- Press and hold the [SAT] button (or the button for your receiver) and the [OK] button simultaneously.
- Hold them down until the red light on the remote flashes twice, then stays lit.
- Select the Device:
- Press and hold the [TV] button.
- Release the [TV] button after the red light flashes once.
- Enter the Code:
- Using the number pad on your Dish remote, enter the first 3-digit code you found for your TV brand. For example, if the code is '001', press '0', then '0', then '1'.
- If your remote supports 4-digit codes, enter all four digits.
- After entering the code, the red light should flash twice to confirm it's a valid code. If it stays lit or flashes rapidly, the code may be incorrect or not supported.
- Test the Remote:
- Press the [POWER] button on your Dish remote. Your TV should turn off.
- If it turns off, press the [POWER] button again to turn it back on.
- Test other functions like volume ([VOL +/-]), channel changing ([CH ^/v]), and input selection.
- If the Code Doesn't Work:
- If the TV doesn't respond, or if only some functions work, repeat steps 2-5 using the next code on your list for your TV brand.
- Continue trying codes until you find one that operates all functions of your TV.
Troubleshooting Direct Code Entry:
- Incorrect Codes: The most common issue is using an incorrect or outdated code. Double-check your code list.
- Remote Model Compatibility: Ensure the codes you are using are specifically for your Dish remote model.
- TV Model Variations: Even within the same brand, different TV models might require different codes. If a brand's codes aren't working, try searching for codes specific to your TV's model number.
Direct code entry is the most efficient method when successful, offering a quick path to unified control of your entertainment system.
Method 3: Using the Learning Functionality
The "Learning Functionality" is a powerful feature found on many Dish Network remotes, allowing them to mimic the signals sent by your original TV remote. This method is particularly useful when the auto code search fails, or when you have specific functions on your TV remote that aren't covered by standard codes. It requires you to have both your Dish remote and your original TV remote in working condition and placed close to each other.
How the Learning Function Works
Essentially, you place the Dish remote in "learning mode." Then, you point your original TV remote at the Dish remote and press the button you want the Dish remote to learn (e.g., Volume Up). The Dish remote receives the IR signal from your TV remote, stores it, and can then replicate that signal when you press the corresponding button on the Dish remote.
Step-by-Step Guide to Using Learning Functionality
- Prepare Your Remotes:
- Ensure both your Dish remote and your original TV remote have fresh batteries.
- Place the remotes head-to-head (IR emitters facing each other) about 1-2 inches apart.
- Make sure there are no obstructions between the IR sensors.
- Put the Dish Remote in Learning Mode:
- Press and hold the [SAT] button and the [INFO] button (or sometimes [MUTE] or [BACK], check your manual) simultaneously.
- Hold until the red light on the Dish remote flashes twice and stays lit. This signifies it's in learning mode.
- Select the Button to Learn On:
- Press and release the button on the Dish remote that you want to program (e.g., [TV POWER], [VOL +], [CH ^]).
- The red light on the Dish remote will blink once and then remain lit, indicating it's ready to receive a signal for that specific button.
- Transmit the Signal from Your TV Remote:
- Point your original TV remote directly at the Dish remote's IR sensor.
- Press and hold the corresponding button on your TV remote (e.g., press and hold the TV's Power button).
- Continue holding the button on your TV remote until the red light on the Dish remote flashes twice. This confirms it has received and stored the signal.
- Repeat for Other Buttons:
- If you want to program other buttons (e.g., Volume Down, Channel Down, Mute, Input), repeat steps 3 and 4 for each button you wish to learn.
- You can program any button that your original TV remote can send.
- Exit Learning Mode:
- Once you have programmed all desired buttons, press and hold the [SAT] button and the [INFO] button (or the buttons used to enter learning mode) again until the red light turns off.
- Alternatively, pressing the [TV] button might also exit learning mode on some models.
- Test the Learned Functions:
- Point the Dish remote at your TV and test the buttons you programmed. They should now perform the same functions as your original TV remote.
Important Notes for Learning Functionality:
- IR Interference: Ensure there are no other IR devices or bright lights interfering with the signal transfer.
- Button Mapping: Be strategic about which buttons you program. It's often best to map functions like Power, Volume, and Channel to the corresponding buttons on the Dish remote.
- Advanced Functions: This method is excellent for learning specific input codes or even obscure buttons that might not be covered by standard universal codes.
- Model Specifics: The exact buttons used to enter and exit learning mode can vary. Always refer to your Dish remote's manual for precise instructions.
The learning functionality provides a highly customizable solution, ensuring your Dish remote can control virtually any function of your television, offering a truly unified remote experience.
Troubleshooting Common Programming Issues
Even with the best guides, programming a universal remote can sometimes present challenges. Fortunately, most issues are common and have straightforward solutions. By understanding these potential pitfalls, you can resolve them quickly and get back to enjoying effortless control of your Dish Network setup.
Issue 1: Remote Not Entering Programming Mode
Symptom: The indicator light (usually red) doesn't flash or stay lit when you press and hold the required buttons (e.g., [SAT] + [OK]).
Possible Causes & Solutions:
- Incorrect Button Combination: Double-check your remote's manual or the steps provided in this guide. Some models might use different button combinations (e.g., [SAT] + [INFO] instead of [SAT] + [OK]).
- Weak Batteries: Low battery power can prevent the remote from performing advanced functions. Replace the batteries with fresh ones.
- Holding Buttons Incorrectly: Ensure you are pressing and holding the buttons simultaneously for the required duration until the light responds.
- Remote Malfunction: In rare cases, the remote itself might be defective.
Issue 2: Auto Code Search Fails to Turn Off TV
Symptom: After cycling through hundreds of codes, the TV remains on, or the remote stops searching without finding a working code.
Possible Causes & Solutions:
- Incorrect Search Method: Ensure you are using the correct sequence for the auto code search (e.g., holding [POWER] and pressing [SAT] repeatedly, or pressing [CH ^] repeatedly after initiating the search).
- TV Brand Not Supported: While rare, some very old or obscure TV models might not have codes in the Dish remote's database.
- Interference: Other electronic devices or even bright sunlight can interfere with the IR signal. Try the process in a different location or at a different time.
- Patience Required: Sometimes, the correct code is simply at the end of the list. Allow ample time for the search. If it seems to stop prematurely, try re-initiating the search.
- Try Direct Code Entry or Learning: If auto search consistently fails, move on to Method 2 (Direct Code Entry) or Method 3 (Learning Functionality).
Issue 3: Code Entry Accepted, But Functions Don't Work
Symptom: The remote accepts the code (indicator light flashes twice), but buttons like Power, Volume, or Channel don't control the TV.
Possible Causes & Solutions:
- Incorrect Code for TV Model: The code might be for a different model or even a different brand of TV. Verify the code's accuracy for your specific TV model.
- Multiple Codes for the Same Brand: Many TV brands have several codes listed. Try the next code on the list for your brand.
- Remote Not Fully in TV Mode: Ensure you have correctly selected the [TV] mode on your Dish remote before testing.
- Limited Functionality: Some codes might only control basic functions like Power and Volume, but not Menu or Input. Try other codes to see if they offer more comprehensive control.
- TV's IR Sensor Issue: Ensure the IR sensor on your TV is clean and unobstructed.
Issue 4: Learning Functionality Not Working
Symptom: The Dish remote doesn't learn commands from the original TV remote, or the learned commands don't work.
Possible Causes & Solutions:
- Incorrect Remote Placement: Ensure the IR emitters of both remotes are facing each other and are very close (1-2 inches apart).
- Interference: Bright lights or other IR signals can disrupt the learning process.
- Original Remote Malfunction: The original TV remote might not be transmitting signals correctly. Test its functions directly on the TV.
- Dish Remote Not in Learning Mode: Confirm you've correctly entered the learning mode sequence for your Dish remote model.
- Holding Buttons Incorrectly: Ensure you are holding the button on the original remote until the Dish remote confirms receipt (flashes twice).
General Troubleshooting Tips:
- Fresh Batteries: Always start with fresh, high-quality batteries.
- Consult the Manual: Your Dish Network remote's user manual is the definitive source for specific instructions and troubleshooting.
- Restart Devices: Sometimes, simply unplugging your TV and the Dish receiver for 30 seconds and plugging them back in can resolve communication glitches.
- Reset the Remote: Many Dish remotes can be reset to factory defaults. This often involves a specific button sequence (check your manual). After resetting, you'll need to reprogram it from scratch.
- Contact Dish Support: If you've exhausted all troubleshooting steps, contact Dish Network customer support. They can provide model-specific advice or confirm if your remote is functioning correctly.
By systematically addressing these common issues, you can overcome most programming hurdles and achieve the desired effortless control over your TV.
Advanced Tips and Tricks for Remote Control
Once you've successfully programmed your Dish Network remote to control your TV, you might wonder if there's more you can do to enhance your experience. Beyond basic programming, several advanced tips and tricks can further streamline your entertainment setup and unlock hidden functionalities. These techniques leverage the full capabilities of modern Dish remotes, making your interaction with your devices even more intuitive and efficient.
1. Programming Multiple Devices
Most Dish Network universal remotes are capable of controlling more than just your TV. They can typically be programmed to operate your Blu-ray player, soundbar, AV receiver, and even streaming devices like Apple TV or Roku. The process is similar to programming your TV:
- Select the Device Mode: Press and hold the appropriate mode button (e.g., [AUX], [DVD], [BD]) along with the [OK] button until the indicator light confirms readiness.
- Use Auto Code Search or Direct Code Entry: Follow the same methods described earlier, but select the correct mode button for the device you are programming.
- Learning Functionality: This is especially useful for devices with unique command sets or when standard codes fail.
By programming all your entertainment devices to your Dish remote, you can eliminate the need for multiple controllers, creating a truly consolidated command center.
2. Mapping Buttons for Customization
As mentioned in the Learning Functionality section, you can often remap buttons to your preference. This is invaluable if a certain button is difficult to reach or if you prefer a different layout. For example, you might want to:
- Map the [MUTE] button to a more accessible location.
- Assign a frequently used input (like HDMI 2) to a dedicated button.
- Program a sequence of commands (macros) to a single button, though this is less common on standard Dish remotes and more typical of high-end universal remotes.
The Learning Functionality is your primary tool for achieving this level of customization.
3. Utilizing Voice Commands (If Applicable)
If you have a Dish Voice Remote (like the XR11 or XR15), familiarize yourself with its voice command capabilities. These remotes can often control:
- Channel Surfing: "Go to ESPN," "Tune to channel 5."
- On-Demand Content: "Play The Mandalorian on Disney+."
- Device Functions: "Turn off the TV," "Increase volume to 50."
- Searching: "Find action movies," "What's the weather?"
To use voice commands, you typically press and hold the microphone button on the remote while speaking your command. Ensure your voice remote is properly paired with your Dish receiver (usually done during initial setup or through the receiver's settings menu).
4. Understanding Input Selection
Switching between different inputs (HDMI 1, HDMI 2, Component, etc.) is crucial for accessing different devices. Your programmed Dish remote should have an [INPUT] or [SOURCE] button. Pressing this button repeatedly cycles through the available inputs on your TV. Some advanced codes might even allow you to directly select an input number.
5. Using the Remote's Built-in Help Features
Some Dish receivers and remotes have built-in help menus or diagnostic tools accessible via the remote. Check your receiver's on-screen menu for options related to remote control setup or troubleshooting. These can sometimes offer guided assistance.
6. Power Management Settings
Explore the settings on your Dish receiver (Hopper or Wally) related to power management and remote control. You might find options to:
- Enable/Disable HDMI-CEC: This feature allows devices connected via HDMI to control each other. If enabled, your Dish remote might be able to power on/off your TV and adjust volume automatically when you control your receiver.
- Configure Remote Behavior: Some settings allow you to fine-tune how the remote interacts with the receiver and TV.
7. Keeping Firmware Updated
While not directly user-controlled, Dish Network occasionally pushes software updates to its receivers and sometimes even to its remotes. These updates can improve compatibility, add new features, and fix bugs. Ensure your receiver is connected to the internet to receive these updates automatically.
By exploring these advanced tips, you can transform your Dish Network remote from a simple channel changer into a powerful, all-encompassing entertainment controller, truly embodying the concept of effortless control.
Integrating with Other Devices (Soundbars, Blu-ray)
The true power of a programmable Dish Network remote lies in its ability to consolidate control over your entire home entertainment system. While programming it for your TV is the primary goal, extending its capabilities to your soundbar, Blu-ray player, or AV receiver significantly enhances convenience. In 2025-26, as home theater setups become more sophisticated, a single remote to manage everything is no longer a luxury but a necessity.
Programming for Soundbars
Soundbars are popular for their ability to deliver immersive audio without the complexity of traditional surround sound systems. Most soundbars can be controlled via IR signals, making them compatible with your Dish remote.
- Identify the Device Mode: Use the [AUX], [AUDIO], or a similarly labeled button on your Dish remote. Check your remote's manual for the correct designation.
- Find Soundbar Codes: Consult Dish Network's code lists or search online for "[Your Soundbar Brand] Dish remote codes." Brands like Bose, Sonos, Samsung, LG, and Vizio typically have compatible codes.
- Use Direct Code Entry or Auto Search: Follow the steps outlined in Method 1 or Method 2, ensuring you are in the correct device mode.
- Learning Functionality: If standard codes fail, use the learning feature (Method 3) with your soundbar's original remote. This is particularly useful for specific EQ settings or sound modes.
- Volume Control via HDMI-CEC: Many modern soundbars and TVs support HDMI-CEC (Consumer Electronics Control). If enabled on both devices, your TV remote (and thus your programmed Dish remote) can often control the soundbar's volume directly through the HDMI connection, bypassing the need for separate programming for volume. However, dedicated programming ensures all soundbar functions are accessible.
Programming for Blu-ray/DVD Players
Whether you're still enjoying physical media or using a player for specific apps, integrating it with your Dish remote is straightforward.
- Identify the Device Mode: Use the [DVD], [BD], or [PLAYER] button on your Dish remote.
- Find Player Codes: Search for codes specific to your Blu-ray or DVD player brand (e.g., Sony Blu-ray, Panasonic DVD). Dish Network's code database is extensive.
- Direct Code Entry is Often Fastest: If you have the code, this method is usually quick.
- Test Key Functions: Once programmed, test basic playback controls: Play, Pause, Stop, Fast Forward, Rewind, Menu Navigation, and Eject.
- Learning Functionality: Useful for less common functions or if standard codes don't cover everything.
Programming for AV Receivers
For users with more complex home theater systems involving AV receivers, programming your Dish remote can significantly simplify operation.
- Identify the Device Mode: This might be labeled [AVR], [AUDIO], or [AMP].
- Find Receiver Codes: AV receivers from brands like Denon, Yamaha, Marantz, and Onkyo often have compatible codes.
- Focus on Essential Functions: Prioritize programming for Power On/Off, Volume Up/Down, Mute, and Input Selection (to switch between sources connected to the receiver).
- Learning Functionality is Highly Recommended: AV receivers have numerous functions (surround modes, audio settings, etc.). The learning feature allows you to map these directly onto your Dish remote, offering unparalleled control.
- Consider Dedicated Universal Remotes: For highly complex AV receiver setups with many customizable features, a dedicated high-end universal remote (like Logitech Harmony, though discontinued, or similar alternatives) might offer more robust programming options than a standard Dish remote. However, for basic integration, the Dish remote is often sufficient.
General Integration Tips:
- One Device at a Time: Program each device individually.
- Test Thoroughly: After programming each device, test all essential functions before moving to the next.
- Keep Original Remotes: Always keep your original remotes in a safe place. They are invaluable for troubleshooting or for using the learning function.
- HDMI-CEC: Explore HDMI-CEC settings on your TV and other devices. It can sometimes automate certain functions, reducing the need for extensive remote programming. However, direct programming offers more granular control.
By successfully integrating your soundbar, Blu-ray player, and AV receiver with your Dish remote, you achieve a truly unified entertainment experience, eliminating remote clutter and maximizing convenience.
The Future of Dish Remote Control
The landscape of remote control technology is constantly evolving, driven by advancements in smart home integration, artificial intelligence, and user interface design. For Dish Network and its subscribers, the future promises even more intuitive and powerful ways to interact with entertainment systems. As we look ahead into the late 2020s and beyond, several key trends are shaping the evolution of Dish remote control.
1. Enhanced Voice Control and AI Integration
Voice control is already a significant feature, but its capabilities will expand dramatically. Expect:
- More Natural Language Processing: Remotes will understand more complex and conversational commands, reducing the need for specific syntax.
- Proactive Assistance: AI could learn your viewing habits and proactively suggest content or adjust settings based on time of day or your presence. Imagine a remote that automatically dims the lights and suggests a movie when it detects you settling down for the evening.
- Deeper Smart Home Integration: Voice commands will seamlessly control not just your TV and receiver, but also other smart home devices like lights, thermostats, and security systems, all through the Dish remote.
2. Advanced Haptic Feedback and Gesture Control
Beyond simple button presses, future remotes might incorporate:
- Haptic Feedback: Subtle vibrations to confirm commands or provide tactile cues, enhancing the user experience without needing to look at the remote.
- Gesture Control: While still niche, the possibility of controlling certain functions through simple hand gestures recognized by the remote or a connected device exists.
3. Seamless Multi-Device Synchronization
The goal of a single remote will become even more achievable. Future Dish remotes will likely feature:
- Automatic Device Discovery and Configuration: New devices added to your network could be automatically detected and configured with the remote, simplifying setup.
- Cloud-Based Profiles: User preferences and customized remote layouts could be stored in the cloud, allowing easy transfer between remotes or devices.
- Integration with Mobile Apps: Dish Network apps will likely offer even more robust remote control functionality, acting as a secondary or primary interface, with features like keyboard input for searching and advanced settings management.
4. Biometric Authentication
For personalized experiences and parental controls, biometric authentication (e.g., fingerprint scanning) could be integrated, allowing different users to access their profiles and preferences instantly.
5. Energy Efficiency and Sustainability
With growing environmental awareness, future remotes might feature:
- Rechargeable Batteries: Moving away from disposable batteries towards integrated rechargeable solutions.
- Solar or Kinetic Charging: Exploring alternative charging methods to reduce waste and reliance on power outlets.
6. The Role of the Dish Receiver
The Dish receiver (like the Hopper or Wally) will continue to be the central hub. Future receivers will likely offer more sophisticated APIs (Application Programming Interfaces) that allow remotes and associated apps to interact with a wider range of services and devices.
While these advancements might seem futuristic, the groundwork is being laid today. Dish Network's ongoing commitment to innovation suggests that users can expect their remote control experience to become increasingly integrated, intelligent, and effortless in the coming years. The focus will remain on simplifying complex technology and putting powerful control directly into the hands of the user.
Conclusion: Effortless Control Awaits
Mastering the programming of your Dish Network remote to your TV is a fundamental step towards a streamlined and enjoyable home entertainment experience. Whether you opt for the patient thoroughness of the Auto Code Search, the speed of Direct Code Entry, or the adaptability of the Learning Functionality, the process is well within reach for any user. By following the detailed steps and troubleshooting tips provided in this guide, you can overcome common hurdles and achieve seamless control over your television and potentially other connected devices.
Remember, the goal is to eliminate the frustration of juggling multiple remotes and to put the power of your entertainment system at your fingertips. Explore the advanced tips, integrate your soundbar or Blu-ray player, and embrace the future of intelligent remote control. Your journey to effortless command begins with understanding these methods and applying them with confidence. With a little patience and the right approach, you'll soon find yourself navigating your favorite channels and content with unparalleled ease.


