-
Posted on: 07 Jan 2026
-
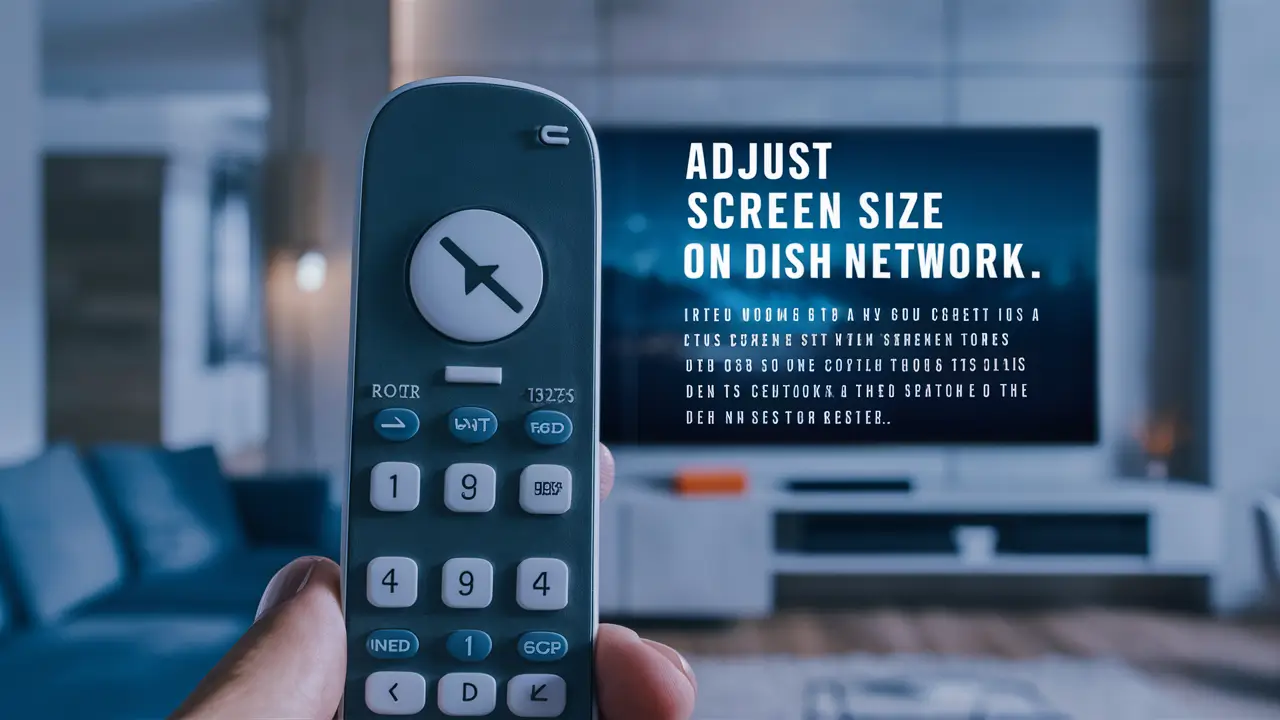
Struggling with a distorted picture on your Dish Network service? This guide will comprehensively show you how to adjust screen size on Dish Network, resolving common aspect ratio issues for a perfect viewing experience. We'll cover remote control adjustments, troubleshooting, and optimizing for modern TVs.
Understanding Screen Size Issues on Dish Network
The visual experience of watching television is significantly impacted by the correct screen size and aspect ratio. When these settings are misconfigured, viewers might encounter a range of frustrating visual anomalies. These can include images that appear stretched horizontally or vertically, black bars on the sides or top and bottom of the screen, or a picture that is simply not filling the available display area as intended. For Dish Network subscribers, understanding how to rectify these issues is crucial for enjoying their favorite programs, movies, and live sports without visual compromise. In 2025, with the prevalence of high-definition and 4K televisions, the expectation for a perfectly formatted picture is higher than ever. Dish Network, like other satellite and cable providers, offers various settings and options to ensure compatibility with different display technologies and broadcast formats.
The primary culprit behind these visual discrepancies is often an incorrect aspect ratio setting. Aspect ratio refers to the proportional relationship between the width and height of an image. Historically, television broadcasts were in a 4:3 aspect ratio, which is more square. Modern widescreen televisions, however, are designed for a 16:9 aspect ratio, which is significantly wider. When a 4:3 program is displayed on a 16:9 screen without proper scaling, you'll see black bars on the sides (pillarboxing). Conversely, if a 16:9 program is stretched to fill a 4:3 screen, it will appear distorted, with people and objects looking unnaturally wide. Dish Network receivers are equipped with settings to manage how these different aspect ratios are displayed, allowing users to choose between filling the screen, maintaining the original aspect ratio with bars, or stretching the image.
Beyond the fundamental aspect ratio, other factors can contribute to screen size problems. These might include the television's own display settings, the resolution being output by the Dish Network receiver, or even the specific channel's broadcast format. For instance, some channels might broadcast in a letterbox format (a 16:9 image with black bars at the top and bottom) even on a widescreen broadcast, to preserve the original cinematic aspect ratio of a movie. Understanding these nuances is the first step towards effectively troubleshooting and adjusting the screen size on your Dish Network setup. The goal is to achieve a clear, undistorted image that optimally utilizes your television's display capabilities, whether you're watching a classic sitcom or the latest blockbuster in stunning high definition.
Common Reasons for Incorrect Screen Size
Several common issues can lead to an improperly adjusted screen size when using Dish Network. Identifying the root cause is key to finding the right solution. These reasons often stem from a combination of receiver settings, television configurations, and the nature of the broadcast content itself.
Receiver Aspect Ratio Settings
The Dish Network receiver (set-top box) has built-in settings that dictate how it should handle different video formats. The most critical of these is the aspect ratio setting. If this is set incorrectly, the receiver might be instructed to stretch a 4:3 image to fill a 16:9 screen, or conversely, to display a 16:9 image with excessive black bars on a 16:9 screen.
- Stretched (16:9): This setting forces all content, regardless of its original aspect ratio, to fill the entire 16:9 screen. This is often the cause of horizontally stretched images, making people look wider than they are.
- Original (4:3 or 16:9): This setting attempts to preserve the original aspect ratio of the broadcast. For 4:3 content, this results in pillarboxing (black bars on the sides). For 16:9 content, it fills the screen appropriately.
- Zoom/Crop: Some receivers offer zoom options that can fill the screen by cropping the top and bottom of a 4:3 image, or by zooming into a 16:9 image. This can cut off parts of the picture.
In 2025, most viewers have 16:9 widescreen televisions, so the ideal setting is usually to allow the receiver to display 16:9 content correctly and to handle 4:3 content by either pillarboxing or offering a zoom option if preferred.
Television Display Settings
Your television itself has its own set of display and aspect ratio controls. These settings can sometimes conflict with or override the settings from your Dish Network receiver.
- TV Aspect Ratio: Modern TVs often have multiple aspect ratio modes, such as "Wide," "Normal," "Zoom," "Stretch," "Just Scan," or "Full Pixel." If the TV is set to "Stretch" while the receiver is also trying to stretch, you'll get a severely distorted image. "Just Scan" or "Full Pixel" modes on HD and 4K TVs are generally recommended for displaying content without overscan or unnecessary scaling.
- Overscan: Older TVs, and some modern ones, have a feature called overscan. This is a slight enlargement of the image to ensure that any potential signal noise or imperfections at the edges of the screen are hidden. However, overscan can also crop off the edges of the intended picture.
- Picture Size/Format: Similar to aspect ratio, many TVs have a "Picture Size" or "Format" menu that allows users to select how the image fills the screen.
Broadcast Content Format
Not all content is broadcast in a standard 16:9 widescreen format. Understanding the original format of what you're watching is important.
- Native 4:3 Content: Older shows, some classic movies, and certain specialized channels still broadcast in the traditional 4:3 aspect ratio.
- Letterboxed 16:9 Content: Many movies, especially those originally filmed for cinemas, are presented in a widescreen format that is narrower than 16:9. This is achieved by adding black bars at the top and bottom (letterboxing) within a 16:9 frame. If your receiver or TV incorrectly tries to "fill" this letterboxed image, you'll get distortion.
- Anamorphic vs. Non-Anamorphic: Anamorphic widescreen content is compressed horizontally to fit into a standard frame and then "un-squeezed" by the display or receiver. Non-anamorphic widescreen content is already in the correct widescreen proportions. Dish receivers are designed to handle anamorphic signals correctly.
HDMI Handshake Issues
Sometimes, communication problems between the Dish Network receiver and the TV, especially over HDMI, can lead to incorrect signal interpretation. This is known as an HDMI handshake issue.
- Cable Quality: A faulty or low-quality HDMI cable can sometimes cause signal degradation or miscommunication.
- Port Issues: Trying a different HDMI port on the TV or receiver can sometimes resolve temporary glitches.
Incorrect Channel Configuration
While less common, in rare cases, a specific channel might have its broadcast signal misconfigured, leading to aspect ratio problems that affect all viewers of that channel. This is usually something Dish Network or the broadcaster needs to fix on their end.
By understanding these common causes, you can better pinpoint why your screen size might be off and apply the correct troubleshooting steps.
Adjusting Screen Size via Dish Remote: Step-by-Step
The most direct way to adjust screen size on Dish Network is through the settings menu on your receiver, accessed using your Dish remote. The exact menu names and options might vary slightly depending on your specific Dish receiver model (e.g., Hopper, Wally, Joey), but the general process is consistent. We'll focus on the common settings for aspect ratio and picture format.
Accessing the Main Menu
First, you need to navigate to the main settings menu.
- Press the "Menu" button on your Dish remote. This is typically located in the upper section of the remote.
- A menu will appear on your screen. Use the arrow keys (up, down, left, right) to navigate through the options.
- Select "Settings" or "System Settings" and press the "Select" or "OK" button.
Locating Picture or Display Settings
Within the Settings menu, you'll need to find the options related to picture or display.
- Navigate to "Picture" or "Display" settings. This might be a standalone option or nested within another category like "System Settings."
- Select this option and press "Select" or "OK."
Adjusting Aspect Ratio Settings
This is the most crucial step. You'll typically find options related to aspect ratio or picture format here.
Option 1: Aspect Ratio (Common for older/simpler menus)
If you see an "Aspect Ratio" setting, you'll likely have choices like:
- 16:9 (Widescreen): This is the standard for modern HDTVs and 4K TVs. Select this if you have a widescreen television and want content to fill it as much as possible.
- 4:3 (Standard): This is for older, square televisions. It's unlikely you'll need this for a modern setup.
- Auto: Many receivers have an "Auto" setting that attempts to detect the broadcast format and adjust accordingly. This is often the best choice for seamless viewing.
Recommendation for 2025: For most users with widescreen TVs, setting this to "16:9" or "Auto" is the most effective. If you choose "16:9" and still see black bars on widescreen content, the issue might be with letterboxing within the broadcast itself. If 4:3 content is stretched, ensure your TV's settings aren't also forcing a stretch.
Option 2: Picture Format (Common for newer receivers like Hopper)
Newer Dish receivers might use a "Picture Format" or "Video Format" setting that offers more granular control. Look for options such as:
- Widescreen (16:9): Similar to the aspect ratio setting, this aims to fill your widescreen TV.
- Standard (4:3): For older TVs.
- Letterbox: This setting is designed to display 4:3 content with black bars on the sides (pillarboxing) and 16:9 content filling the screen.
- Pan & Scan: This option often crops the top and bottom of a 4:3 image to fill a 16:9 screen, or it might zoom into 16:9 content. Use with caution as it can cut off parts of the picture.
- Zoom: Similar to Pan & Scan, this enlarges the image to fill the screen, potentially cropping edges.
- Original: This setting attempts to show the content in its native aspect ratio, adding bars as needed.
Recommendation for 2025: For optimal viewing on a 16:9 TV:
- If you want to see 4:3 content as it was originally broadcast (with black bars on the sides), choose "Letterbox" or "Original."
- If you prefer to have all content fill your widescreen TV, even if it means some distortion or cropping, you might choose "Widescreen" or experiment with "Zoom." However, this is generally not recommended for maintaining picture integrity.
- The "Auto" setting, if available under Picture Format, is often the best bet for automatic adjustment.
Saving Your Changes
After selecting your desired setting, make sure to save it.
- Navigate to "Save," "Apply," or "OK" and press the "Select" button.
- The receiver might restart or prompt you to confirm.
Testing the New Settings
Exit the menu by pressing the "Exit" button on your remote. Watch a few different channels and programs, including older shows (likely 4:3) and modern HD content (likely 16:9), to see if the screen size issue is resolved.
If the issue persists, you may need to adjust your television's own display settings, which we will cover next.
Troubleshooting Aspect Ratio Settings
Sometimes, even after adjusting the Dish Network receiver's settings, the screen size issue might persist. This often indicates that your television's own display settings are interfering or need adjustment. Troubleshooting involves checking both the receiver and the TV in tandem.
Step 1: Reset Receiver Settings
As a first troubleshooting step, it's often wise to reset the Dish Network receiver's picture settings to their defaults. This can clear any corrupted configurations.
- Navigate back to the "Settings" menu on your Dish receiver.
- Look for an option like "Reset," "Factory Reset," or "Restore Defaults." This might be under "System Settings" or "Picture Settings."
- Select the option to reset picture settings. You may be prompted to confirm.
- After the reset, reapply the recommended aspect ratio settings (e.g., "16:9" or "Auto").
Step 2: Check Your TV's Aspect Ratio Settings
Your television has its own controls for how it displays an incoming video signal.
Accessing TV Settings
- Press the "Menu," "Settings," or "Home" button on your TV remote (not the Dish remote).
- Navigate to the "Picture," "Display," or "Aspect Ratio" section of your TV's menu.
Common TV Aspect Ratio Options
You'll likely find options similar to these:
- Wide/Full/16:9: This setting makes the picture fill the screen.
- Normal/4:3: Displays content in its original 4:3 format with bars.
- Zoom/Stretch: These options enlarge or distort the image to fill the screen. Avoid these if you're experiencing stretching.
- Just Scan/Screen Fit/Full Pixel/Dot-by-Dot: These settings are generally the best for modern TVs as they display the image at its native resolution without overscaling or cropping. They aim to show the exact pixels sent by the source.
Recommendation for 2025: For HD and 4K TVs, try setting your TV's aspect ratio to "Just Scan," "Screen Fit," "Full Pixel," or "Dot-by-Dot." If these options aren't available, "16:9" is usually the next best choice, but ensure it's not combined with a "Stretch" or "Zoom" mode on the receiver that causes distortion.
Step 3: Disable Overscan on Your TV
Overscan is a legacy feature that can crop the edges of the picture. Most modern TVs allow you to disable it.
- In your TV's picture settings, look for an option labeled "Overscan," "Picture Size," "Display Area," or similar.
- If available, set it to "Off" or "1:1 Pixel Mapping."
Step 4: Test Different Combinations
It's sometimes a process of trial and error to find the perfect combination between your Dish receiver and your TV.
Scenario A: Stretched Image (Objects look wide)
- Dish Receiver: Set to "Auto" or "16:9 Letterbox."
- TV: Set to "Just Scan" or "16:9." Avoid "Stretch" or "Zoom" on the TV.
Scenario B: Black Bars on the Sides of 16:9 Content
- Dish Receiver: Ensure it's set to "16:9" or "Auto" and not forcing 4:3.
- TV: Ensure it's set to "16:9" or "Just Scan." Check if the TV has a "Zoom" or "Stretch" setting that might be active.
Scenario C: Black Bars on Top/Bottom of 16:9 Content (Letterboxing)
- This is often intentional for cinematic movies. If you dislike it, your Dish receiver's "Zoom" or "Pan & Scan" setting might override it, but this will crop the image. Your TV's "Zoom" or "Stretch" settings could also affect this.
Step 5: Power Cycle Your Equipment
A simple power cycle can resolve temporary glitches.
- Turn off both your Dish receiver and your TV.
- Unplug the power cords from both devices.
- Wait for at least 60 seconds.
- Plug the power cords back in and turn on the devices.
- Recheck your settings and picture.
Step 6: Check HDMI Cables
A faulty HDMI cable can cause signal issues.
- Try using a different, high-quality HDMI cable.
- Ensure the cable is securely plugged into both the receiver and the TV.
- Try a different HDMI port on your TV.
By systematically working through these troubleshooting steps, you should be able to resolve most common screen size and aspect ratio problems with your Dish Network service.
Advanced Settings and Considerations
Beyond the basic aspect ratio adjustments, there are a few advanced settings and considerations that can further refine your viewing experience with Dish Network in 2025. These include understanding specific video output settings, the impact of different broadcast signals, and how to manage settings for multiple TVs.
Video Output Resolution
The resolution setting on your Dish Network receiver determines the quality of the video signal sent to your TV. While not directly controlling aspect ratio, it plays a role in how the image is displayed and can sometimes interact with aspect ratio settings.
- Recommended Settings: For HD TVs, set the output resolution to 1080p. For 4K TVs, set it to 2160p (4K).
- Auto Setting: Many receivers have an "Auto" resolution setting that attempts to match the TV's capabilities. This is usually reliable.
- Troubleshooting: If you're experiencing strange scaling issues, try manually setting the resolution to 1080p, even on a 4K TV, to see if it resolves the problem. Sometimes, a mismatch in resolution can cause unexpected aspect ratio behavior.
To find this setting: Navigate to Menu > Settings > System Settings > Video Output (or similar path).
Understanding Broadcast Signal Types
Dish Network broadcasts a variety of content, each with its own format. Understanding these can help you interpret why certain channels look different.
- Standard Definition (SD): Older, lower-resolution broadcasts (typically 480i or 480p). These are almost always in a 4:3 aspect ratio and will appear with black bars on the sides on a 16:9 TV if your settings are correct.
- High Definition (HD): Higher resolution broadcasts (typically 720p or 1080i/1080p). These are usually in a 16:9 aspect ratio.
- 4K Ultra HD: The highest resolution available (2160p). These are also 16:9.
- Letterboxed Widescreen: As mentioned, cinematic films are often presented in aspect ratios like 2.35:1 or 2.39:1. To fit these onto a 16:9 screen, black bars are added at the top and bottom (letterboxing). Your receiver's "Letterbox" or "Original" setting should handle this correctly. If you use "Zoom" or "Pan & Scan," these bars will be removed, but the image will be cropped.
- Anamorphic 16:9: This is a compressed widescreen signal that, when "un-squeezed" by the receiver or TV, displays in the correct 16:9 aspect ratio. Dish receivers are designed to handle this automatically.
Settings for Multiple TVs (Hopper/Joey System)
If you have a Dish Hopper system with Joey clients, each Joey can potentially have its own display settings, or they can inherit settings from the main Hopper.
- Independent Settings: You can usually access the same picture and display settings menus on a Joey as you can on the Hopper. This allows you to customize the screen size for each TV independently.
- Inherited Settings: In some configurations, Joey settings might mirror the Hopper's. If you change a setting on the Hopper, it might affect the Joey. Check your specific Hopper system's documentation for details.
- Troubleshooting: If one TV has a screen size issue and others don't, focus your troubleshooting on that specific Joey client and its connected TV.
Parental Controls and Picture Restrictions
While not directly related to screen size, it's worth noting that some parental control settings or channel locks could inadvertently affect how content is displayed if they trigger specific modes. However, this is highly unlikely to be the cause of standard aspect ratio issues.
Firmware Updates
Ensure your Dish Network receiver is running the latest firmware. Updates often include improvements to signal processing, aspect ratio handling, and compatibility with newer TVs.
- Automatic Updates: Dish receivers typically update automatically when in standby mode.
- Manual Check: You can sometimes check for updates manually in the system settings menu.
Understanding Your TV's "Game Mode" or "PC Mode"
Some TVs have special modes like "Game Mode" or "PC Mode" that reduce input lag. These modes can sometimes bypass certain image processing features, including aspect ratio adjustments. If you're experiencing unusual scaling in these modes, try switching back to a standard picture mode.
By considering these advanced aspects, you can gain a deeper understanding of how your Dish Network system interacts with your display and fine-tune your settings for the best possible picture quality.
Optimizing for Different TV Types (HD, 4K, Smart TVs)
The type of television you own significantly influences how you should configure your Dish Network settings for optimal screen size and picture quality. As of 2025, most households have moved beyond standard definition, with HD and 4K televisions being the norm. Smart TV features can also play a role.
High Definition (HD) Televisions (1080p)
HD TVs have a native aspect ratio of 16:9 and a resolution of 1920x1080 pixels.
- Dish Receiver Settings:
- Aspect Ratio: Set to "16:9" or "Auto."
- Video Output Resolution: Set to "1080p" or "Auto."
- TV Settings:
- Aspect Ratio: "16:9," "Full," or "Just Scan" are usually best. Avoid "Zoom" or "Stretch."
- Overscan: Disable if possible.
- Content Handling:
- 16:9 HD Content: Should fill the screen perfectly with the receiver and TV set to their native 16:9 modes.
- 4:3 SD Content: Will display with black bars on the sides (pillarboxing) if your receiver is set to "Letterbox" or "Original," or if your TV is set to "Normal." This is the correct way to view 4:3 content on an HD screen to avoid distortion.
4K Ultra HD Televisions (2160p)
4K TVs offer a much higher resolution (3840x2160 pixels) and also have a 16:9 aspect ratio. While Dish Network's 4K channel offerings are still growing in 2025, most content is upscaled.
- Dish Receiver Settings:
- Aspect Ratio: Set to "16:9" or "Auto."
- Video Output Resolution: Set to "2160p (4K)" or "Auto." If you experience issues, try "1080p" to see if it resolves the problem, as not all content is native 4K.
- TV Settings:
- Aspect Ratio: "16:9," "Full," or "Just Scan" (or equivalent like "Screen Fit," "Full Pixel").
- Overscan: Disable if possible.
- Content Handling:
- 16:9 HD/4K Content: Should fill the screen. Dish receivers will upscale HD content to 4K if the receiver and TV support it.
- 4:3 SD Content: Will appear with black bars on the sides, as with HD TVs. If your TV has a "Zoom" function, it might offer an option to fill the 4K screen by cropping and stretching, but this is generally not recommended for picture quality.
Smart TVs
Smart TVs integrate internet connectivity and apps, but their core display functions are similar to standard HD or 4K TVs. The "smart" features usually don't directly interfere with Dish Network's signal unless you're using a specific picture mode designed for apps.
- Dish Receiver Settings: Maintain the recommended settings for HD or 4K TVs based on your TV's resolution.
- TV Settings:
- Picture Modes: Smart TVs often have various picture modes (e.g., "Vivid," "Standard," "Cinema," "Game," "Movie"). "Cinema" or "Movie" modes are often calibrated for accurate aspect ratios and color. "Game" mode can sometimes alter aspect ratio handling to reduce lag.
- App-Specific Settings: Some smart TV apps might have their own aspect ratio or zoom settings. Ensure these are set to default or match your desired viewing preference.
- Interference: Be mindful of any "motion smoothing" or "dynamic contrast" features on your smart TV, as these can sometimes alter the perceived picture size or introduce artifacts, though they are not direct aspect ratio controls.
Older Televisions (CRT or early flat-panels)
While less common now, some users might still have older 4:3 aspect ratio televisions.
- Dish Receiver Settings:
- Aspect Ratio: Set to "4:3."
- Video Output Resolution: Set to "480i" or "480p."
- TV Settings:
- Aspect Ratio: "4:3" or "Normal."
- Content Handling:
- 4:3 Content: Should fill the screen.
- 16:9 Content: Will appear with black bars on the sides (pillarboxing) if your receiver is set to "4:3" and displays the signal correctly. If your receiver or TV attempts to stretch 16:9 content to fill a 4:3 screen, it will look distorted. Some older TVs might have a "Zoom" function to fill the screen, but this will crop the image.
General Tip for All TV Types: Always prioritize the settings on your Dish Network receiver first. Then, adjust your TV's settings to complement the receiver's output, aiming for modes like "Just Scan" or "16:9" on modern TVs to ensure the image is displayed as intended by the broadcaster and receiver.
When to Contact Dish Support
While most screen size and aspect ratio issues can be resolved through the steps outlined in this guide, there are instances where professional assistance from Dish Network support is necessary. If you've exhausted all troubleshooting options and the problem persists, it's time to reach out.
Persistent Issues After Troubleshooting
If you have diligently followed the steps for adjusting receiver settings, TV settings, power cycling, and checking cables, and the picture remains distorted (stretched, squashed, cropped incorrectly, or with persistent unwanted black bars on all channels), it's a strong indicator that the problem might be beyond your direct control.
Specific Channel Problems
If the screen size issue occurs only on one or a few specific channels, and you've confirmed that other channels display correctly, it might be an issue with the broadcast signal from that particular channel.
- Dish Support's Role: Dish support can check if there are known transmission issues with that channel or if the channel's signal is being incorrectly formatted. They can also escalate the issue to the channel provider if necessary.
Receiver Malfunction
In rare cases, the Dish Network receiver itself might be malfunctioning. If settings changes have no effect, or if you experience other technical glitches with the receiver (e.g., freezing, error messages, inability to change channels), it could be a hardware problem.
- Dish Support's Role: They can diagnose potential receiver issues, guide you through advanced resets, or arrange for a replacement receiver if it's deemed faulty.
Inability to Access Settings
If you're unable to navigate the menus on your Dish receiver or TV, or if you're unsure how to access specific settings due to unfamiliarity with your equipment, Dish support can provide step-by-step guidance over the phone.
New Equipment Installation Issues
If you've recently had new equipment installed by Dish Network and are experiencing immediate screen size problems, contacting support is advisable. They can verify the installation and ensure all components are configured correctly.
Before Contacting Dish Support
To make your call to Dish support as efficient as possible, have the following information ready:
- Your Dish Network Account Number
- The Make and Model of your Dish Network Receiver (e.g., Hopper 3, Wally)
- The Make and Model of your Television
- A clear description of the problem: What exactly is wrong with the picture? When does it occur (all channels, specific channels, specific times)?
- What troubleshooting steps you have already taken: Mention that you've adjusted receiver settings, TV settings, power cycled, and checked cables. This shows you've done your due diligence.
- Any error messages you are seeing.
Dish Network's customer support can be reached through their official website or by calling their customer service number. They are equipped to handle a wide range of technical issues and can help you achieve the best possible viewing experience.
Conclusion
Effectively adjusting screen size on Dish Network is achievable by understanding the interplay between your receiver's settings and your television's display options. We've explored the common causes of aspect ratio issues, provided step-by-step instructions for using your Dish remote, and detailed troubleshooting techniques for persistent problems. Optimizing for modern HD and 4K televisions is straightforward when you prioritize the "16:9" or "Auto" settings on your receiver and complementary modes like "Just Scan" or "16:9" on your TV. Remember to disable overscan on your TV and consider power cycling your equipment as a quick fix for temporary glitches. If all else fails, don't hesitate to contact Dish Network support, armed with the information about your equipment and the troubleshooting steps you've already performed. By following this comprehensive guide, you can ensure a perfectly formatted, distortion-free viewing experience for all your favorite Dish Network content in 2025 and beyond.


