-
Posted on: 07 Jan 2026
-
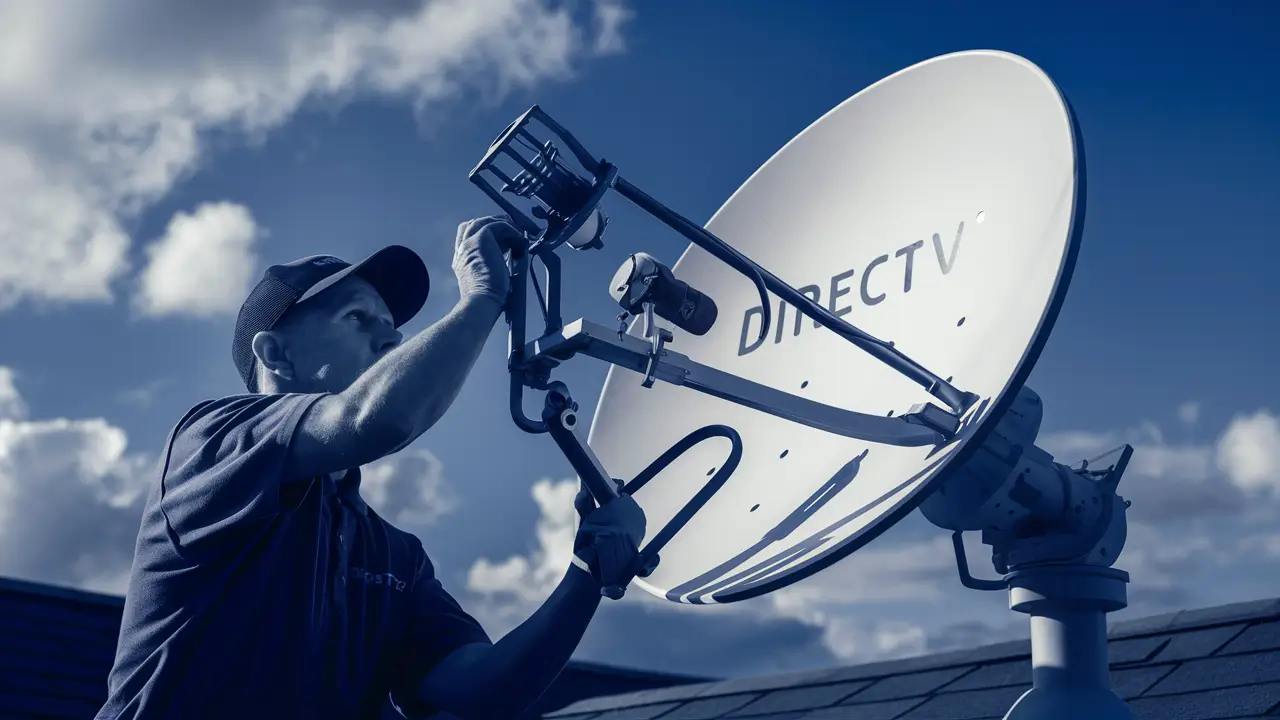
Struggling with a weak DirecTV signal or error messages? Learning how to align your DirecTV satellite dish is crucial for a clear, uninterrupted viewing experience. This comprehensive guide will walk you through the process, from understanding the basics to fine-tuning your dish for optimal performance, ensuring you get the most out of your satellite television service.
Understanding Satellite Dish Alignment
Satellite dish alignment is the process of precisely positioning your DirecTV dish so that it can effectively capture the signal broadcast from a specific satellite orbiting Earth. This signal travels vast distances and is incredibly faint by the time it reaches your dish. The parabolic shape of the dish acts like a mirror, concentrating these faint signals onto a small receiver called a Low-Noise Block downconverter (LNB), which then amplifies and transmits the signal to your DirecTV receiver inside your home. For optimal performance, the dish must be pointed directly at the satellite, which requires accurate adjustments in both azimuth (horizontal direction) and elevation (vertical angle), as well as polarization (the angle of the LNB). Even a slight misalignment can lead to pixelation, freezing, or complete signal loss, impacting your viewing experience. In 2025, with the increasing demand for high-definition and 4K content, maintaining a perfectly aligned dish is more critical than ever to ensure you're receiving the best possible picture quality.
Essential Tools and Preparation
Before you embark on the task of aligning your DirecTV satellite dish, gathering the right tools and performing thorough preparation is paramount. This will not only make the process smoother but also significantly increase your chances of success. For 2025, the technology for alignment tools has become more sophisticated, but the core principles remain the same. Ensure you have a clear understanding of your DirecTV equipment model and the specific satellite(s) your service relies on. This information is typically found in your user manual or on the DirecTV website.
Here's a breakdown of essential tools and preparation steps:
- DirecTV Receiver and TV: You'll need access to your DirecTV receiver and a television to monitor signal strength readings. Ensure the TV is within audible or visual range of where you'll be working on the dish, or use a portable monitor.
- Satellite Finder (Optional but Recommended): While you can align a dish using just the receiver's on-screen diagnostics, a dedicated satellite finder tool (either a simple audible buzzer type or a digital meter) can greatly simplify the process by providing immediate feedback on signal strength. Digital meters offer more precise readings.
- Adjustable Wrench or Socket Set: To loosen and tighten the bolts that secure the dish to its mounting arm and pole. You'll need to make small adjustments, so having tools that allow for precise control is beneficial.
- Compass: Essential for determining the correct azimuth (horizontal direction) towards the satellite. Ensure it's a reliable compass and understand how to account for magnetic declination in your area.
- Inclinometer or Angle Finder: Crucial for setting the correct elevation (vertical angle) of the dish. Many satellite dishes have built-in elevation markings, but an external tool provides greater accuracy.
- Ladder: A sturdy, stable ladder is necessary to safely reach the dish. Ensure it's placed on level ground and secured properly.
- Gloves and Safety Glasses: For protection against sharp edges and debris.
- Marker or Chalk: To mark the initial positions of the dish and mounting hardware before making adjustments. This helps you return to a previous setting if needed.
- Weather-Resistant Tape: To secure any cables and prevent them from flapping in the wind.
- DirecTV Installation Manual or Online Resources: This will provide specific aiming data (azimuth, elevation, polarization) for your location and the satellite(s) you need to lock onto. For 2025, DirecTV often provides this information through their online tools or customer service.
- Clear Line of Sight: Before you begin, ensure there are no obstructions (trees, buildings, etc.) between your dish location and the southern sky (where most DirecTV satellites are located). This is a fundamental requirement for a stable signal.
Preparation Checklist:
- Confirm your DirecTV account is active and your receiver is functioning correctly.
- Locate your DirecTV installation manual or access the online aiming data for your specific service and location.
- Identify the exact satellite(s) your DirecTV service uses. DirecTV typically uses multiple satellites for different channels and services.
- Determine the correct azimuth, elevation, and LNB skew (polarization) settings for your location. Websites like DishPointer.com are invaluable resources for this, providing precise coordinates based on your address.
- Check the weather forecast. Clear skies are essential for accurate alignment. Wind can also make the process difficult and dangerous.
- Ensure the dish mounting pole is plumb (perfectly vertical) and securely anchored. A wobbly pole will make alignment impossible.
Step-by-Step DirecTV Satellite Dish Alignment Guide
Aligning a DirecTV satellite dish might seem daunting, but by following a systematic approach, you can achieve optimal signal strength. This guide breaks down the process into manageable steps, incorporating current best practices for 2025. Remember that patience and precision are key throughout this procedure.
Step 1: Gather Your Equipment
As detailed in the previous section, ensure you have all necessary tools and information. This includes your receiver, TV, compass, inclinometer, wrenches, ladder, and the precise aiming data for your location. Double-check that your DirecTV receiver is powered on and displaying the signal strength meter screen. This screen is your primary indicator of success.
Step 2: Locate Your Satellite
DirecTV satellites are positioned in geostationary orbit, meaning they appear to remain in the same spot in the sky. For most North American DirecTV services, these satellites are located in the southern part of the sky. You'll need to use your compass to find the correct azimuth. If you have a digital satellite finder, it can help you get a preliminary lock on the general direction. Websites like DishPointer.com are invaluable for providing the exact azimuth, elevation, and LNB skew for your specific address and the DirecTV satellite(s) you need to target. Input your address, and it will generate a map with the satellite's direction and provide the necessary aiming parameters.
Step 3: Mount the Dish Securely
The dish must be mounted on a stable, vertical pole. If you are installing a new dish, ensure the pole is firmly set in the ground or attached to a secure structure. If you are realigning an existing dish, check that the pole is still plumb. Use a level to confirm it's perfectly vertical. A dish mounted on a leaning pole will be impossible to align correctly. The mounting bracket should also be securely fastened to the pole, allowing for smooth but firm adjustments.
Step 4: Initial Dish Positioning
Before making fine adjustments, set the dish to its approximate azimuth and elevation angles. Loosen the bolts on the dish mount just enough so that you can move the dish by hand, but it still holds its position. Using your compass, point the dish in the correct horizontal direction (azimuth). Then, use your inclinometer (or the markings on the dish mount) to set the correct vertical angle (elevation). For polarization (LNB skew), consult your aiming data. This initial positioning is a rough estimate, but it gets you in the general vicinity of the satellite.
Step 5: Fine-Tuning for Signal Strength
This is the most critical part of the alignment process. With the dish roughly in place, you'll need to make very small, incremental adjustments. If you are using your DirecTV receiver's signal meter, have someone inside watch the screen while you make adjustments. If you're using an audible satellite finder, listen for the tone to change. The goal is to find the point where the signal strength is maximized.
Method using Receiver's Signal Meter:
- Slowly move the dish horizontally (azimuth) in one direction, pausing every few seconds to allow the receiver to register the signal. Watch the signal strength meter on your TV.
- If the signal strength increases, continue in that direction until it starts to decrease. Then, move back to the point of maximum strength.
- Once you've found the best horizontal position, repeat the process vertically (elevation). Slowly move the dish up and down, again pausing and observing the signal meter.
- Find the elevation that gives you the strongest signal.
- You may need to go back and forth between azimuth and elevation adjustments, making tiny nudges each time, to find the absolute peak signal strength.
- LNB Skew: After achieving the best azimuth and elevation, you may need to adjust the LNB's rotation. Loosen the LNB clamp slightly and rotate it a few degrees at a time, checking the signal strength after each adjustment. The optimal skew angle ensures the LNB is correctly polarized to receive the satellite's signal.
Method using Audible Satellite Finder:
- Connect the satellite finder between the LNB and the coaxial cable running to your receiver.
- As you point the dish towards the satellite, the finder will emit a tone. The stronger the signal, the higher the pitch or faster the beeping.
- Make slow, sweeping motions horizontally and vertically until you hear the strongest, most consistent tone.
- Once you've found the peak signal, you can then fine-tune using the receiver's signal meter for the most precise alignment.
Target Signal Strength: Aim for a signal strength of 80-100% and a signal quality of 70-100% on your DirecTV receiver's diagnostic screen. Higher is always better, but a stable signal above these thresholds is generally sufficient for clear reception.
Step 6: Securing the Dish
Once you have found the optimal position with the strongest and most stable signal, it's crucial to secure the dish firmly. Do this very carefully, making sure not to bump or shift the dish. Tighten all adjustment bolts and nuts securely. If you are using locking nuts, ensure they are engaged. The dish must remain in this precise position even under varying weather conditions.
Step 7: Final Checks and Troubleshooting
After securing the dish, go back inside and check the signal strength on your TV. Ensure it remains high and stable. If it has dropped significantly, you may need to slightly re-tighten the bolts or make minor adjustments. Run a channel scan or diagnostic test on your DirecTV receiver to confirm all channels are being received clearly. If you still experience issues, consider the following:
- Obstructions: Re-check for any new obstructions that may have appeared, such as growing branches.
- Cable Issues: Inspect the coaxial cable for damage, kinks, or loose connections. Ensure all connections are tight and weatherproofed.
- LNB Failure: In rare cases, the LNB itself might be faulty.
- Receiver Problems: Ensure your DirecTV receiver is functioning correctly.
If you've followed these steps and are still unable to achieve a stable signal, it might be time to consider calling a professional DirecTV installer.
Advanced Techniques and Tips
For those seeking to perfect their DirecTV satellite dish alignment or tackle more complex scenarios, several advanced techniques and tips can prove invaluable. These methods often involve specialized tools and a deeper understanding of signal mechanics, helping you achieve a more robust and reliable connection, especially in areas prone to signal degradation. In 2025, with advanced receivers and higher data rates, these fine-tuning methods are more important than ever.
Using a Satellite Finder Tool
While basic audible satellite finders are helpful, digital satellite meters offer a significantly more precise way to align your dish. These devices provide numerical readings for signal strength and quality, allowing for finer adjustments than an audible tone alone. They connect in-line between the LNB and the receiver's cable. When pointed towards the satellite, the meter will display real-time data. Advanced digital meters can even identify specific satellites by their transponder frequencies, making it easier to lock onto the correct one. For professional installers, meters that can measure BER (Bit Error Rate) or SNR (Signal-to-Noise Ratio) are common, offering the most accurate assessment of signal integrity.
Tips for using a digital satellite finder:
- Calibrate: Ensure your meter is properly calibrated according to the manufacturer's instructions.
- Start Broad: Begin with broad sweeps to get a strong initial reading, then narrow down your search.
- Fine-Tune: Make extremely small adjustments when you see the signal strength increasing.
- Record Readings: Note down the highest stable readings for signal strength and quality.
- LNB Skew: Use the meter to fine-tune the LNB skew for maximum signal quality, as this parameter is critical for polarization.
Interpreting Signal Strength Readings
Understanding what the numbers on your DirecTV receiver's signal meter mean is crucial. Generally, you'll see two main metrics: Signal Strength and Signal Quality. For 2025, DirecTV's standard for a good signal is typically above 70% for both, with 80-100% being ideal.
Signal Strength: This indicates how much signal energy the dish is receiving. A higher signal strength means the dish is effectively capturing the broadcast. However, high strength alone doesn't guarantee a good picture; it's possible to have a strong signal with a lot of interference.
Signal Quality: This is arguably more important than strength. It measures the clarity of the signal and its resistance to interference. A high signal quality means the data being received is clean and accurate, leading to a clear picture and sound. Even with a strong signal, low quality can result in pixelation, freezing, or audio dropouts. Therefore, when aligning, you should aim to maximize both, but prioritize improving signal quality if you have to choose.
Troubleshooting based on readings:
- Low Strength, Low Quality: The dish is likely misaligned or there's a significant obstruction.
- High Strength, Low Quality: This could indicate interference, a faulty LNB, or a cable issue. It might also mean the dish is pointing to a satellite with a strong signal but not the correct one, or it's picking up reflected signals.
- Fluctuating Readings: This often points to a loose dish mount, a wobbly pole, or environmental factors like wind or rain.
Common Alignment Issues and Solutions
Even with careful alignment, you might encounter persistent problems. Understanding these common issues can help you troubleshoot effectively.
Issue 1: Inconsistent Signal / Pixelation
- Cause: Slight dish movement due to wind, loose bolts, or a wobbly pole. Also, minor misalignment or a weak signal quality.
- Solution: Re-tighten all bolts on the dish mount and arm. Ensure the pole is plumb and securely anchored. Revisit the fine-tuning process, aiming for the highest possible signal quality. Check for any new obstructions.
Issue 2: No Signal on Certain Channels Only
- Cause: DirecTV uses multiple satellites and transponders. If you're missing channels, it might mean your dish is locked onto a satellite but not the primary one for those channels, or a specific transponder is having issues.
- Solution: Ensure you are aiming for the correct set of DirecTV satellites for your service package. You may need to adjust your dish slightly to pick up signals from secondary satellites or different transponders. Consult your DirecTV receiver's diagnostics to see which satellite(s) it's currently locked onto.
Issue 3: Signal Loss During Bad Weather (Rain Fade)
- Cause: Heavy rain, snow, or dense clouds can absorb or scatter satellite signals. This is known as rain fade.
- Solution: While some rain fade is unavoidable, a perfectly aligned dish with high signal quality is more resilient. Ensure your dish is clean and free of ice or heavy snow accumulation. For persistent issues, consider a larger dish or a more robust installation, though this is typically handled by professionals.
Issue 4: Difficulty Finding the Satellite Initially
- Cause: Incorrect azimuth or elevation settings, or significant obstructions.
- Solution: Double-check your aiming data from a reliable source like DishPointer.com. Ensure your compass and inclinometer are accurate. Systematically scan the sky in the general direction of the satellite, making slow, deliberate movements. If you suspect obstructions, try to find an alternative mounting location with a clear line of sight.
Issue 5: LNB Skew Problems
- Cause: Incorrect polarization alignment.
- Solution: After achieving good azimuth and elevation, fine-tune the LNB rotation. Use your receiver's signal quality meter to find the sweet spot. A small rotation can make a significant difference.
By understanding these advanced techniques and troubleshooting common issues, you can significantly improve your DirecTV satellite dish's performance and ensure a consistently clear viewing experience.
Understanding DirecTV Satellite Specifications
To effectively align your DirecTV satellite dish, it's essential to understand the specifications of the satellites your service relies on. DirecTV uses a constellation of satellites in geostationary orbit to broadcast its signals across North America. These satellites are located at specific orbital slots, typically ranging from 95° West to 119° West longitude. For 2025, the primary satellites used by DirecTV include:
- DirecTV 10, 11, 12: These satellites operate in the Ka-band and Ku-band frequencies and are crucial for delivering a wide range of HD and SD channels.
- DirecTV 14: A powerful satellite that has expanded DirecTV's capacity and reach.
- DirecTV 15, 16, 17: Newer additions that enhance bandwidth and support advanced services.
Each satellite broadcasts signals on specific frequencies, and your DirecTV receiver is designed to lock onto these frequencies. The key parameters you need to know for alignment are:
- Satellite Name/Number: The identifier for the specific satellite (e.g., DirecTV 10, DirecTV 11).
- Orbital Position: The longitude of the satellite in orbit (e.g., 103° W).
- Azimuth: The horizontal angle (measured clockwise from true North) at which you need to point your dish.
- Elevation: The vertical angle (measured from the horizon) at which you need to point your dish.
- LNB Skew (Polarization): The rotational angle of the LNB element. This aligns the LNB with the polarization of the satellite signal (e.g., linear, circular). For DirecTV, it's typically circular polarization.
How these specifications affect alignment:
The orbital position determines the general direction in the sky you need to point your dish. Satellites further west will require a more southerly and sometimes slightly more westerly azimuth compared to satellites further east. The elevation angle is determined by your latitude; the further north you are, the lower the elevation angle will be. The LNB skew is also location-dependent and ensures the LNB is correctly oriented to receive the polarized signal.
Where to find this information:
The most reliable way to get accurate aiming data for your specific location is to use online tools like DishPointer.com. You input your address, and it cross-references with satellite databases to provide precise azimuth, elevation, and LNB skew values for the DirecTV satellites you need to target. DirecTV's own website or customer support can also provide this information. For 2025, these tools are continuously updated to reflect the current satellite constellation and optimal aiming parameters.
Understanding these specifications helps you move beyond guesswork and approach the alignment process with precise, data-driven adjustments, leading to a much higher likelihood of success.
Environmental Factors Affecting Signal
The performance of your DirecTV satellite dish is significantly influenced by environmental factors. While proper alignment is crucial, understanding how these external elements can impact your signal strength and quality can help you troubleshoot and maintain optimal reception throughout the year. In 2025, with the increasing density of satellite signals and the demand for consistent high-definition content, awareness of these factors is more important than ever.
1. Obstructions:
- Trees: Growing trees are a common culprit for signal loss. Leaves, especially when wet, can absorb and scatter satellite signals. As trees grow, they can gradually block the line of sight to the satellite.
- Buildings and Structures: Walls, chimneys, and other permanent structures can block the signal path. Ensure your dish has a clear, unobstructed view of the southern sky.
- New Construction: Be aware of any new construction in your vicinity that might introduce obstructions.
Solution: Regularly inspect your dish's line of sight. Trim trees if possible and safe to do so. If obstructions are unavoidable, consider relocating the dish to a different mounting point or seeking professional advice for alternative solutions.
2. Weather Conditions:
- Rain Fade: This is the most common weather-related issue. Heavy rainfall, especially thunderstorms, can absorb and scatter the satellite signal. The higher the frequency of the signal, the more susceptible it is to rain fade.
- Snow and Ice: Accumulation of snow or ice on the dish surface can block or deflect the signal.
- Wind: Strong winds can cause the dish to move, even if it's securely mounted. This leads to fluctuating signal strength and potential loss of lock.
- Fog and Heavy Clouds: While less impactful than rain, dense fog or very heavy cloud cover can also attenuate satellite signals.
Solution: For rain fade, ensure your dish is aligned for maximum signal quality, as this provides the best resilience. Keep the dish clear of snow and ice. Regularly check and tighten the dish mounting hardware to mitigate wind effects. In areas with frequent severe weather, professional installation with robust mounting solutions is recommended.
3. Atmospheric Interference:
- Ionospheric Disturbances: While less common for typical DirecTV frequencies, extreme solar activity can sometimes affect satellite signals.
- Atmospheric Refraction: The bending of radio waves as they pass through different layers of the atmosphere can slightly alter the apparent position of the satellite, though this is usually accounted for in aiming data.
Solution: These are generally beyond your control. If you experience prolonged signal issues attributed to atmospheric conditions, it's often a temporary problem that resolves itself.
4. Electromagnetic Interference (EMI):
- Nearby Electronic Devices: Powerful radio transmitters, Wi-Fi routers operating on adjacent frequencies, or even poorly shielded electronics can sometimes cause interference.
- Poorly Shielded Cables: Damaged or low-quality coaxial cables can act as antennas, picking up unwanted signals.
Solution: Ensure your coaxial cables are in good condition and properly terminated. Try to minimize the proximity of potential EMI sources to your dish and cabling. Use high-quality, shielded cables.
By being aware of these environmental factors and taking proactive steps to mitigate their effects, you can significantly improve the reliability and performance of your DirecTV satellite dish, ensuring a more consistent viewing experience.
When to Call a Professional
While this guide provides comprehensive steps for aligning your DirecTV satellite dish, there are specific situations where calling a certified DirecTV professional is the most sensible and effective course of action. Attempting to resolve complex issues yourself can sometimes lead to further problems or wasted time. In 2025, professional installers have access to advanced diagnostic tools and extensive experience that can quickly identify and resolve issues that might be beyond the scope of a DIY repair.
Consider calling a professional installer if:
- You've Tried Everything and Still Have No Signal: If you've meticulously followed all the steps in this guide, checked your equipment, and are still unable to achieve a stable signal, it's time to admit defeat and call in the experts. They have specialized equipment and knowledge to diagnose subtle problems.
- You Have Persistent Signal Issues (Pixelation, Freezing): Even with a seemingly aligned dish, if you continuously experience poor picture quality, it could indicate a more complex issue such as faulty equipment (LNB, receiver), damaged cabling, or interference that a professional can identify.
- Your Dish is in a Difficult-to-Access Location: If your dish is mounted on a high roof, a steep slope, or any location that poses a significant safety risk, it is strongly advised to hire a professional. Safety should always be your top priority.
- You Suspect Equipment Failure: If you believe your LNB, dish, or even receiver might be faulty, a professional can test and replace these components. They have access to genuine DirecTV replacement parts.
- You Need a New Installation or Relocation: For a brand-new installation or if you need to move your dish to a new location, a professional can ensure it's installed correctly from the start, minimizing future alignment problems.
- You're Dealing with Complex Obstructions: If trees have grown significantly or new buildings have been erected, obstructing your line of sight, a professional can assess the situation and suggest the best course of action, which might include dish relocation or exploring alternative solutions.
- You're Not Comfortable with Heights or Tools: Satellite dish alignment requires working at heights and using tools. If you lack the confidence, experience, or physical ability to perform these tasks safely, it's best to leave it to the professionals.
- You Need to Align Multiple Satellites: While most DirecTV services primarily use one or two main satellites, some advanced setups or older systems might require alignment with multiple satellites. Professionals have the tools and expertise to manage these complex configurations.
A professional DirecTV installer can often diagnose and fix alignment issues in a fraction of the time it might take a DIYer, saving you frustration and ensuring a reliable, high-quality signal. Their expertise guarantees that your system is set up to the manufacturer's specifications, providing the best possible performance for your DirecTV service.
Conclusion
Mastering how to align your DirecTV satellite dish is a rewarding skill that ensures you receive the best possible viewing experience. By understanding the fundamental principles of satellite communication, preparing meticulously with the right tools, and following the step-by-step guide, you can overcome signal issues and enjoy uninterrupted HD and 4K content. Remember that precision in azimuth, elevation, and LNB skew is paramount, and consistent fine-tuning, especially when using signal strength meters, is key to achieving optimal signal quality. Environmental factors like weather and obstructions can impact your signal, so regular checks and maintenance are advisable. While DIY alignment is achievable for many, don't hesitate to call a certified DirecTV professional when facing complex challenges, safety concerns, or persistent signal problems. With the right approach, your DirecTV dish will be perfectly tuned, delivering the crystal-clear entertainment you expect.


