-
Posted on: 07 Jan 2026
-
Connecting your DirecTV DVR to your DirecTV satellite dish is a crucial step for enjoying your favorite channels. This comprehensive guide will walk you through the entire process, ensuring a seamless setup and optimal viewing experience. We'll cover everything from initial checks to troubleshooting common issues, empowering you to get your system up and running.
Understanding Your DirecTV Setup
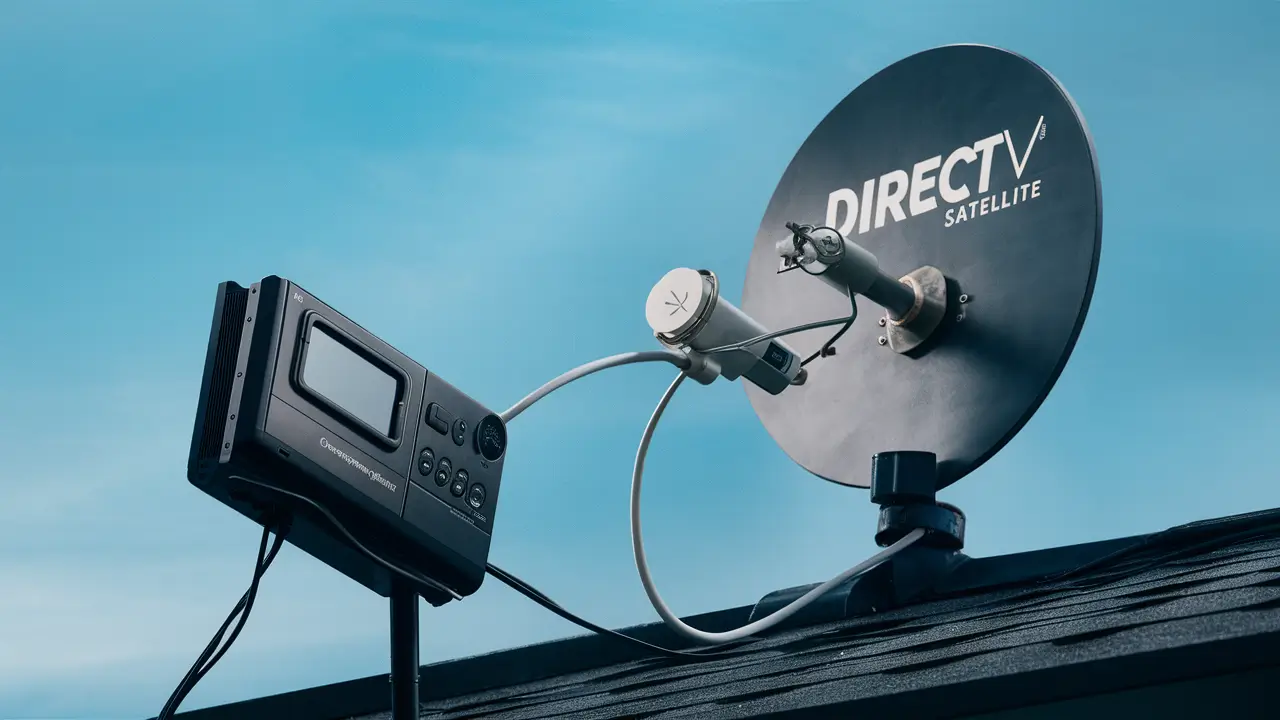
Before diving into the connection process, it's essential to grasp the fundamental architecture of a DirecTV system. At its core, a DirecTV setup involves a satellite dish mounted externally, a receiver (your DVR) located inside your home, and the coaxial cables that bridge the gap between them. The satellite dish captures signals from orbiting satellites, which are then transmitted down the coaxial cable to your receiver. Your DVR then processes these signals, allowing you to watch live TV, record programs, and access the DirecTV programming guide. Understanding these components helps demystify the connection process and aids in troubleshooting if issues arise.
In 2025-26, DirecTV continues to offer a robust satellite television service. While streaming options have grown, DirecTV remains a popular choice for those seeking comprehensive channel packages and reliable reception, especially in areas with less-than-ideal internet speeds. The technology behind the dish-to-receiver connection has remained relatively consistent, focusing on signal integrity and proper cable management. Knowing the type of dish and receiver you have can sometimes streamline the process, though the fundamental connection principles are universal across most DirecTV installations.
The Role of the Satellite Dish
The satellite dish, often referred to as a "dish antenna," is the primary point of contact with the DirecTV satellite network. It's designed to precisely focus on specific orbital positions where DirecTV's satellites transmit their signals. The size and configuration of the dish can vary depending on your location and the number of satellites you need to access. Newer installations often utilize advanced multi-satellite dishes, capable of receiving signals from multiple orbital slots simultaneously, which is crucial for accessing a wider range of channels and features. The LNB (Low-Noise Block downconverter) mounted on the arm of the dish is responsible for receiving the satellite signals and converting them into a frequency range that can be transmitted through coaxial cable.
The Function of the DirecTV DVR
Your DirecTV DVR (Digital Video Recorder) is the brain of your home entertainment system. It's the device that decodes the satellite signals and makes them viewable on your television. Beyond basic viewing, a DVR allows you to:
- Record Programs: Schedule recordings of live TV shows, movies, and sports events.
- Pause and Rewind Live TV: Take control of your viewing experience, pausing live broadcasts to answer the phone or rewind to catch a missed moment.
- Access the Program Guide: Browse upcoming schedules, view program descriptions, and set recordings directly from the guide.
- On-Demand Content: Access a library of movies and shows available through DirecTV's On-Demand service (requires an internet connection for some features).
The DVR connects to your television via HDMI, and to the satellite dish via coaxial cable. Its internal tuner processes the incoming signal, and its hard drive stores recorded content.
Coaxial Cables: The Lifeline
Coaxial cables are the unsung heroes of your DirecTV setup. These shielded cables are designed to carry radio frequency (RF) signals efficiently over distances with minimal loss. For a DirecTV system, you'll typically use RG-6 coaxial cable, which is thicker and better shielded than older RG-59 cables, making it ideal for satellite signals. The quality and condition of these cables are paramount to a stable connection and good signal strength. Damaged or improperly connected coaxial cables are a common source of viewing problems.
Essential Components for Connection
To successfully connect your DirecTV DVR to your satellite dish, you'll need a few key components. Ensuring you have these ready before you begin will make the process smoother and more efficient. Each component plays a vital role in the signal chain, from the dish on your roof to the screen in your living room.
The DirecTV DVR Unit
This is the central hub of your DirecTV experience. Ensure you have the correct DVR model provided by DirecTV. It should have the necessary ports for coaxial cable input, power, and output to your television (typically HDMI).
Satellite Dish and LNB
The satellite dish itself, along with its attached LNB, is responsible for receiving signals from space. While you typically don't need to connect these directly in terms of physical setup (this is usually done by a professional installer), understanding their role is important. The LNB has a port where the coaxial cable will connect.
Coaxial Cables
You will need at least one, and often two, coaxial cables. These cables are specifically designed for satellite and cable TV signals. They feature F-type connectors on each end. For optimal performance and signal integrity, it's recommended to use RG-6 coaxial cable. If your installation requires a long run, ensure the cable is of high quality to minimize signal degradation. The number of coaxial cables needed depends on the type of receiver and the number of satellites it needs to access. Most modern DirecTV DVRs require at least two coaxial inputs to receive signals from multiple satellites simultaneously and enable features like picture-in-picture or recording one channel while watching another from a different satellite.
F-Type Connectors
These are the screw-on connectors found at each end of your coaxial cables. They ensure a secure and reliable connection to both the LNB on the dish and the back of your DirecTV DVR. Ensure these are clean and free from damage.
Power Adapters and Cords
Your DirecTV DVR will require a power source. Make sure you have the correct power adapter and that it's plugged into a functioning electrical outlet.
HDMI Cable (or equivalent)
To connect your DVR to your television for video and audio output, you'll need an HDMI cable. Ensure it's in good condition and compatible with both your DVR and TV.
Tools (Optional but Recommended)
While not always strictly necessary for a basic connection, having a few tools can be helpful:
- Cable Stripper/Crimper: For preparing coaxial cable ends if you need to attach new F-type connectors.
- Adjustable Wrench: To ensure F-type connectors are snug, but not overtightened.
- Level: If you are adjusting the dish angle, though this is typically a professional installer's task.
Step-by-Step Connection Guide
Connecting your DirecTV DVR to your satellite dish is a straightforward process if you follow these steps carefully. This guide assumes your satellite dish is already installed and aligned correctly. The primary focus here is on the internal connections within your home.
Pre-Installation Checks
Before you begin physically connecting cables, perform a thorough check of your equipment and surroundings. This proactive step can save you significant time and frustration later.
1. Verify Satellite Dish Alignment
The most critical aspect of your DirecTV setup is the satellite dish's alignment. If the dish is not precisely aimed at the correct satellites, you will not receive a signal. For new installations or if you suspect alignment issues, it's highly recommended to have a certified DirecTV technician perform this task. They use specialized equipment to ensure optimal signal reception. If your dish was recently moved or tampered with, and you're experiencing no signal, this is the most likely culprit.
2. Inspect Coaxial Cables
Examine all coaxial cables for any signs of damage. Look for cuts, kinks, frayed shielding, or bent pins on the F-type connectors. Damaged cables are a major cause of signal loss and intermittent service. If you find any damaged cables, they must be replaced. Ensure the cables are rated for satellite use (RG-6 is standard).
3. Check F-Type Connectors
The F-type connectors at the ends of your coaxial cables should be clean and securely attached. Ensure they are screwed on tightly to both the dish's LNB and the back of your DVR. Loose connections are a frequent cause of signal problems.
4. Locate Your DirecTV DVR
Choose a suitable location for your DirecTV DVR. It should be near your television and a power outlet. Ensure there is adequate ventilation around the DVR to prevent overheating. Avoid placing it in enclosed cabinets or directly next to heat-generating appliances.
5. Identify Input Ports on DVR
On the back of your DirecTV DVR, locate the coaxial input ports. These are typically labeled "Satellite In," "LNB In," or similar. Most modern DVRs require at least two coaxial inputs to function optimally, allowing for reception from multiple satellites. If your DVR only has one input, it might be an older model or a different type of receiver, and its functionality might be limited.
6. Ensure TV is Accessible
Make sure your television is positioned so you can easily see its screen during the setup and activation process. You'll need to navigate menus and confirm information displayed on the TV.
Connecting the Cables: A Detailed Breakdown
With your pre-installation checks complete, you're ready to connect the hardware. This involves linking the satellite dish's signal to your DVR.
Step 1: Connect Coaxial Cables from Dish to DVR
Take your RG-6 coaxial cables. One end of each cable will connect to the LNB on your satellite dish. The LNB typically has multiple ports; consult your DirecTV installation guide or look for labels indicating which ports to use (often labeled "1," "2," or "A," "B"). Screw the F-type connector of the coaxial cable onto the LNB port until it is snug. Do not overtighten. Then, run the other end of the coaxial cable(s) into your home. If the cable needs to pass through a wall, ensure it goes through a pre-existing entry point or a professionally installed wall plate to maintain weatherproofing.
Connect the other end of each coaxial cable to the corresponding "Satellite In" or "LNB In" ports on the back of your DirecTV DVR. Again, screw the F-type connectors on securely but without overtightening. If your DVR has two inputs, connect one cable to each. This dual-cable setup is essential for most DVRs to enable full functionality, such as recording while watching different channels or accessing a wider range of programming.
Step 2: Connect DVR to Television
Use an HDMI cable to connect your DirecTV DVR to your television. Plug one end of the HDMI cable into the "HDMI Out" port on the back of the DVR and the other end into an available "HDMI In" port on your TV. If you are using an older TV or your DVR doesn't have HDMI, you might use component (red, green, blue) or composite (red, white, yellow) cables, but HDMI is highly recommended for the best picture quality.
Step 3: Connect Power
Plug the power adapter into the designated power port on your DirecTV DVR. Then, plug the other end of the power adapter into a working electrical outlet. Ensure the outlet is not controlled by a light switch that could be accidentally turned off.
Step 4: Power On Devices
Turn on your television and then turn on your DirecTV DVR. Your TV should be set to the correct HDMI input that you used to connect the DVR.
Receiver Setup and Activation
Once the physical connections are made, your DirecTV DVR needs to be set up and activated by DirecTV. This process involves the receiver communicating with DirecTV's network to verify your subscription and authorize service.
Initial Boot-Up and On-Screen Prompts
When you power on your DirecTV DVR for the first time after connecting it, it will begin its boot-up sequence. This can take several minutes. You will see a DirecTV logo and then a series of on-screen prompts. These prompts will guide you through the initial setup, which typically includes:
- Language Selection: Choose your preferred language.
- Location Information: You may be asked to confirm your zip code or address to ensure you receive local channels.
- Receiver Information: The system will display information about your receiver, including its serial number and access card number (if applicable).
Activation Process
The activation process is crucial. Your DVR needs to "talk" to DirecTV's servers to get authorized. There are a few ways this can happen:
- Automatic Activation: In many cases, if your system is correctly installed and connected, the activation process will begin automatically after the initial setup prompts. You'll see messages like "Activating Receiver" or "Downloading Guide Data." This can take anywhere from 15 minutes to a couple of hours, depending on the amount of data being downloaded. During this time, you might experience intermittent service or see a blank screen with an activation message.
- Manual Activation: If the automatic activation doesn't complete or if you encounter an error, you may need to manually initiate the activation. This usually involves calling DirecTV customer service or using their online activation tool. You will likely need your DirecTV account number and the receiver's serial number, which can be found on the DVR itself or on the initial setup screen.
Downloading Guide Data
Once activated, your DVR will download the electronic program guide (EPG) data. This data includes information about all the channels you're subscribed to, including program titles, descriptions, air times, and channel numbers. This process can also take a significant amount of time, especially for the first download. During this period, you might be able to watch some channels, but the guide may be incomplete or unavailable.
Signal Strength Check
After the initial activation and guide download, it's a good time to check your signal strength. You can usually find this option within the DVR's menu system, often under "Settings," "System," or "Diagnostics." Navigate to the signal strength meter. You should aim for a strong, stable signal for all the satellites your dish is designed to receive. A signal strength of 80% or higher is generally considered good. If your signal strength is low or fluctuating, it indicates a potential issue with the dish alignment, LNB, or cabling.
Optimizing Your Signal Strength
A strong and stable signal is the bedrock of a good DirecTV viewing experience. Even with a correct connection, factors can affect signal quality. Optimizing your signal ensures you avoid pixelation, freezing, or complete signal loss, especially during adverse weather conditions.
Understanding Signal Strength Metrics
When you access the signal strength meter on your DirecTV DVR, you'll typically see two key metrics:
- Signal Strength: This indicates the raw power of the signal received from the satellite.
- Signal Quality: This measures the clarity and integrity of the signal, indicating how free it is from noise and interference.
Both are crucial. You can have a strong signal that is of poor quality, leading to viewing issues. Ideally, you want both metrics to be high and stable. For most DirecTV satellites, aim for signal strength above 80% and signal quality above 70%. These are general guidelines, and specific optimal numbers can vary slightly.
Factors Affecting Signal Strength
Several factors can degrade your satellite signal:
- Dish Alignment: As mentioned, this is the most critical factor. Even slight misalignments can drastically reduce signal.
- Obstructions: Trees, buildings, or other objects that have grown or been placed in the line of sight between the dish and the satellite can block or weaken the signal.
- Weather: Heavy rain, snow, or dense fog can absorb or scatter satellite signals, causing temporary service interruptions. This is known as "rain fade."
- Cable Issues: Damaged coaxial cables, loose connectors, or excessive cable length can lead to signal loss.
- LNB Problems: The LNB can degrade over time or be affected by weather.
Tips for Improving Signal
- Professional Dish Alignment: If you suspect alignment issues or have persistent problems, the best course of action is to schedule a service call with a DirecTV technician. They have the tools and expertise to precisely align your dish.
- Clear Line of Sight: Regularly inspect the area around your satellite dish. Trim any branches from trees that may have grown to obstruct the signal path. Ensure no new structures are blocking the view of the sky.
- Cable Management: Ensure all coaxial cables are securely connected and protected from the elements. If you need to replace a cable, use high-quality RG-6 cable and ensure connectors are properly installed. Avoid sharp bends or kinks in the cable.
- Check Connectors: Periodically (and carefully) ensure that the F-type connectors on your coaxial cables are tight. If you see any corrosion or damage, clean or replace the connector.
- Consider a Slimline Dish (if applicable): For areas prone to severe weather, DirecTV offers advanced dish models, like the Slimline series, which are designed to capture signals more effectively and are less susceptible to rain fade.
- LNB Replacement: If your dish is older and you're experiencing persistent signal issues despite other checks, the LNB might be failing and could require replacement. This is also a job best left to a professional.
2025-26 Update: DirecTV continues to invest in its satellite network. While satellite technology is mature, advancements in dish design and LNB technology aim to improve signal resilience, especially against atmospheric interference. For users experiencing consistent signal degradation, especially during mild weather, it's worth investigating potential physical obstructions or cable integrity.
Troubleshooting Common Connection Issues
Despite following all the steps, you might encounter some issues. Here's a guide to troubleshooting the most common problems when connecting your DirecTV DVR to your satellite dish.
No Signal / Intermittent Signal
This is the most frequent problem. If you see "No Signal" on your TV screen or the picture is constantly freezing or pixelating:
- Check Coaxial Connections: Ensure both ends of your coaxial cable(s) are tightly screwed into the LNB on the dish and the back of your DVR.
- Verify Dish Alignment: This is the most likely cause. If you suspect misalignment, contact DirecTV for a professional service call.
- Inspect Cables: Look for any visible damage to the coaxial cables. If found, replace the cable.
- Check Receiver Power: Ensure the DVR is powered on and receiving power. Try unplugging it for 30 seconds and plugging it back in to reboot.
- Check Weather: If it's raining heavily, snowing, or very foggy, this could be temporary "rain fade." The signal should return when the weather clears.
- Run System Test: Access the signal strength meter in your DVR's menu and check the readings. If they are consistently low, it points to a physical issue.
Receiver Not Activating
If your DVR is stuck on an activation screen or shows an activation error:
- Confirm Account Information: Ensure you have the correct DirecTV account number and that your service is active.
- Check Internet Connection (if applicable): Some activation processes may require a stable internet connection for your DVR.
- Restart the DVR: Unplug the DVR from power for 30 seconds, then plug it back in.
- Contact DirecTV Support: You may need to call DirecTV customer service to manually trigger the activation or troubleshoot account-specific issues. Have your receiver's serial number ready.
Guide Data Not Loading or Incomplete
If your program guide is blank, showing errors, or only partially loaded:
- Ensure Activation is Complete: The guide data download begins after successful activation. If activation failed, the guide won't load.
- Check Signal Strength: A weak or intermittent signal can interrupt the guide data download. Address any signal issues first.
- Allow Sufficient Time: The initial guide data download can take several hours. Ensure the DVR remains powered on and connected.
- Reboot the DVR: A simple reboot can sometimes resolve temporary glitches.
Picture or Sound Issues (but no "No Signal" error)
If you have a signal but the picture is distorted, has color issues, or the sound is garbled:
- Check HDMI Cable: Ensure the HDMI cable is securely connected at both ends and is not damaged. Try a different HDMI cable if possible.
- Check TV Settings: Ensure your TV is set to the correct aspect ratio (e.g., 16:9) and picture mode.
- Reboot DVR and TV: Power cycle both your DVR and television.
- Check for Software Updates: Your DVR may have pending software updates that could resolve such issues. Check the system settings menu.
2025-26 Note: DirecTV's network infrastructure is robust, but user-side issues often stem from cabling, dish alignment, or environmental factors. Prioritizing these physical checks will resolve the vast majority of connection problems.
Advanced Considerations for Your DirecTV System
Once your DirecTV DVR is successfully connected and functioning, there are a few advanced considerations that can enhance your experience and ensure long-term reliability. These often involve understanding the nuances of your specific setup and how it interacts with the DirecTV network.
Multiple Receivers / Whole-Home DVR
If you have multiple televisions in your home, you might have additional DirecTV receivers or Genie clients connected to your main DVR. These systems, often referred to as DirecTV's Whole-Home DVR service, allow you to watch and record content from your main DVR on other TVs. The connection between these devices is typically made via a DECA (DirecTV Ethernet to Coaxial Adapter) or directly through your home network (Ethernet or Wi-Fi). Ensuring these connections are stable is key to a seamless multi-room viewing experience.
Key Points for Multi-Receiver Setups:
- DECA Network: If your system uses DECA adapters, ensure they are powered on and their indicator lights are functioning correctly. These adapters use your existing coaxial cabling to create a network for your receivers.
- Ethernet/Wi-Fi: If your Genie clients connect via Ethernet or Wi-Fi, ensure a strong and stable network connection. This is crucial for streaming recorded content and accessing On-Demand features.
- Coaxial Cabling: Even with multiple receivers, the primary connection from the dish to the main DVR still relies on coaxial cables. Ensure these are in good condition.
Internet Connection for On-Demand and Smart Features
While DirecTV is a satellite service, many of its modern features, including On-Demand content, app integration, and certain interactive services, require an internet connection. Your DirecTV DVR or Genie client will need to be connected to your home's internet router, either via an Ethernet cable or Wi-Fi. This connection is separate from the satellite connection but is vital for unlocking the full potential of your DirecTV service.
Benefits of an Internet Connection:
- DirecTV On Demand: Access a vast library of movies and TV shows without additional charges.
- App Integration: Use the DirecTV app on your mobile devices to control your DVR, stream live TV, and manage your account.
- Interactive Features: Access enhanced program guides, sports scores, and other interactive content.
- Software Updates: Ensure your receiver is always running the latest software for optimal performance and new features.
Understanding LNB Types and Satellite Configurations
DirecTV uses different types of satellite dishes and LNBs depending on your location and the programming package you subscribe to. The most common setup involves a dish that can receive signals from multiple orbital slots (e.g., 99°, 101°, 103°, 110°, 119° West Longitude). Newer installations often use the Slimline dish series, which is more compact and efficient.
Key LNB Information:
- Legacy LNBs: Older systems might have separate LNBs for different satellites.
- Universal LNBs: Most modern dishes use a universal LNB that can receive signals from multiple satellites.
- SWM (Single Wire Multiswitch): Some DirecTV systems utilize SWM technology, which allows all satellite signals to be delivered to the receiver through a single coaxial cable. This simplifies installation and reduces the number of cables needed. If your system uses SWM, ensure the SWM module is functioning correctly.
If you are experiencing issues that cannot be resolved by basic troubleshooting, understanding your specific LNB and satellite configuration can be helpful when speaking with DirecTV support.
Maintaining Your System
Regular maintenance can prevent future problems:
- Keep the Dish Clear: Ensure no new obstructions develop around your dish.
- Check Cables Periodically: Especially if you live in an area with extreme weather, a quick visual inspection of cables and connectors can catch potential issues early.
- Restart Your DVR: Occasionally rebooting your DVR (unplugging for 30 seconds) can clear temporary glitches and improve performance.
- Keep Software Updated: Ensure your DVR is connected to the internet and has automatic updates enabled to benefit from the latest software improvements.
By considering these advanced aspects, you can ensure your DirecTV system is not only connected but also optimized for the best possible performance and functionality, providing a superior home entertainment experience well into 2025-26 and beyond.
In conclusion, connecting your DirecTV DVR to your satellite dish is a manageable process that, when followed step-by-step, leads to a seamless viewing experience. By understanding the essential components, meticulously connecting the coaxial cables, and properly activating your receiver, you'll be well on your way to enjoying your favorite channels. Remember to prioritize signal strength and quality through regular checks and troubleshooting, and don't hesitate to contact DirecTV support for professional assistance when needed. Your gateway to a world of entertainment is just a few connections away.