-
Posted on: 07 Jan 2026
-
Discover how to craft a functional and protective satellite dish cover to shield your equipment from the elements, improve signal stability, and extend its lifespan. This comprehensive guide provides step-by-step instructions, material considerations, and expert tips for a DIY solution that saves money and enhances performance.
Why Cover Your Satellite Dish?
Satellite dishes are essential for receiving television and internet signals, but they are constantly exposed to the harsh realities of outdoor environments. Snow, ice, heavy rain, strong winds, and even prolonged sun exposure can significantly impact their performance and longevity. A well-designed satellite dish cover acts as a shield, mitigating these adverse effects. In 2025, with the increasing reliance on stable satellite internet for remote work and entertainment, maintaining optimal dish performance is more critical than ever. Data from the Satellite Industry Association (SIA) in late 2024 indicated that over 35 million households in North America rely on satellite broadband, highlighting the importance of reliable signal reception. Without protection, these dishes are prone to signal degradation due to obstructions like snow accumulation or ice build-up on the dish surface. This can lead to pixelation, dropped connections, and frustrating service interruptions. Furthermore, extreme weather can cause physical damage, such as bending the dish or loosening its mounting, leading to costly repairs or replacements. Investing time in creating a DIY satellite dish cover is a proactive measure that can prevent these issues, ensuring consistent service and prolonging the life of your equipment. It's a cost-effective solution that offers significant benefits, especially in regions with challenging climates.
Impact of Weather on Satellite Dishes
The parabolic shape of a satellite dish is designed to precisely focus incoming radio waves onto a receiver (LNB). Any obstruction or deformation on this surface can scatter or block these signals, leading to a weaker or entirely lost connection.
- Snow and Ice: Accumulation on the dish face acts as a physical barrier, scattering or reflecting signals away from the LNB. Ice, being denser, can cause more significant signal loss. In 2025, winter storms continue to be a major disruptor for satellite users in affected regions.
- Rain Fade: Heavy rainfall can absorb and scatter satellite signals, particularly at higher frequencies (Ku and Ka bands). While modern dishes and LNBs have some resilience, severe downpours can still cause temporary signal degradation.
- Wind: Strong winds can vibrate the dish, causing it to move slightly out of alignment with the satellite. This misalignment directly impacts signal strength and stability. Persistent high winds can also loosen mounting hardware over time.
- Sun Exposure: While less direct, prolonged UV exposure can degrade the materials of the dish and its components, leading to brittleness and potential cracking over years of use.
Benefits of a Satellite Dish Cover
A properly designed cover addresses these issues directly:
- Signal Stability: Prevents snow, ice, and debris from accumulating on the dish, maintaining a clear path for signals.
- Durability: Protects the dish and LNB from the direct impact of rain, hail, and UV radiation, reducing wear and tear.
- Longevity: By shielding the equipment from the elements, a cover can significantly extend the operational lifespan of your satellite dish system.
- Cost Savings: Avoids frequent service calls for de-icing or realignment due to weather-related issues.
- Improved Performance: Ensures a more consistent and reliable signal, crucial for uninterrupted viewing and internet connectivity.
Types of Satellite Dish Covers
When considering a satellite dish cover, there are several approaches, ranging from simple DIY solutions to commercially available products. Each has its pros and cons, influencing cost, effectiveness, and ease of installation. Understanding these options will help you decide which type best suits your needs and technical abilities.
Commercial vs. DIY Covers
Commercial covers are pre-fabricated and designed for specific dish models. They often offer a polished look and guaranteed fit but come at a higher price point. DIY covers, on the other hand, allow for customization and can be significantly cheaper, but require more effort and skill to construct.
Commercial Covers
- Pros: Professional appearance, precise fit, often made from durable, weather-resistant materials, easy installation (usually).
- Cons: Higher cost, limited availability for older or less common dish models, may not offer specific features needed for extreme climates.
DIY Covers
- Pros: Cost-effective, customizable to specific dish dimensions and environmental needs, provides a sense of accomplishment.
- Cons: Requires time, tools, and basic DIY skills, appearance may be less refined, potential for improper construction leading to reduced effectiveness or signal obstruction.
Common Cover Designs
The most common cover designs aim to protect the dish's parabolic surface without interfering with signal reception.
1. The Shield/Visor Type
This is perhaps the most popular and effective DIY design. It typically consists of a curved or flat panel that extends over the front of the dish, acting as a barrier against falling snow, ice, and direct rain. The key is to ensure it doesn't obstruct the LNB or the direct path to the satellite.
- Pros: Excellent protection against overhead precipitation, relatively simple to construct.
- Cons: May not fully protect against wind-blown rain or ice clinging to the sides.
2. The Full Enclosure Type
This involves creating a more comprehensive housing that surrounds the dish, often with a clear or semi-transparent front panel. These are less common for DIY due to the complexity of ensuring signal transparency and proper ventilation.
- Pros: Offers the most complete protection against all elements.
- Cons: Significantly more complex to build, potential for signal obstruction if materials are not chosen carefully, requires careful ventilation to prevent overheating or moisture buildup.
3. The LNB Cover (or "Sock")
This is a smaller, often fabric or plastic cover specifically designed to protect only the LNB. While it doesn't protect the main dish surface, it can prevent ice and snow buildup directly on the crucial LNB component, which is often the first point of signal failure in severe weather.
- Pros: Very simple and inexpensive to make or buy, targets the most vulnerable component.
- Cons: Offers no protection to the main dish surface, which can still accumulate snow and ice.
For the purpose of this guide, we will focus on the **Shield/Visor Type** as it offers the best balance of protection, simplicity, and effectiveness for a DIY project.
Planning Your Satellite Dish Cover
Before you pick up a single tool, meticulous planning is crucial for a successful DIY satellite dish cover. This stage involves understanding your specific dish, its mounting, and the environmental challenges you face. Rushing this phase can lead to a cover that is ineffective, difficult to install, or even detrimental to your signal. In 2025, with increased reliance on satellite services, ensuring a robust plan is paramount.
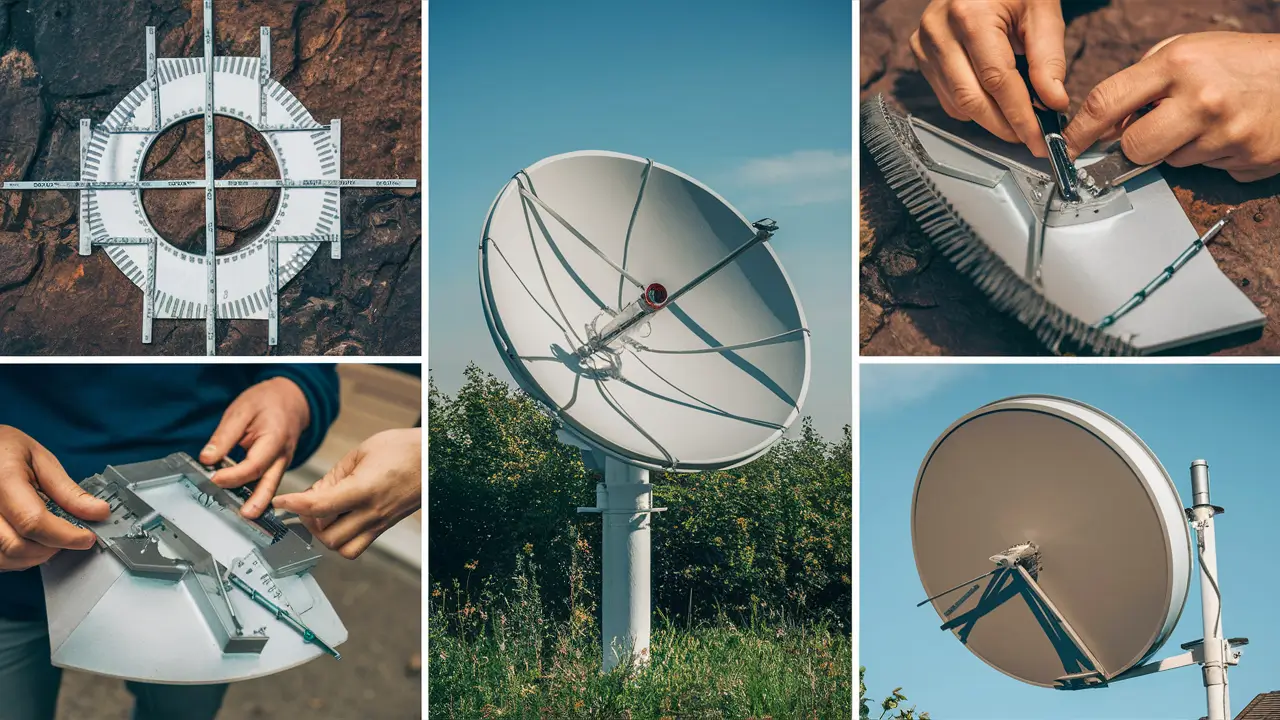
Measuring Your Satellite Dish
Accurate measurements are the foundation of any good DIY project. You'll need to measure the key dimensions of your satellite dish to ensure your cover fits correctly and doesn't interfere with its function.
Key Measurements:
- Diameter: Measure the widest point of the dish, usually from rim to rim. This is the most critical measurement for determining the overall size of your cover.
- Depth: Measure from the center of the dish face to the rim. This helps understand the curvature and how much of the dish's surface needs protection.
- LNB Arm Length: Measure the distance from the dish face to the LNB. This is vital for ensuring your cover doesn't block the LNB itself.
- LNB Size: Note the dimensions of the LNB.
- Mounting Arm/Bracket: Observe how the dish is attached to its mount. This will influence how you attach the cover and ensure it doesn't impede dish adjustment.
Tip: Use a flexible tape measure for curved surfaces and a rigid one for straight lines. It's always a good idea to take multiple measurements and average them or use the largest dimension to be safe.
Assessing Environmental Factors
Your local climate dictates the type and extent of protection required. A dish in a region with heavy snowfall will need a different approach than one in an area prone to high winds and driving rain.
- Precipitation Type and Frequency: Is it primarily snow, ice, or heavy rain? How often does it occur? This influences material choice and design (e.g., a steeper angle for snow shedding).
- Wind Speed: High winds require a cover that is securely fastened and aerodynamically designed to avoid becoming a sail.
- Temperature Extremes: Very cold temperatures can make some plastics brittle.
- Sunlight Intensity: Prolonged, intense sun can degrade certain materials.
Choosing a Cover Design (Shield/Visor)
For the shield/visor type, the primary design considerations are:
- Shape: A curved visor often mimics the dish's contour, offering a sleeker look and better aerodynamic properties. A flat visor is simpler to construct.
- Size: The visor should extend beyond the dish's rim to effectively block precipitation. However, it must not be so large that it obstructs the signal path or becomes unwieldy in wind. A common rule of thumb is to extend it 2-4 inches beyond the dish rim.
- Angle: A slight downward angle (5-10 degrees) can help shed water and snow more effectively.
- Attachment Points: How will the visor be secured to the dish's existing structure? This is critical for stability.
Signal Path Considerations
This is the most critical aspect of designing a satellite dish cover. Any part of the cover that obstructs the direct line between the satellite and the LNB will cause signal loss.
- Clearance: Ensure the LNB and its feed arm have ample clearance. The cover should not touch or interfere with the LNB.
- Material Transparency: While solid materials like plastic or metal are common for the visor, they must be positioned correctly. The "line of sight" to the satellite is paramount. For a visor, this means ensuring the visor material is *never* in the path.
- Dish Adjustment: The cover should not prevent you from making minor adjustments to the dish's elevation or azimuth if needed.
Material Selection Considerations
The materials you choose will impact the durability, weight, cost, and effectiveness of your cover.
- Plastic Sheets (e.g., Polycarbonate, Acrylic, PVC): These are popular choices. Polycarbonate is highly impact-resistant and UV-stable, making it ideal but more expensive. Acrylic is a good alternative, offering clarity and decent durability. PVC is cheaper but can become brittle in cold.
- Sheet Metal (e.g., Aluminum, Galvanized Steel): Offers excellent durability and weather resistance. Aluminum is lighter and rust-proof. Steel is stronger but heavier and prone to rust if not properly coated.
- Wood: Can be used, but requires thorough sealing and regular maintenance to prevent rot and warping. Less ideal for long-term outdoor exposure.
- Fasteners: Stainless steel bolts, nuts, and washers are recommended to prevent rust.
Materials and Tools You'll Need
Gathering the right materials and tools before you begin construction will streamline the process and ensure a professional-looking and functional outcome. For a typical shield/visor type cover, you'll need a combination of structural materials, fasteners, and basic tools.
Materials List (Example for a Polycarbonate Shield Cover)
This list is for a common DIY shield cover. Adjust quantities based on your dish size and chosen materials.
- Main Cover Material: 1 x Sheet of Polycarbonate (or Acrylic/PVC), typically 1/8" to 1/4" thick. Dimensions will depend on your dish measurements (e.g., 2ft x 2ft or larger). Clear or translucent is often preferred for aesthetic reasons, though opaque is fine for function.
- Support Brackets: 2-3 x L-shaped metal brackets (e.g., 3" x 3" or 4" x 4"). Choose galvanized steel or aluminum for rust resistance.
- Fasteners:
- 4-6 x Stainless steel bolts (e.g., 1/4" diameter, 1" to 1.5" length) with matching nuts and washers. These will attach brackets to the dish's existing mounting points or rim.
- 4-6 x Stainless steel screws (e.g., #8 or #10, 1/2" to 3/4" length) with washers. These will attach the polycarbonate sheet to the brackets.
- Sealant (Optional but Recommended): Silicone sealant or weatherstripping to seal any gaps between the cover and the dish mounting points, preventing water ingress.
- Paint/Coating (Optional): If using wood or unpainted metal, consider a weather-resistant paint or sealant.
Tools List
Ensure you have these basic tools readily available.
- Measuring Tape: For accurate measurements.
- Marker Pen: For marking cutting lines on the material.
- Safety Glasses: Essential for eye protection when cutting or drilling.
- Gloves: To protect your hands.
- Cutting Tool:
- For Polycarbonate/Acrylic: A fine-tooth jigsaw, circular saw, or even a sharp utility knife (for thinner sheets).
- For Sheet Metal: Tin snips or a metal-cutting jigsaw blade.
- Drill: With drill bits appropriate for metal and plastic.
- Wrenches or Socket Set: To tighten bolts and nuts.
- Screwdriver: To match your chosen screws.
- Clamps: To hold materials in place while drilling or fastening.
- Sandpaper: For smoothing edges after cutting.
- Ladder: A stable ladder to safely reach your satellite dish.
Pre-Construction Checklist
Before you start cutting and assembling, double-check:
- All measurements are accurate.
- The chosen materials are suitable for outdoor use and your climate.
- You have all the necessary tools and safety equipment.
- You have a clear, safe workspace.
- You understand how the cover will attach to your specific dish and mount without obstructing movement or signal.
Step-by-Step Guide to Making Your Own Cover
This guide details the construction of a shield/visor type satellite dish cover, focusing on a common design using polycarbonate and metal brackets. Adapt these steps based on your chosen materials and specific dish dimensions. Safety first – always wear safety glasses and gloves, and ensure your ladder is stable.
Step 1: Prepare Your Materials and Template
Based on your measurements, you'll need to cut your main cover material.
- Cut the Cover Material: Using your measurements, mark the desired shape onto your polycarbonate sheet. For a shield, this might be a large rectangle or a slightly curved piece that extends a few inches beyond the dish rim on all sides (except perhaps the bottom where it attaches). If you're aiming for a curved visor, you might need to gently heat and bend the polycarbonate, or cut it into sections that can be joined. For simplicity, we'll assume a rectangular or slightly curved panel.
- Smooth Edges: After cutting, use sandpaper to smooth all the cut edges to prevent sharp corners and improve the finish.
Step 2: Fabricate or Prepare Brackets
These brackets will connect your cover material to the dish's mounting structure.
- Position Brackets: Hold your L-shaped brackets against the back or side of your dish's mounting arm or where you can securely attach them. Identify points where they can be bolted to the dish's existing structure without interfering with the dish's ability to move or the LNB. Often, the bolts holding the dish to its mount can be used, or you might need to drill new holes.
- Mark and Drill Bracket Holes: Mark the positions for the bolts that will attach the brackets to the dish. Drill these holes through the brackets.
- Mark and Drill Cover Material Holes: Hold the brackets in their final position against the polycarbonate sheet. Mark where the screws will pass through the polycarbonate to attach to the brackets. Drill these holes in the polycarbonate. Ensure these holes are slightly larger than the screws to allow for expansion and contraction.
Step 3: Attach Brackets to the Dish
This is where the cover starts to take shape.
- Secure Brackets: Using your stainless steel bolts, nuts, and washers, securely attach the L-brackets to the satellite dish's mounting arm or frame. Ensure they are firmly in place and do not wobble. If using existing bolt holes, loosen the dish bolts slightly, slide the bracket on, and re-tighten. If drilling new holes, ensure they are in structurally sound areas.
- Check for Interference: Before proceeding, ensure the attached brackets do not prevent the dish from being adjusted to its correct satellite position.
Step 4: Attach the Cover Material to Brackets
Now, you'll connect your prepared polycarbonate shield to the mounted brackets.
- Position the Cover: Hold the polycarbonate shield against the brackets. Align the pre-drilled holes in the polycarbonate with the holes in the brackets.
- Fasten the Cover: Use your stainless steel screws and washers to attach the polycarbonate shield to the brackets. Tighten securely but avoid overtightening, which could crack the polycarbonate.
- Adjust Position: Ensure the cover is positioned so it extends over the dish's face to provide protection but does not block the LNB or the direct line of sight to the satellite. A slight downward angle can be beneficial.
Step 5: Final Checks and Sealing
The final steps ensure the cover is secure and protected from the elements.
- Test Stability: Gently push and pull on the cover to ensure it is securely attached and doesn't move excessively.
- Seal Gaps (Optional): If there are any gaps between the brackets and the dish, or where the cover meets the mounting arm, apply a bead of silicone sealant to prevent water from seeping in.
- Check Signal: After installation, it's crucial to check your satellite signal strength. You may need to slightly re-aim the dish if the cover has caused any minor misalignment. Refer to your satellite provider's instructions or a signal meter if available.
Alternative Attachment Methods
If drilling into the dish mount is not feasible or desired, consider these alternatives:
- Hose Clamps: Heavy-duty stainless steel hose clamps can sometimes be used to attach brackets to the dish's existing support structure.
- Zip Ties (Heavy Duty): For lighter covers, industrial-strength zip ties might offer a temporary or less permanent solution, though they are less secure in high winds.
- Custom Mounts: Fabricate custom brackets that clamp onto the dish rim itself, if the rim is robust enough.
Installation and Maintenance
Proper installation and regular maintenance are key to ensuring your DIY satellite dish cover performs effectively and lasts for years. Even the best-made cover needs attention to remain functional and prevent potential issues.
Installation Best Practices
The way you install your cover can significantly impact its performance and the dish's signal reception.
- Safety First: Always use a stable ladder and have someone spot you if working at height. Wear safety glasses and gloves.
- Secure Fastening: Ensure all bolts and screws are tightened securely. Loose parts can vibrate in the wind, causing noise, potential damage, or signal fluctuations.
- Optimal Angle: Position the cover with a slight downward angle (around 5-10 degrees) to encourage water and snow to run off, rather than accumulate.
- Clearance is Crucial: Double-check that the LNB and its feed arm have ample clearance. The cover should not touch or obstruct these components at any point during dish adjustment.
- No Signal Obstruction: Verify that no part of the cover is directly in the line of sight between the satellite and the LNB. A quick signal strength check after installation is essential.
- Allow for Dish Adjustment: Ensure the cover does not restrict the dish's ability to be aimed precisely.
Routine Maintenance Schedule
Just like any outdoor equipment, your satellite dish cover will benefit from periodic checks and maintenance.
Monthly Checks:
- Visual Inspection: Look for any signs of damage, such as cracks in the plastic, rust on metal parts, or loose fasteners.
- Tighten Fasteners: Gently check if bolts and screws are still tight. Vibrations from wind can loosen them over time.
- Clean the Cover: Wipe down the cover to remove dirt, leaves, or bird droppings that could potentially impede signal or degrade materials.
Seasonal Checks (Spring and Fall):
- Thorough Cleaning: Give the cover and the dish a more thorough cleaning. Remove any accumulated debris.
- Inspect for Wear: Check for signs of UV degradation on plastic, corrosion on metal, or rot on wood (if applicable).
- Re-seal (if necessary): If you used sealant, check if it's still intact. Reapply if it shows signs of cracking or peeling.
- Check for Ice/Snow Buildup (after winter storms): Even with a cover, monitor performance after significant weather events. If you see persistent buildup, the cover might need adjustments or a different design.
Troubleshooting Common Issues
Even with careful construction, you might encounter minor issues.
- Signal Loss After Installation: This is the most common problem. It usually means the cover is slightly obstructing the signal path or the dish has been knocked out of alignment during installation. Try re-aiming the dish. If the problem persists, you may need to adjust the cover's position or angle.
- Cover Rattles in Wind: This indicates loose fasteners or the cover itself is vibrating. Tighten all bolts and screws. You might need to add a shim or bracket for better stability.
- Water/Snow Accumulation: If water or snow is still collecting on the dish, the cover might not be angled correctly, or it doesn't extend far enough. Adjust the angle or consider extending the visor.
- Cracked or Damaged Cover: If the cover material is damaged, especially if it's plastic, it will need to be repaired or replaced. Minor cracks can sometimes be mended with strong adhesive or plastic welding, but replacement is often the best long-term solution.
When to Consider Professional Help
While DIY is often rewarding, there are times when professional help is advisable:
- If you are uncomfortable working at heights or lack a stable ladder.
- If your dish is in a particularly difficult-to-access location.
- If you've tried DIY solutions and are still experiencing persistent signal problems.
- If the dish mount itself appears damaged or unstable.
Advanced Options and Considerations
For those seeking enhanced performance or facing particularly challenging conditions, several advanced options and considerations can elevate your DIY satellite dish cover project. These might involve material choices, design modifications, or integrating features that go beyond a basic shield. In 2025, with the increasing demand for uninterrupted satellite connectivity, these advanced strategies can make a significant difference.
Material Innovations for Extreme Climates
While standard plastics and metals work well, specialized materials can offer superior performance in harsh environments.
- UV-Resistant Polycarbonate: Look for polycarbonate specifically rated for extreme UV exposure and impact resistance. This ensures it won't become brittle or yellow over time, maintaining clarity and strength.
- Aerospace-Grade Aluminum: For ultimate durability and light weight, consider aircraft-grade aluminum alloys. They offer excellent corrosion resistance and strength, though they are more expensive and harder to work with.
- Heated Covers (Commercial/Advanced DIY): In areas with persistent ice buildup, some commercial solutions incorporate heating elements. A DIY version could involve integrating low-voltage heating wires (similar to car defroster elements) embedded within a layered cover, powered by a small solar panel and battery system. This is a complex project requiring electrical knowledge and careful waterproofing.
Optimizing Aerodynamics and Wind Resistance
High winds are a major concern for satellite dishes and their covers.
- Curved Visor Design: A smoothly curved visor that follows the dish's contour is more aerodynamic than a flat panel. This reduces wind resistance and the likelihood of the cover being dislodged.
- Ventilation Slots: Strategically placed ventilation slots or holes can allow wind to pass through the cover, reducing pressure buildup. Ensure these are positioned so they don't allow direct water ingress.
- Secure Mounting Systems: For extremely windy areas, consider using more robust mounting hardware. This might involve multiple attachment points, U-bolts that wrap around the dish's support structure, or even custom-fabricated clamps.
Integrated Solutions and Smart Features
While complex, integrating features can enhance functionality.
- De-icing Systems: As mentioned, low-power heating elements can be a game-changer for ice-prone regions. This requires careful planning for power supply, wiring, and thermostat control.
- Signal Monitoring Integration: For the tech-savvy, a DIY cover could potentially house a small, weather-resistant enclosure for a signal strength monitoring device, providing real-time feedback.
- Modular Designs: Consider a design where the cover can be easily removed or adjusted seasonally. For example, a visor might be removable during summer months when snow and ice are not a concern.
Environmental Considerations and Material Lifespan
Choosing materials that are durable and have a long lifespan contributes to sustainability.
- Recycled Materials: Explore options for using recycled plastics or metals if they meet the necessary performance criteria.
- Material Degradation: Understand how different materials degrade over time due to UV, temperature fluctuations, and moisture. This will inform your maintenance schedule and when replacement might be necessary. Polycarbonate generally offers a lifespan of 10-20 years with proper care, while unpainted steel might only last 5-10 years before significant corrosion.
Comparison of Advanced Cover Materials
Here's a quick comparison of materials for advanced applications:
Material Pros Cons Typical Lifespan (Years) Cost UV-Resistant Polycarbonate High impact resistance, good clarity, excellent UV stability Can be expensive, requires specific tools for cutting/drilling 10-20 $$$ Aerospace Aluminum Lightweight, strong, excellent corrosion resistance Expensive, requires specialized tools/skills for fabrication 20+ $$$$ Fiberglass Reinforced Plastic (FRP) Strong, durable, good weather resistance, can be molded Can be brittle in extreme cold, may require specialized finishing 10-15 $$$ Galvanized Steel Strong, readily available, cost-effective Heavy, susceptible to rust if coating is damaged, can be noisy in wind 5-10 (depending on coating quality) $$ When selecting materials and design features, always prioritize functionality and signal integrity. A complex, feature-rich cover is only beneficial if it doesn't compromise the primary purpose of receiving a clear satellite signal.
Conclusion
Implementing a DIY satellite dish cover is a practical and cost-effective strategy for safeguarding your valuable equipment against the elements. By carefully measuring your dish, understanding your local climate, and selecting appropriate materials, you can construct a protective shield that enhances signal stability and prolongs the life of your satellite system. The shield/visor design, as detailed in this guide, offers an excellent balance of protection and simplicity, making it an achievable project for most homeowners. Remember that meticulous planning, precise execution, and regular maintenance are paramount to success. Always prioritize safety during installation and ensure that your cover does not obstruct the crucial line of sight to the satellite. With the right approach, your DIY cover will provide years of reliable service, ensuring uninterrupted viewing and connectivity.


