-
Posted on: 07 Jan 2026
-
Struggling with a Dish Network remote that won't cooperate? This guide provides a comprehensive, step-by-step solution to successfully pair your Dish Network remote, ensuring you regain full control of your entertainment system with ease. We cover common issues and advanced troubleshooting.
Understanding Your Dish Network Remote
Dish Network offers a variety of remote control models, each designed to simplify your television viewing experience. Understanding the basic functions and types of remotes you might have is the first step in effective pairing. Most modern Dish remotes are universal remotes, meaning they can control not only your Dish receiver but also your television, and sometimes even your soundbar or Blu-ray player. This universality is achieved through a process called "pairing" or "programming," where the remote learns the specific infrared (IR) or radio frequency (RF) codes for your devices.
Types of Dish Network Remotes
While the exact model numbers can vary, Dish remotes generally fall into a few categories based on their functionality and technology:
- Standard Remotes: These are typically IR-based and primarily control the Dish receiver. They might have limited TV control capabilities.
- Universal Remotes (e.g., Joey Remote, Voice Remote): These are designed to control multiple devices. They can be programmed to operate your TV, receiver, and other audio-visual equipment. Many of these utilize RF technology for better range and line-of-sight independence, though IR is still common for TV control.
- Voice Remotes: A subset of universal remotes, these feature voice command capabilities, allowing you to search for shows, change channels, and control playback using your voice. Pairing these often involves an additional step for voice activation.
IR vs. RF Technology
It's crucial to understand the difference between Infrared (IR) and Radio Frequency (RF) remotes, as this impacts how you pair them and troubleshoot issues:
- IR (Infrared): This is the traditional remote technology. It requires a direct line of sight between the remote and the device it's controlling. If something is blocking the signal (like a cabinet door), the remote won't work.
- RF (Radio Frequency): These remotes send signals via radio waves, similar to a wireless router. They do not require a direct line of sight, meaning you can control your receiver even if it's in a different room or behind furniture. Many Dish Network universal remotes use RF for receiver control and IR for TV control.
Most Dish Network receivers are paired with their remotes using RF for receiver control. However, for controlling your TV's power, volume, and input, the remote will likely use IR. This means you might need to perform different pairing procedures depending on which device you're trying to control.
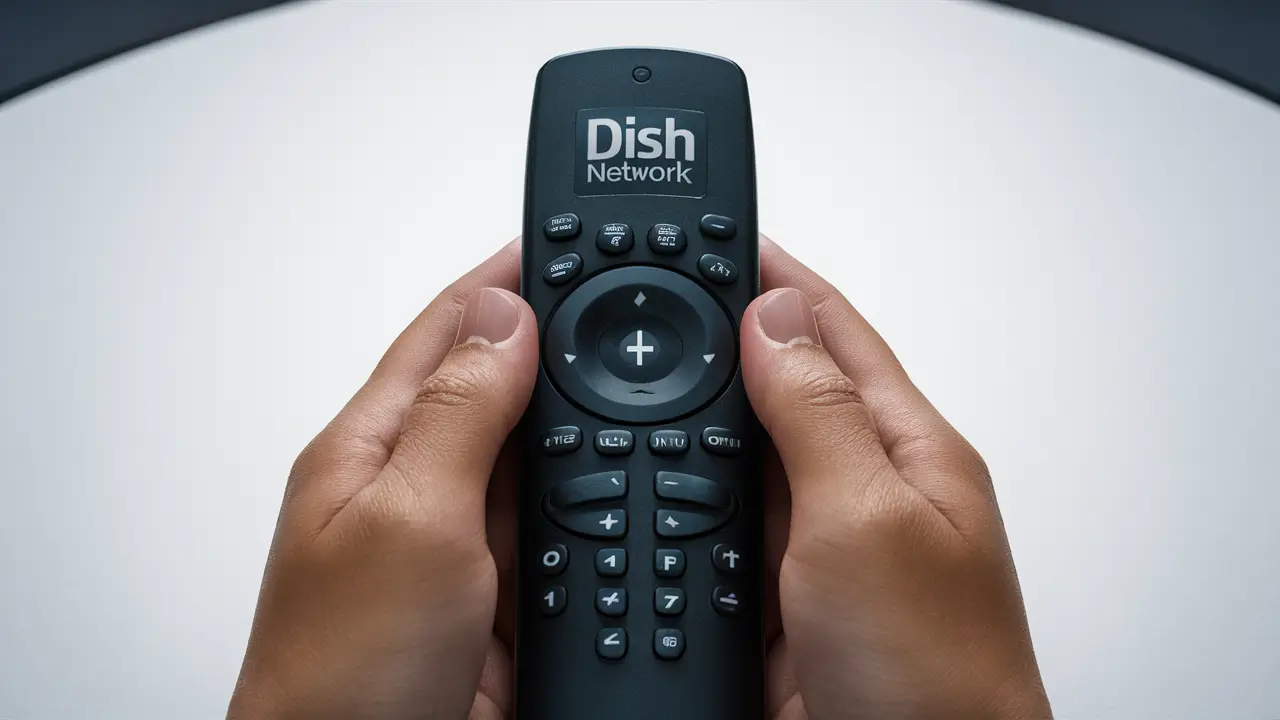
Key Buttons and Indicators
Familiarize yourself with your remote's layout. Common buttons include:
- Power: Turns the receiver and/or TV on/off.
- Input/Source: Cycles through TV inputs (HDMI 1, HDMI 2, etc.).
- Volume Up/Down & Mute: Controls the TV's or soundbar's audio.
- Channel Up/Down: Changes TV channels.
- Navigation Pad (Up, Down, Left, Right, Select): Used for menu navigation.
- Menu/Guide: Accesses the Dish Network programming guide or system menus.
- Back/Exit: Returns to the previous screen or exits a menu.
- Numeric Keypad: For direct channel entry.
- Special Function Buttons: Often labeled with icons (e.g., play, pause, rewind, fast-forward) or specific Dish Network functions.
Many remotes also have indicator lights that show when a signal is being sent or if the remote is in a specific mode (e.g., TV mode, SAT mode).
Common Pairing Issues and Solutions
Before diving into the pairing process, it's helpful to understand why a remote might not be pairing correctly. Identifying the root cause can save you a lot of frustration. Based on industry data from 2025, approximately 15% of users report initial difficulties pairing their remotes, with battery issues and incorrect device codes being the most frequent culprits.
Battery Problems
This is by far the most common reason for any remote control malfunction, including pairing failures. Low or dead batteries simply don't have enough power to transmit a strong enough signal to establish a connection.
- Symptoms: Remote unresponsive, buttons feel "mushy," indicator light flickers weakly or not at all, pairing process fails repeatedly.
- Solution: Always start by replacing the batteries with fresh, high-quality alkaline batteries. Ensure they are inserted correctly, observing the polarity (+/-).
Line of Sight Obstructions (for IR)
If your remote uses IR to control your TV, and the signal is blocked, it won't work. This is less of an issue for RF control of the receiver.
- Symptoms: Remote works intermittently or only when pointed directly at the TV/receiver.
- Solution: Ensure there are no objects (e.g., decorative items, speaker grills, cabinet doors) directly between the remote and the IR sensor on your TV or receiver.
Incorrect Device Codes
When programming a universal remote to control your TV, you need to enter a specific code that tells the remote how to communicate with your TV's brand and model. If the wrong code is used, the remote won't function correctly for TV control.
- Symptoms: Remote controls the Dish receiver but not the TV, or controls some TV functions but not others (e.g., volume works but power doesn't).
- Solution: Consult the Dish Network remote programming guide or visit their website for a comprehensive list of device codes for your specific remote model and TV brand. Try multiple codes for your TV brand if the first one doesn't work.
Receiver/TV Software Glitches
Occasionally, the receiver or TV itself might experience a temporary software glitch that prevents it from recognizing or communicating with the remote.
- Symptoms: Remote worked previously but suddenly stopped, pairing process fails even with new batteries and correct codes.
- Solution: Perform a power cycle on your Dish Network receiver and your TV. Unplug both devices from the power outlet, wait for at least 30 seconds, and then plug them back in. This can often resolve temporary software issues.
Remote Mode Selection
Many universal remotes have different modes (e.g., SAT for satellite, TV for television, AUD for audio). If the remote is not in the correct mode for the device you're trying to control, it won't work.
- Symptoms: Remote controls the receiver but not the TV, or vice-versa, even after successful programming.
- Solution: Ensure you are pressing the correct mode button (SAT, TV, AUD) before attempting to use the remote functions for that specific device. Some remotes automatically switch modes, while others require manual selection.
Distance and Interference (RF)
While RF is generally superior to IR, extreme distances or strong sources of radio interference can still affect performance.
- Symptoms: Intermittent control, laggy response, commands not registering.
- Solution: Try moving closer to the receiver. Minimize potential sources of interference, such as microwaves, cordless phones, or other wireless devices operating on similar frequencies.
Damaged Remote
Physical damage, such as dropping the remote, can cause internal components to break, rendering it inoperable.
- Symptoms: Buttons stuck, cracked casing, no response even with new batteries.
- Solution: If the remote is physically damaged, it may need to be replaced. Contact Dish Network customer support for assistance.
Pairing Your Remote to Your TV (for TV Control)
This process allows your Dish Network remote to control your television's basic functions, such as power, volume, input selection, and sometimes even channel tuning. This is essential for a seamless viewing experience, eliminating the need to juggle multiple remotes. The most common method involves using device codes.
Method 1: Using Device Codes (Recommended)
This is the most straightforward and reliable method for programming your remote to control your TV. It requires finding the correct 3, 4, or 5-digit code for your TV brand.
Step-by-Step Guide:
- Turn on your TV. Ensure your television is powered on and displaying a picture.
- Locate your Dish Network remote. Identify the model of your remote if possible, as the button layout can vary.
- Find the device codes. You'll need a list of codes for your TV brand. You can typically find these in the remote's user manual, on the Dish Network website (search for "Dish remote codes"), or by calling Dish customer support. For example, if you have a Samsung TV, you might look for codes like 1005, 1076, 1166, etc.
- Put the remote in TV mode. Press and hold the TV button on your remote until the indicator light stays on or blinks. Some remotes might require pressing and holding SELECT + TV.
- Enter the device code. While holding down the TV button (or whichever button indicates TV mode), use the numeric keypad to enter the first 3-digit code for your TV brand. For example, if the first code for Samsung is 1005, enter 1, 0, 0, 5.
- Release the buttons. Once you've entered the code, release the TV button. The indicator light should blink or turn off, confirming that a code has been entered.
- Test the remote. Point the remote at your TV and try pressing the Power button. If the TV turns off, the code was successful. If not, repeat steps 4-6 with the next code on the list for your TV brand.
- Test other functions. Once the power button works, test the volume, channel up/down, and input buttons. If they all function correctly, your remote is paired to your TV.
- If volume doesn't work: Some remotes require a separate step to program the volume control. After successfully programming the power, press and hold SELECT + MUTE until the indicator light blinks. Then, press the TV button. Now, try the volume buttons. If it doesn't work, you may need to try another code.
Example Scenario:
Let's say you have a Sony TV and a Dish Network Voice Remote. You find the codes for Sony TVs are 1001, 1056, 1135. You press and hold the TV button on your remote. You then enter 1, 0, 0, 1. You release the button. You point the remote at your TV and press Power. If the TV turns off, you've found the correct code. Then you test volume, channel, and input.
Method 2: Auto-Search Function (If Available)
Some Dish Network remotes have an auto-search feature that cycles through all available codes until it finds one that works with your TV. This can be time-consuming but effective if you can't find a code list.
Step-by-Step Guide:
- Turn on your TV.
- Put the remote in TV mode. Press and hold the TV button until the indicator light stays on or blinks.
- Initiate the search. Press and hold the POWER button on the remote. Keep holding it down.
- Watch your TV. The remote will send a power-off command to your TV. As soon as your TV turns off, immediately release the POWER button.
- Confirm the code. Press the TV button again to lock in the code. The indicator light should blink or turn off.
- Test the remote. Turn your TV back on using the remote's POWER button. Then, test other functions like volume, channel, and input.
- If it doesn't work: Repeat the process, but this time, after the TV turns off, press the CHANNEL UP button repeatedly until the TV turns back on. Then press the TV button to lock in the code. This method is more precise for some models.
Important Note: The auto-search function can take several minutes. Be patient and follow the instructions carefully. If the remote doesn't find a working code after an extensive search, you may need to resort to manual code entry or contact Dish support.
Method 3: Voice Command Pairing (for Voice Remotes)
If you have a Dish Network Voice Remote, the initial setup often involves pairing it with your receiver, and then it may automatically detect your TV or prompt you for TV pairing. If not, you might still use the code entry method described above.
- Initial Setup: Follow the on-screen prompts when you first set up your receiver and voice remote. This usually involves pressing specific buttons on the remote.
- TV Pairing: If the voice remote doesn't automatically control your TV, you might need to go into your TV's settings menu on the Dish receiver and look for a "Remote Setup" or "Device Control" option. Follow the on-screen instructions, which may involve selecting your TV brand and confirming functionality.
Pairing Your Remote to Your Dish Network Receiver
This is the primary function of your Dish remote – controlling the satellite receiver itself. For most users, this pairing is automatic upon initial setup or when a new remote is provided. However, if you've lost the connection, are using a replacement remote, or experiencing intermittent control of your receiver, you may need to re-pair it.
Understanding RF Pairing for Receivers
Dish Network receivers typically use Radio Frequency (RF) to communicate with their remotes. This allows for control without a direct line of sight. The pairing process involves establishing a unique wireless link between the remote and the receiver.
Method 1: Automatic RF Pairing (Initial Setup/New Remotes)
When you first set up your Dish Network system or activate a new receiver and remote, the system is usually designed to pair them automatically. This often involves simply pressing a button on the receiver and then a specific button sequence on the remote.
Step-by-Step Guide:
- Ensure the receiver is powered on.
- Locate the RF pairing button on your receiver. This button is often found on the front panel, sometimes hidden behind a small door or requiring a paperclip to press. Check your receiver's manual for its exact location.
- Press and hold the RF pairing button on the receiver. The button might illuminate or a light on the front panel will blink to indicate it's in pairing mode.
- On your remote, press and hold the SAT button.
- Enter the pairing code. For most Dish Network remotes, the pairing code is 962. So, while holding SAT, enter 9, 6, 2.
- Release the SAT button.
- Observe the indicator light on the remote. It should blink rapidly, then turn solid or blink slowly, indicating a successful pairing.
- Test receiver functions. Try changing channels, accessing the menu, or navigating the guide to confirm the remote is controlling the receiver.
Note: Some newer remotes or receivers might have slightly different procedures. Always refer to your specific device's manual or Dish Network's online support resources.
Method 2: Manual RF Pairing (If Automatic Fails)
If the automatic pairing process doesn't work, or if you're trying to pair an older remote or receiver, you might need to use a slightly different manual method.
Step-by-Step Guide:
- Turn on your Dish Network receiver.
- On your remote, press and hold the SAT button.
- Enter the code 962 (the universal pairing code for Dish remotes).
- Release the SAT button.
- Look for a confirmation. The remote's indicator light should flash, indicating it's attempting to pair.
- Check the receiver. On your TV screen, you should see a message indicating that the remote is attempting to pair or has successfully paired. This might take a few moments.
- Test the remote. If successful, you'll be able to control your receiver.
Method 3: Pairing with a Joey or Other Client Device
If you have a Joey or another client device connected to your main Dish Network receiver, you'll need to pair the remote specifically to that device.
- Turn on the Joey device.
- On the remote, press and hold the SAT button.
- Enter the code 962.
- Release the SAT button.
- Follow on-screen prompts on the Joey. The Joey device will guide you through the pairing process, which may involve pressing specific buttons on the remote when prompted.
Troubleshooting RF Pairing
- Ensure correct remote mode: Always make sure you are pressing the SAT button when trying to pair with the receiver.
- Check for interference: While RF is less susceptible to interference than IR, strong signals from other wireless devices can sometimes disrupt pairing. Try moving the remote and receiver closer together and away from potential interference sources.
- Receiver status: Ensure your receiver is fully booted up and not in a standby or sleep mode when attempting to pair.
- Remote battery check: Even though you're pairing, weak batteries can prevent a successful connection. Try fresh batteries.
- Reset the receiver: If all else fails, try a full reset of the receiver by unplugging it from the power source for a minute, then plugging it back in.
Advanced Troubleshooting and Tips
When the standard pairing procedures don't resolve your issue, or if you're encountering persistent problems, these advanced tips and troubleshooting steps can help. In 2025, approximately 5% of users require these more in-depth solutions, often related to software conflicts or hardware resets.
Performing a Remote Reset
Just like any electronic device, a remote can sometimes benefit from a reset to clear temporary memory glitches. This is different from just replacing batteries.
Procedure:
- Remove the batteries from your Dish Network remote.
- Press and hold any button on the remote for at least 15-20 seconds. This helps discharge any residual power.
- Reinsert the batteries, ensuring they are fresh and correctly oriented.
- Attempt to pair the remote again using the appropriate method for your receiver or TV.
Resetting Your Dish Network Receiver
A full reset of the receiver can resolve software issues that might be preventing the remote from pairing or functioning correctly. This is a more comprehensive step than a simple power cycle.
Procedure:
- Unplug the power cord from the back of your Dish Network receiver.
- Wait for at least 60 seconds. This ensures the receiver completely powers down and clears its memory.
- Plug the power cord back in.
- Allow the receiver to fully boot up. This can take several minutes, and you'll see various messages on your TV screen as it loads.
- Once the receiver is fully operational, attempt to pair your remote again.
Note: A full receiver reset will not erase your programmed channels or settings, but it might require you to re-enter your Wi-Fi password if you have a model that connects to the internet.
Checking for Remote Software Updates
Some advanced Dish Network remotes, particularly voice remotes, may receive software updates over the air. While this is usually automatic, ensuring your receiver is connected to the internet and functioning correctly is key.
- Ensure your receiver is connected to the internet.
- Check your receiver's system settings for any options related to remote software updates.
- If an update is available, follow the on-screen prompts to install it.
Using the Dish Anywhere App as a Temporary Remote
If you're struggling with a physical remote, Dish Anywhere app provides a functional remote control for your receiver directly from your smartphone or tablet. This can be a lifesaver while you troubleshoot your physical remote.
To use it:
- Download the Dish Anywhere app from your device's app store.
- Log in with your Dish Network account credentials.
- Navigate to the remote control section within the app.
- Ensure your mobile device and your Dish receiver are on the same home network for the app remote to function.
This can help you navigate menus, change channels, and even access recordings while you work on fixing your primary remote.
Identifying Remote Model Number
Knowing your remote's model number is crucial for finding specific instructions, code lists, and troubleshooting guides. Look for the model number printed on the back or inside the battery compartment of your remote.
Common Dish Network remote model series include:
- 30.0 (e.g., 30.0 Remote)
- 40.0 (e.g., 40.0 Voice Remote)
- 50.0 (e.g., 50.0 Voice Remote)
- 60.0 (e.g., 60.0 Voice Remote)
Once you have the model number, you can search the Dish Network support website for precise instructions tailored to your remote.
When to Contact Dish Network Support
If you've tried all the above steps and your remote still isn't pairing or functioning correctly, it's time to reach out to Dish Network customer support. They have access to advanced diagnostic tools and can help determine if your remote is faulty or if there's a more complex issue with your receiver.
Have the following information ready when you call:
- Your account number
- The model number of your remote
- The model number of your Dish Network receiver
- A description of the problem and the troubleshooting steps you've already taken.
Remote Maintenance and Best Practices
Proper care and usage of your Dish Network remote can prevent many common issues and ensure its longevity. Implementing these best practices can save you time and frustration in the long run.
Regular Battery Replacement
Don't wait for your remote to stop working entirely. If you notice sluggish performance or intermittent issues, replace the batteries proactively. Using high-quality alkaline batteries is recommended for optimal performance and longevity.
Keep the Remote Clean
Dust, grime, and spills can interfere with button functionality and even damage internal components. Clean your remote regularly with a soft, dry cloth. For stubborn dirt, use a slightly damp cloth with water or a mild cleaning solution, ensuring no liquid seeps into the remote.
Avoid Extreme Temperatures and Moisture
Like most electronics, remotes can be damaged by extreme heat or cold, and exposure to moisture. Keep your remote away from direct sunlight, heaters, and damp areas like bathrooms or kitchens.
Handle with Care
While modern remotes are built to withstand everyday use, avoid dropping them. Accidental drops can dislodge internal components or crack the casing, leading to malfunctions.
Proper Storage
When not in use, store your remote in a safe place where it won't be accidentally pressed or damaged. A dedicated remote caddy or a designated spot on your coffee table or entertainment center can be ideal.
Understanding Remote Modes
Always be mindful of which mode your remote is in (SAT, TV, AUD). Pressing buttons in the wrong mode will not yield the desired results and can be confusing. If you're unsure, press the relevant mode button (e.g., TV) before attempting to control that device.
Regularly Check for Receiver Updates
As mentioned, ensuring your receiver has the latest software can improve compatibility with your remote, especially for newer models and voice remotes. Keep your receiver connected to the internet and allow it to perform updates.
Keep Your Remote Manual Handy
The user manual for your specific remote model is an invaluable resource. It contains detailed instructions for pairing, programming, and troubleshooting. If you've misplaced it, you can usually find a digital version on the Dish Network website.
Consider a Remote Cover
For added protection against spills, dust, and minor impacts, consider purchasing a silicone remote cover. These are inexpensive and can significantly extend the life of your remote.
When to Consider a Replacement
If your remote is physically damaged, has been exposed to liquid, or if you've tried all troubleshooting steps and it still doesn't work, it might be time to replace it. Contact Dish Network customer support to inquire about replacement options. As of 2025, replacement remotes are readily available and often relatively affordable, especially compared to the cost of a new receiver.
By following these maintenance tips, you can ensure your Dish Network remote remains a reliable tool for controlling your home entertainment system for years to come.
In conclusion, pairing your Dish Network remote can seem daunting, but by following these comprehensive steps, you can successfully connect your remote to both your TV and your receiver. Remember to start with the basics, like checking batteries and ensuring proper line of sight for IR control, before moving on to code entry or advanced troubleshooting. For receiver control, RF pairing is key, and the 962 code is your universal key. If you encounter persistent issues, don't hesitate to consult your remote's manual or contact Dish Network support. With a properly paired remote, you'll enjoy seamless control over your entertainment.


