-
Posted on: 07 Jan 2026
-
Removing a satellite dish from your roof can seem daunting, but with the right preparation and safety precautions, it's a manageable DIY task. This guide provides a comprehensive, step-by-step approach to safely and effectively dismantle and remove your satellite dish, ensuring you avoid common pitfalls and potential hazards.
Safety First: Essential Precautions Before You Start
Before you even think about climbing onto your roof or touching a tool, safety must be your absolute top priority. Working at heights is inherently dangerous, and satellite dishes, especially older ones, can be surprisingly heavy and awkward to handle. In 2025, the Consumer Product Safety Commission (CPSC) reported that falls from roofs account for a significant percentage of homeowner-related injuries, many of which are preventable with proper planning and execution. Understanding and mitigating these risks is paramount.
Understanding the Risks
The primary risks associated with satellite dish removal include:
- Falls: This is the most significant danger. Roof surfaces can be slippery due to moss, dew, rain, or ice. Steep pitches increase the risk of losing balance.
- Electrical Hazards: While satellite dishes themselves are low-voltage, the cables can sometimes be routed near or alongside electrical wiring. It's crucial to identify and avoid any contact with live electrical lines.
- Structural Damage: Improper removal of the mount can damage your roof shingles, underlayment, or even the roof structure itself, leading to leaks and costly repairs.
- Injury from Equipment: The dish components can have sharp edges. Dropping parts can also cause injury to yourself or damage property below.
- Weather Conditions: Never attempt to remove a dish during inclement weather, such as rain, snow, high winds, or extreme heat.
Essential Safety Gear
Investing in the right safety gear is non-negotiable. Here’s what you’ll need:
- Sturdy Ladder: Ensure your ladder is in good condition, rated for your weight plus any tools, and placed on stable, level ground. Use a ladder stabilizer if possible.
- Non-Slip Footwear: Wear work boots or sturdy shoes with excellent grip.
- Work Gloves: Protect your hands from sharp edges and provide a better grip.
- Safety Glasses: To protect your eyes from debris.
- Roof Harness and Rope System (Recommended): For roofs with a significant pitch or height, a professional-grade safety harness secured to a strong anchor point is highly recommended. Consult professional guidelines if unsure about anchor points.
- Hard Hat: To protect against falling debris or accidental bumps.
- Assistance: It's always safer to have at least one other person with you – one on the roof and one on the ground to assist, spot, and call for help if needed.
Pre-Removal Checks
Before ascending, perform these checks:
- Weather: Check the forecast for the entire duration of your task.
- Roof Condition: Inspect the area around the dish for any signs of damage or weakness.
- Obstructions: Note any overhead power lines or branches that could pose a hazard.
- Ground Area: Clear the area directly below the work zone of any people, pets, or valuable items.
Gathering Your Tools and Materials
Having the right tools readily available will make the process smoother and safer. Here’s a comprehensive list:
Essential Tools
- Socket Wrench Set: With various socket sizes (common sizes for satellite dish mounts include 7/16", 1/2", 9/16", and 5/8").
- Adjustable Wrench: For bolts that may not fit standard socket sizes.
- Screwdrivers: Both Phillips and flathead, in various sizes.
- Pliers: Standard and possibly needle-nose for intricate cable connections.
- Wire Strippers/Cutters: For safely disconnecting coaxial cables if necessary.
- Caulking Gun and Sealant: High-quality, exterior-grade roof sealant for patching the mount holes.
- Utility Knife: For cutting through any stubborn sealant or tape.
- Putty Knife or Scraper: To remove old sealant around the mount.
- Bucket: To collect small parts and debris.
- Measuring Tape: To assess the size of bolts and components.
- Level: To ensure the ladder is positioned correctly.
- Hammer: For gently tapping components or removing stubborn fasteners.
- Drill with appropriate bits: May be needed for some mounting hardware.
Materials
- Replacement Shingles (if needed): It's wise to have a few spare shingles matching your roof type in case of damage during removal.
- Roof Patching Materials: Depending on the mount type, you might need small pieces of wood or flashing to cover larger holes.
- Duct Tape or Electrical Tape: For temporarily securing cables or marking components.
- Trash Bags or Tarp: For collecting removed parts and debris.
Optional but Recommended
- Magnetic Pickup Tool: Invaluable for retrieving dropped nuts and bolts.
- Cordless Drill/Impact Driver: Can speed up the removal of numerous bolts.
- Extension Poles: For reaching certain fasteners from the ground or ladder.
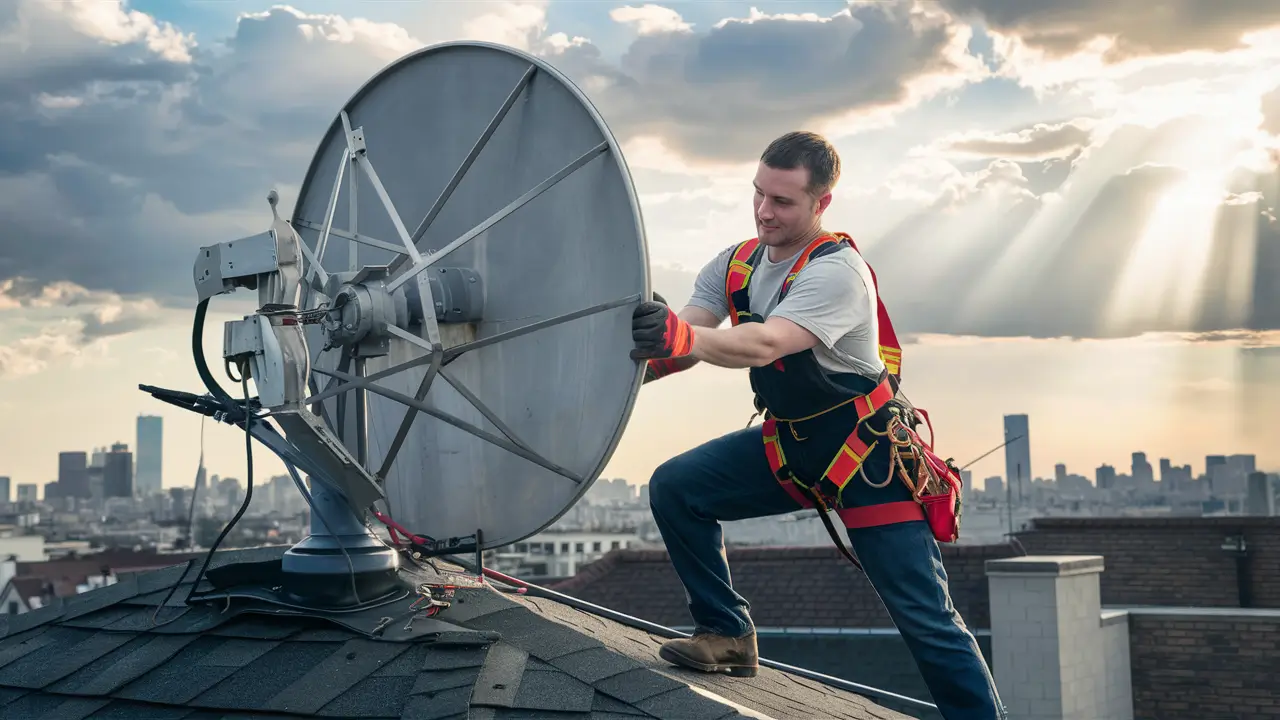
Locating the Dish and Mount
Before any dismantling begins, you need to clearly identify the satellite dish and its mounting system. This step is crucial for planning your approach and understanding what you're dealing with.
Identifying the Dish Components
A typical satellite dish setup consists of several key parts:
- The Dish (Reflector): The parabolic-shaped antenna that receives the satellite signal. These can vary in size, from small pizza-box style dishes to larger round ones.
- The LNB (Low-Noise Block downconverter): The arm extending from the dish that holds the receiver/transmitter.
- The Feedhorn: The component at the end of the LNB arm that collects the signal.
- The Arm: Connects the LNB to the dish.
- The Mast: A pole that the dish assembly is attached to.
- The Mount: The base that secures the mast to the roof. This is often the most critical part for structural integrity and removal.
Types of Roof Mounts
Understanding the type of mount will dictate the removal process. Common types include:
- Tripod Mounts: These have three legs that are secured directly to the roof surface, often with lag bolts. They are common on flat or low-slope roofs.
- Pole Mounts (with Flashing): A single pole is secured to the roof rafters with a base plate, typically surrounded by a flashing system to prevent water ingress. These are prevalent on sloped roofs.
- Wall Mounts: While not on the roof, some dishes are mounted on fascia boards or siding. The principle of removal is similar but involves different structural considerations.
Assessing the Mount's Attachment
Carefully examine how the mount is attached to your roof. Note the number and type of fasteners used. Are they lag bolts screwed into rafters? Are they through-bolts? Are there screws into the roof decking? This information will guide your tool selection and removal strategy. For pole mounts, pay close attention to the flashing. This metal piece is designed to divert water and may be secured with screws or sealant.
Visualizing the Removal Sequence
Mentally (or even by sketching) plan the order in which you will dismantle the components. Generally, it's best to work from the outermost parts inward: first the dish, then the arm, then the mast, and finally the mount base. This reduces the weight and leverage you have to manage on the roof.
Disconnecting the Cables
This is a critical step that requires careful attention to avoid damaging the cables or creating electrical hazards. In 2025, many homeowners are switching to streaming services, making satellite dish removal a common task.
Locating the Coaxial Cables
Follow the coaxial cable(s) from the dish down to where they enter your home. You'll typically find one or two cables connected to the LNB on the dish assembly. These cables carry the satellite signal.
Safely Disconnecting at the LNB
At the LNB, the coaxial cable(s) will be attached via a connector, usually an F-type connector (a screw-on connector). Ensure you have a good grip and turn the connector counter-clockwise to unscrew it from the LNB. If the connection is tight, use pliers gently. Be careful not to twist the cable itself too much, as this can damage the internal wiring.
Handling Multiple Cables
Some systems might have multiple cables, especially for advanced receivers or older setups. Disconnect each cable individually, taking note of which port it came from if you plan to reuse any components.
Securing Loose Cables
Once disconnected, the loose ends of the coaxial cables should be secured. You can temporarily tape them to the dish arm or mast to prevent them from dangling precariously. If you are decommissioning the service entirely, you may want to seal the ends of the cables to prevent moisture ingress if they are to remain in place for a period.
Checking for Other Wiring
While satellite dishes are low-voltage, it’s always prudent to be aware of your surroundings. Visually inspect the area for any other wires that might be routed nearby. If you see any power cables, treat them with extreme caution. If there's any doubt about electrical safety, consult a qualified electrician before proceeding.
Disconnecting Inside the House
You'll also need to disconnect the cables from your satellite receiver inside your home. Simply unplug the coaxial cables from the back of the receiver. If you're removing the dish permanently, you might consider removing the cables entirely from your house, which can be a more involved process depending on how they were routed. For most DIY removals, leaving the cable run within the walls or attic is acceptable, provided the entry points are properly sealed.
Dismantling the Dish Itself
This is where you start to reduce the bulk and weight of the assembly. Work methodically to ensure stability and safety.
Removing the LNB and Arm
The LNB and its supporting arm are usually the first major components to detach from the dish. Look for bolts or screws that attach the LNB to the arm, and then bolts that attach the arm to the dish bracket. These are often standard nuts and bolts. Use your socket wrench or adjustable wrench to loosen and remove them. Keep these small parts in your bucket.
- Tip: If the dish is still attached to the mast, it will have a degree of movement. Be prepared for this and have someone stabilize it if necessary.
Detaching the Dish from the Mast Bracket
The dish assembly is typically connected to the mast via a bracket. This bracket allows for the dish's elevation and azimuth adjustments. You'll find bolts that secure the dish to this bracket. Loosen and remove these. Once these bolts are out, the dish itself should be free from the bracket. This is often the heaviest single piece, so be prepared.
- Consideration: For larger dishes, it's highly advisable to have at least two people for this step. One person can support the dish while the other removes the final fasteners.
Managing the Dish's Weight and Size
Satellite dishes, even smaller ones, can be surprisingly heavy and unwieldy due to their shape and the wind resistance they present. If you are on a sloped roof, the dish can act like a sail. Always ensure you have a secure footing and a firm grip. If the dish is too large or heavy for you to manage safely, do not hesitate to call for assistance or a professional. In 2025, the trend is towards lighter, more integrated streaming devices, but older, bulkier dishes are still common.
Lowering or Carrying the Dish
Once detached, you need to get the dish off the roof. If you have a helper on the ground, you can carefully lower it using a rope. Otherwise, you'll need to carry it down the ladder. Plan your descent carefully, ensuring the dish doesn't snag on anything and that you maintain balance.
Removing the Mount from the Roof
This is the most critical step for preventing roof damage and leaks. The mount is typically secured by lag bolts or screws that penetrate the roof decking and are often attached to rafters.
Accessing the Mount Fasteners
You'll need to get close to the base of the mast and the mount. This might involve working around the remaining dish bracket or directly at the base of the pole.
Removing Lag Bolts or Screws
Use your socket wrench or drill to loosen and remove the lag bolts or screws that secure the mount to the roof. Turn them counter-clockwise. Be prepared for them to be tight, as they are often exposed to the elements and can corrode.
- Tip: If the bolts are very stubborn, a penetrating lubricant (like WD-40) can help. Apply it and let it sit for a few minutes before trying again.
Dealing with Pole Mounts and Flashing
For pole mounts, the flashing is designed to integrate with the shingles and roof deck. You may need to gently pry up shingles around the base of the flashing with a putty knife to access screws or bolts holding the flashing down. Be very careful not to tear the shingles. Once the fasteners are removed, the entire mount and flashing assembly should lift away.
Patching Roof Holes
This is an essential step to prevent leaks. Once the mount is removed, you will have holes in your roof.
- Small Holes (from screws/bolts): Clean the area around the holes. Apply a generous amount of exterior-grade roof sealant into each hole and around the edges. You can then insert a short piece of wooden dowel or even a screw (if the hole is small enough) into the hole, covered in sealant, to fill it.
- Larger Holes (from tripod legs or base plates): These will require a more substantial patch.
- Clean the area thoroughly.
- If the hole is in the decking, you may need to insert a small piece of treated plywood cut to fit, secured with exterior screws.
- Apply a generous amount of roofing sealant around the edges of the patch and any screw heads.
- If the original flashing was removed, you may need to install a new, appropriately sized roof flashing over the patched area, integrating it with the surrounding shingles. This is a critical step for water management.
Important Note on Flashing: If you removed a pole mount with flashing, you MUST replace it with new flashing designed for that specific type of roof penetration. Improperly sealing these holes is a common cause of roof leaks. Many DIY guides recommend using a standard roof repair patch kit or a purpose-built roof flashing designed for satellite dish mount removal.
Replacing Shingles
If any shingles were damaged during the removal process, carefully lift the surrounding shingles and slide in your replacement shingles. Secure them with roofing nails, ensuring the nail heads are covered by the shingle above. Apply sealant under the tabs of the surrounding shingles to help them adhere and prevent lifting.
Disposal and Recycling Options
Once the dish is safely removed, you'll need to decide what to do with it. Simply throwing it in the trash might not be the best option, especially for larger dishes.
Check with Your Satellite Provider
Some satellite providers may offer a take-back program for old equipment, especially if you are switching to a new service. It's worth a quick call to inquire. This is becoming more common in 2025 as companies focus on sustainability.
Local Recycling Centers
Many electronic recycling centers accept satellite dishes. These centers are equipped to handle the various materials (metal, plastic) and ensure they are disposed of responsibly. Search online for "e-waste recycling near me" or "satellite dish recycling."
Scrap Metal Yards
The main body of most satellite dishes is made of metal. You can often take them to a local scrap metal yard. They will weigh the metal and pay you a small amount for it. This is a great way to recycle the metal components.
Donation
If the dish is still in good working condition, consider donating it to a community organization, a school, or a maker space that might be able to repurpose it. Some amateur radio enthusiasts also use parts from satellite dishes.
Hazardous Waste Considerations
While most satellite dish components are not considered hazardous waste, it's always good practice to check with your local waste management authority if you have any doubts about disposal methods.
Proper Packaging for Transport
If you are transporting the dish to a recycling center or scrap yard, consider disassembling it further if possible. Wrap any sharp edges with tape or cardboard to prevent injury during transport.
When to Call a Professional
While many homeowners can safely remove a satellite dish themselves, there are specific situations where it's much safer and wiser to hire a professional installer or roofer.
Complex Roof Structures
If you have a very steep roof, a multi-level roof, a roof made of fragile materials (like slate or tile), or a roof that is difficult to access, the risks of DIY removal increase significantly. Professionals have the specialized equipment and experience to work on such surfaces.
Height and Accessibility Issues
If the dish is located on a particularly high section of your roof, or if accessing it requires extensive ladder work or scaffolding, it's best left to the pros. In 2025, safety regulations for working at heights are more stringent than ever.
Uncertainty About Structural Integrity
If you are unsure about how the mount is secured, or if you suspect there might be underlying structural issues with your roof where the dish is mounted, a professional can assess the situation and perform the removal without causing further damage.
Lack of Proper Safety Equipment
If you don't have access to a sturdy ladder, safety harness, or other essential safety gear, or if you're not comfortable using them, hiring a professional is the safest bet.
Concerns About Roof Damage
If you are worried about damaging your roof shingles, flashing, or underlayment during the removal process, a professional installer will have the expertise to remove the mount cleanly and patch the holes correctly to prevent leaks.
Electrical Concerns
If you notice any wiring that looks suspect, or if the dish installation is close to electrical lines, do not attempt removal. Call a professional who can identify and mitigate any electrical hazards.
Time Constraints and Skill Level
If you are short on time, or if you simply don't feel confident in your DIY abilities, hiring a professional is a worthwhile investment for peace of mind and a job done right. The cost of professional removal in 2025 typically ranges from $150 to $400, depending on the complexity and location.
Professional Options
- Satellite Installers: Many companies that install satellite dishes also offer removal services.
- Roofing Contractors: Some roofing companies will also perform dish mount removal and roof patching.
- General Handymen Services: A reputable handyman service with experience in roof work can also be a good option.
Always get quotes from multiple professionals and check reviews before hiring.
Conclusion
Removing a satellite dish from your roof is a task that requires careful planning, the right tools, and a strong emphasis on safety. By following the step-by-step guidance provided, from understanding the risks and gathering your equipment to safely disconnecting cables, dismantling the dish, and properly sealing your roof, you can successfully complete this DIY project. Remember that your safety is paramount; if at any point you feel uncomfortable or unsure, it is always best to call a professional. Properly addressing the mount's holes with sealant and potentially new flashing is crucial to prevent future leaks. With diligence and adherence to these instructions, you can achieve a clean and safe removal, leaving your roof in good condition.
How To Remove A Satellite Dish From Roof?
Research, Compare & Choose With Confidence
Last updated: June 25, 2026


