-
Posted on: 07 Jan 2026
-
Replacing your DIRECTV receiver might seem daunting, but this comprehensive guide breaks down the process into simple, actionable steps. We'll cover everything from identifying the need for a replacement to troubleshooting common issues, ensuring a smooth transition for uninterrupted entertainment.
Why Replace Your DIRECTV Receiver?
Several indicators might signal that your DIRECTV receiver needs replacement. Over time, electronic components can degrade, leading to performance issues. Common signs include frequent freezing or rebooting, error messages on screen (like "receiver not responding" or "searching for satellite signal"), inability to record programs, poor picture quality, or a complete lack of signal. In some cases, older models may no longer support newer DIRECTV features or channels, making an upgrade necessary for the best viewing experience. By understanding these signs, you can proactively address potential problems and ensure your home entertainment system functions optimally.
Understanding DIRECTV Receiver Models
DIRECTV has offered various receiver models over the years, each with its own set of features and capabilities. Knowing your current model can help you understand its limitations and what to expect from a replacement. As of 2025-2026, DIRECTV continues to evolve its hardware to offer enhanced user experiences.
Current Generation Receivers (2025-2026)
DIRECTV's latest generation of receivers are designed for advanced features, including 4K Ultra HD viewing, Genie² functionality, and enhanced DVR capabilities. These models often come with built-in Wi-Fi for easier connectivity and access to on-demand content and streaming apps.
- Genie²: This is DIRECTV's premier system, offering advanced whole-home DVR service. It can support multiple Genie Minis (client receivers) in different rooms without needing individual tuners in each location. The Genie² is known for its sleek design and robust performance.
- HR54 Genie: While not the absolute latest, the HR54 is still a very capable and widely used Genie model. It offers excellent DVR functionality and supports multiple Genie Minis. Many users still find this model perfectly adequate for their needs.
- C61K Genie Mini: These are client receivers that connect to a primary Genie (like the HR54 or Genie²). They don't have tuners themselves but provide access to recorded content and live TV from the main Genie. The C61K is specifically designed for 4K viewing when paired with a compatible Genie.
Older Generation Receivers
If you have an older system, you might have models like the HR44, HR34, or even older standard definition receivers. While these might still function, they often lack the advanced features of newer models, such as 4K support, advanced app integration, and the ability to handle more simultaneous recordings. DIRECTV may encourage upgrades for these older units to ensure compatibility with their evolving service.
Factors to Consider When Choosing a Replacement
When deciding on a replacement receiver, consider the following:
- Number of TVs: How many televisions in your home will need access to DIRECTV service?
- Recording Needs: How many programs do you typically record simultaneously?
- Picture Quality: Are you interested in 4K Ultra HD viewing?
- Connectivity: Do you want built-in Wi-Fi for streaming apps and on-demand content?
- Budget: New receivers can come with associated costs, either through purchase or lease agreements.
Troubleshooting Common Receiver Issues
Before you decide to replace your receiver, it's worth exploring common issues and troubleshooting steps. Many problems can be resolved without needing new hardware.
No Signal or Weak Signal
This is one of the most frequent problems. It can be caused by several factors:
- Dish Alignment: The satellite dish might have shifted due to weather or physical obstruction.
- Weather: Heavy rain, snow, or thunderstorms can temporarily interfere with satellite signals.
- Cabling: Loose or damaged coaxial cables connecting the dish to the receiver can cause signal loss.
- LNB (Low-Noise Block downconverter): This component on the dish might be faulty.
Troubleshooting Steps:
- Check all cable connections at the receiver and behind the dish (if accessible and safe).
- Restart your receiver by unplugging it from the power outlet for 30 seconds, then plugging it back in.
- Use the receiver's built-in diagnostic tools (often found in the Settings menu under "System Test" or "Satellite Setup") to check signal strength for each transponder.
- If the issue persists and you suspect a dish or LNB problem, it's best to contact DIRECTV support.
Receiver Freezing or Rebooting
Frequent freezing or unexpected reboots can be frustrating. This often points to an internal receiver issue or overheating.
Troubleshooting Steps:
- Power Cycle: Unplug the receiver from power for at least 30 seconds. This can clear temporary glitches.
- Ventilation: Ensure the receiver has adequate airflow. Avoid placing it in enclosed cabinets or stacking other electronics on top of it. Dust buildup can also cause overheating. Gently clean the vents with a soft brush or compressed air.
- Software Update: Ensure your receiver's software is up to date. Most updates happen automatically, but you can sometimes manually check via the settings menu.
- Hard Drive Issues (for DVR models): If you have a DVR model and experience frequent recording failures or slow performance, the internal hard drive might be failing. This usually requires a replacement.
Error Messages
Specific error codes can provide clues. For example:
- "Receiver is not responding" (Error 771): This typically indicates a satellite signal problem.
- "Searching for Satellite Signal": Similar to Error 771, pointing to a signal reception issue.
- "No satellite signal is being received" (Error 775): Again, a signal problem, often related to dish alignment or LNB.
Refer to the DIRECTV support website for a comprehensive list of error codes and their specific solutions. Many common errors can be resolved with the steps outlined above.
Inability to Record or Playback Recordings
This issue is almost always related to the DVR's hard drive or the receiver's ability to communicate with it.
Troubleshooting Steps:
- Check Storage Space: Ensure your DVR isn't full. Delete old recordings you no longer need.
- Restart Receiver: A simple power cycle can sometimes resolve temporary glitches affecting recording functions.
- Hard Drive Test: Some receivers have a built-in hard drive diagnostic tool.
- Hard Drive Failure: If the above steps don't work, the hard drive is likely failing or has failed. This is a strong indicator that the receiver unit itself needs replacement.
When and How to Contact DIRECTV Support
While DIY troubleshooting is often effective, there are times when professional assistance is necessary. DIRECTV support is your primary resource for diagnosing complex issues, scheduling technician visits, and arranging for receiver replacements.
When to Call DIRECTV Support
- Persistent Signal Issues: If you've tried basic troubleshooting and still have no signal or very weak signal, it's time to call. This often indicates a problem with the dish, LNB, or cabling that requires a technician.
- Hardware Malfunction: If your receiver is consistently freezing, rebooting, or displaying persistent error messages that you cannot resolve, it's likely a hardware failure.
- Hard Drive Failure: If you suspect your DVR's hard drive has failed, DIRECTV will need to diagnose and replace the unit.
- Upgrade Eligibility: If you're interested in upgrading to a newer receiver model, contacting DIRECTV is the first step to understand your options and any associated costs or promotions.
- New Installation or Relocation: If you're moving and need to set up DIRECTV at a new address or are installing the service for the first time, you'll need to schedule a professional installation.
How to Contact DIRECTV Support
DIRECTV offers several convenient ways to get in touch:
- Phone Support: The primary customer service number is readily available on their website. Be prepared with your account information.
- Online Chat: Many users find the online chat feature to be a quick way to get answers to common questions or initiate troubleshooting.
- DIRECTV Website: The official DIRECTV website (directv.com) has a comprehensive support section with FAQs, troubleshooting guides, and tools to manage your account.
- My DIRECTV App: The mobile app allows you to manage your account, schedule appointments, and sometimes access basic troubleshooting tools.
When you contact support, have your account number and receiver model information handy. Clearly describe the problem you're experiencing, including any error messages you've seen and the troubleshooting steps you've already taken. This will help the representative diagnose the issue more efficiently.
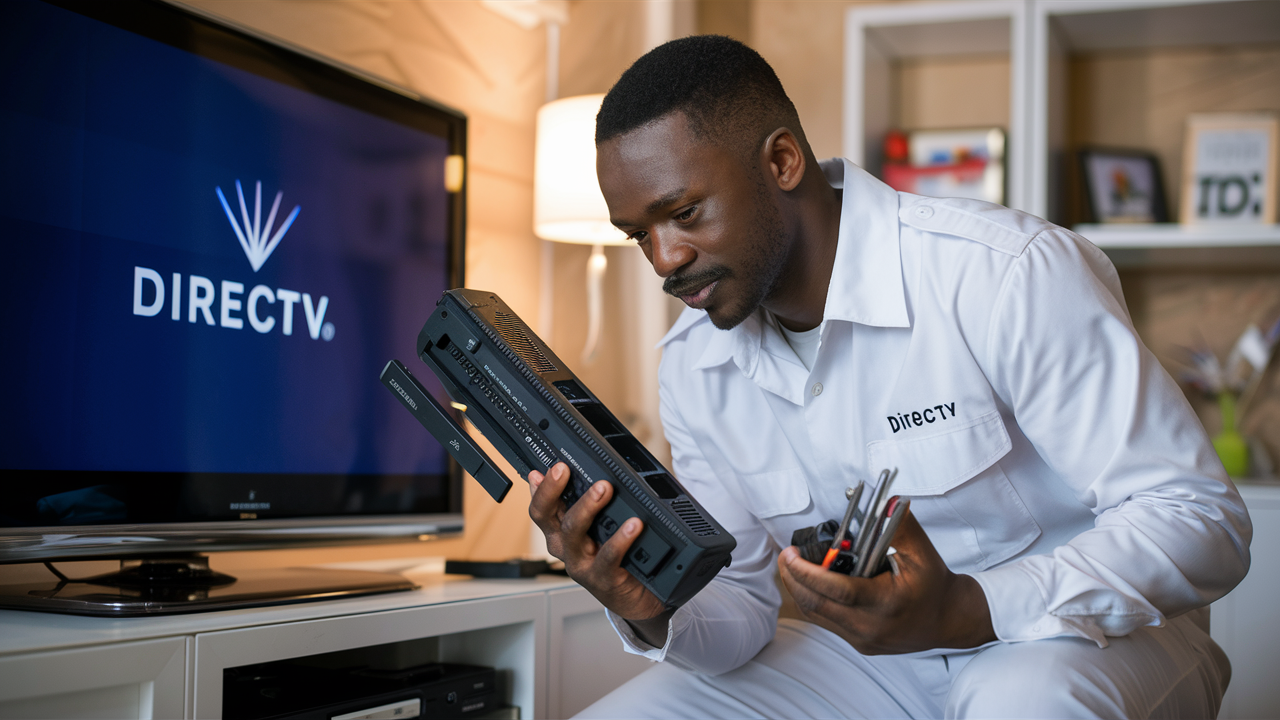
The DIY Receiver Replacement Process
In some cases, DIRECTV may allow or even encourage you to replace your receiver yourself, especially if you're upgrading or have received a replacement unit directly from them. This can save you the cost of a technician visit. However, it's crucial to follow the instructions precisely.
When is DIY Replacement an Option?
DIY replacement is typically an option when:
- You have received a new receiver unit directly from DIRECTV and are instructed to perform the swap.
- You are upgrading to a newer receiver and have purchased it independently (ensure it's compatible).
- Your existing receiver has failed, and DIRECTV has shipped you a replacement unit.
Important Note: DIY replacement usually assumes you are comfortable with basic cable management and following technical instructions. It generally does NOT involve touching the satellite dish or external wiring.
Step-by-Step DIY Receiver Replacement Guide
Here’s a general guide. Always refer to the specific instructions provided by DIRECTV with your new receiver.
Step 1: Prepare Your New Receiver
Unpack the new receiver and its accessories. Familiarize yourself with the ports and connections on the back of the unit. Ensure you have the correct power cord and any necessary remote control batteries.
Step 2: Power Down Your Current System
Turn off your television and unplug the power cord from your existing DIRECTV receiver. It's also a good idea to unplug any connected devices like external hard drives or streaming sticks.
Step 3: Disconnect Cables from the Old Receiver
Carefully note or take pictures of how the cables are connected to your old receiver. This will make reassembly easier. You'll typically need to disconnect:
- The coaxial cable(s) coming from the satellite dish (these are usually screw-on connectors).
- The HDMI or other video cable connecting to your TV.
- Any Ethernet cable for internet connectivity.
- Audio cables (if applicable).
- Power cord.
Step 4: Connect Cables to the New Receiver
Connect the cables to the corresponding ports on your new receiver. Ensure the coaxial cable(s) are securely attached. If you have multiple coaxial inputs and your old receiver used only one, consult your new receiver's manual or DIRECTV support to determine if the second input is needed for the new model.
- Coaxial Cable(s): Connect to the "Satellite In" or "LNB In" ports.
- HDMI Cable: Connect to the "HDMI Out" port and to your TV's HDMI input.
- Ethernet Cable: Connect to the "Ethernet" or "Network" port if you are using a wired internet connection.
Step 5: Power Up the New Receiver and TV
Plug the power cord into the new receiver and then into the wall outlet. Turn on your television and select the correct HDMI input for the receiver. The new receiver should begin its startup sequence.
Step 6: Follow On-Screen Activation and Setup Prompts
Your new receiver will likely guide you through an activation and setup process. This may include:
- Satellite Alignment Check: The receiver will attempt to connect to the DIRECTV satellites.
- System Test: It may run a series of tests to ensure all components are working correctly.
- Software Updates: The receiver will download and install the latest software.
- Account Activation: You may need to enter a confirmation code or follow prompts to link the new receiver to your DIRECTV account.
This process can take anywhere from 15 minutes to over an hour, depending on the receiver model and software updates required. Be patient and do not interrupt the process.
Step 7: Remote Control Setup
You may need to program your DIRECTV remote to control your TV (volume, power). Follow the on-screen prompts or the remote's manual for this process.
Considering Professional Installation
While DIY replacement is possible for some scenarios, professional installation offers distinct advantages, especially for complex setups or when you want to ensure everything is done correctly the first time.
When Professional Installation is Recommended
- No Prior DIRECTV Service: If you are a new customer, professional installation is mandatory to ensure the dish is correctly aligned and all equipment is properly connected.
- Dish or LNB Issues: If your problem stems from the satellite dish itself (misalignment, damage) or the LNB, a technician is required to fix or replace these external components.
- Complex Home Wiring: If your home has intricate cable runs or multiple satellite input points, a professional can ensure optimal connections.
- New Receiver Upgrade with Advanced Features: For models like the Genie² or if you're moving to a 4K setup, a technician can ensure compatibility and proper configuration.
- Lack of Technical Confidence: If you're not comfortable with electronics or following technical instructions, a professional installation is the safest bet to avoid further issues.
- Moving Homes: If you're relocating, DIRECTV technicians can disconnect and reconnect your service at the new location, ensuring proper dish installation.
What to Expect During a Professional Installation
A professional installation typically involves:
- Site Assessment: The technician will assess the best location for the satellite dish and ensure a clear line of sight to the southern sky.
- Dish and LNB Installation/Alignment: They will install or adjust the dish and LNB for optimal signal reception.
- Cabling: Running and connecting coaxial cables from the dish to the interior of your home.
- Receiver Setup: Installing and connecting the DIRECTV receiver(s) and Genie Minis.
- System Activation and Testing: Completing the activation process, running system diagnostics, and ensuring all channels and features are working correctly.
- Customer Education: The technician will usually walk you through the basic operation of your new receiver and remote.
Cost Considerations: While DIY can save money, professional installation often has an associated fee. However, DIRECTV frequently offers promotions that can reduce or waive these costs, especially for new customers or when upgrading certain equipment. Always inquire about current offers when scheduling service.
Post-Replacement Setup and Activation
Once your new receiver is physically installed, the crucial steps of activation and setup begin. This process links the new hardware to your DIRECTV account and enables service.
The Activation Process
Activation is the process by which DIRECTV registers your new receiver to your account. This is typically initiated automatically when the receiver powers on for the first time after installation. If you performed a DIY replacement, you might need to actively start this process.
- Automatic Activation: For professionally installed receivers, the technician will usually manage the activation.
- Manual Activation: If you're doing a DIY swap and the receiver doesn't activate automatically, you might need to call DIRECTV support or use the "My DIRECTV" app/website to initiate activation. You'll likely need the new receiver's access card number or serial number.
The activation process can take anywhere from 15 minutes to a couple of hours. During this time, the receiver will download necessary software, channel guides, and security protocols. Do not unplug the receiver during activation unless instructed to do so.
Setting Up Your New Receiver
After activation, you'll proceed with the initial setup:
- Language and Accessibility Settings: Choose your preferred language and any accessibility options.
- Network Connection: If your receiver has Wi-Fi or Ethernet capabilities, you'll connect it to your home internet. This is essential for on-demand content, app access, and software updates.
- TV Setup: Configure the receiver to output the best video and audio signal for your television. This might involve selecting resolutions (e.g., 1080p, 4K) and audio formats.
- Remote Control Pairing: Pair your DIRECTV remote with the new receiver and program it to control your TV's power and volume.
- Genie Mini Setup (if applicable): If you have a Genie system, you'll need to set up and pair any Genie Minis to the main receiver.
Configuring Recording Preferences
Once the basic setup is complete, take time to configure your recording preferences:
- Default Recording Quality: Choose between HD, SD, or Best Available.
- Recording Conflicts: Decide how the receiver should handle situations where multiple programs you want to record are airing simultaneously.
- Whole-Home Viewing Settings: If you have a Genie system, ensure whole-home viewing is enabled to access recordings from any connected TV.
- Parental Controls: Set up parental controls if needed.
Troubleshooting Your New Receiver
Even with a brand-new receiver, you might encounter minor issues. Here are common problems and solutions:
No Picture or Sound
Possible Causes: Incorrect HDMI input selected on TV, loose HDMI cable, receiver not fully activated, incorrect resolution settings.
Solutions:
- Ensure your TV is on the correct HDMI input.
- Check that the HDMI cable is securely connected to both the receiver and the TV.
- Verify that the receiver has completed its activation process.
- If the receiver is set to a resolution your TV doesn't support (e.g., 4K on an older HD TV), you may need to cycle through resolution settings using the remote's advanced functions or by performing a receiver reset.
Receiver Not Responding to Remote
Possible Causes: Remote batteries low, remote not paired, interference, receiver frozen.
Solutions:
- Replace the remote's batteries.
- Try re-pairing the remote with the receiver (refer to your remote's manual).
- Ensure there are no obstructions between the remote and the receiver.
- Perform a receiver power cycle (unplug for 30 seconds).
Wi-Fi Connectivity Issues
Possible Causes: Incorrect Wi-Fi password, router issues, receiver too far from router, network interference.
Solutions:
- Double-check your Wi-Fi password.
- Restart your home router and modem.
- Move the receiver closer to the router or consider a Wi-Fi extender.
- Ensure your router's firmware is up to date.
Inability to Access On-Demand or Apps
Possible Causes: No internet connection, subscription issues, outdated software.
Solutions:
- Verify your internet connection is working correctly.
- Ensure your DIRECTV subscription includes access to the desired services.
- Check for and install any available software updates for the receiver.
Recording Issues on New DVR
Possible Causes: Insufficient storage space (though unlikely on a new unit), conflicting recordings, tuner issues.
Solutions:
- Ensure you haven't accidentally set up conflicting recordings.
- Check the receiver's diagnostic tools for tuner status.
- If the problem persists, contact DIRECTV support as it might indicate a hardware defect.
Important Considerations and Best Practices
Replacing a DIRECTV receiver involves more than just swapping hardware. Considering these factors can ensure a smoother experience and maximize your entertainment setup.
Data Transfer and Recordings
Crucial Point: DIRECTV receivers do not typically allow for the transfer of recorded programs from one unit to another. When you replace your DVR receiver, any recordings on the old unit will be lost unless you have a very specific older model that might allow for some form of external backup (which is rare and not officially supported for migration). Plan to watch or delete important recordings before replacing a DVR.
Equipment Lease vs. Purchase
DIRECTV equipment is often leased. When you replace a receiver, you'll typically continue leasing the new one. Understand the monthly lease costs associated with your new equipment. If you are purchasing a receiver outright (less common now), ensure it is compatible with DIRECTV's service and activation procedures.
Environmental Factors
Ensure your new receiver is placed in a well-ventilated area. Overheating is a common cause of premature equipment failure. Avoid placing it in direct sunlight, enclosed cabinets, or directly on top of other heat-generating electronics.
Power Protection
Consider using a surge protector or an Uninterruptible Power Supply (UPS) for your DIRECTV receiver and television. Power surges and outages can damage electronics and disrupt service. A UPS can also provide a few minutes of backup power, allowing for a graceful shutdown during an outage.
Software Updates
Keep your receiver connected to the internet (via Wi-Fi or Ethernet) to ensure it receives automatic software updates. These updates often include performance improvements, bug fixes, and new features, enhancing your viewing experience and ensuring compatibility with DIRECTV's evolving services.
Keeping Your Old Equipment
If DIRECTV sends you a replacement receiver, they will likely provide instructions on how to return the old unit. Failure to return leased equipment can result in unreturned equipment fees. Follow their instructions carefully for packaging and shipping.
Understanding Your Subscription
Ensure your DIRECTV subscription plan is compatible with your new receiver's capabilities. For example, to access 4K content, you'll need a subscription package that includes 4K channels and a 4K-compatible receiver (like the C61K Genie Mini paired with a compatible Genie). If you're unsure, consult your subscription details or DIRECTV support.
Future-Proofing
When choosing a replacement, consider future needs. If you plan to add more TVs or upgrade to 4K in the future, selecting a receiver that supports these capabilities from the outset can save you from another replacement down the line.
Replacing a DIRECTV receiver is a manageable process when approached systematically. Whether you opt for a DIY swap or professional installation, understanding the steps involved, common issues, and best practices will ensure you get back to enjoying your favorite programming with minimal interruption. Always prioritize clear communication with DIRECTV support and follow their specific guidance for your account and equipment.
In conclusion, replacing your DIRECTV receiver is a straightforward process when you have the right information. From identifying the need for a replacement by recognizing common issues like signal loss or frequent reboots, to understanding the different receiver models available, this guide has equipped you with the knowledge to proceed confidently. Whether you choose a DIY approach, carefully following the step-by-step instructions for cable management and activation, or opt for the expertise of a professional installer for complex setups, the goal is a seamless transition. Remember that recordings on DVRs are typically not transferable, so back up or enjoy them before the swap. By ensuring proper setup, network connectivity, and understanding your subscription's capabilities, you can fully leverage the features of your new receiver. Stay informed about lease agreements and equipment return policies to avoid unexpected fees. Ultimately, a well-executed receiver replacement means uninterrupted entertainment and access to the latest DIRECTV features, ensuring your home viewing experience remains top-notch.