-
Posted on: 07 Jan 2026
-
Running cable for Dish Network might seem daunting, but with the right guidance, it's a manageable DIY project. This comprehensive guide will walk you through every step, from planning your installation to securing the cable, ensuring a professional-looking and functional setup for your satellite TV.
Planning Your Dish Network Cable Run
Before you even pick up a tool, meticulous planning is the cornerstone of a successful Dish Network cable installation. This phase is critical for avoiding future headaches, ensuring optimal signal strength, and maintaining the aesthetic appeal of your home. In 2025, with the increasing complexity of home entertainment systems, proper cable management is more important than ever. A well-planned run minimizes signal loss, prevents cable damage, and makes future maintenance or upgrades significantly easier.
Assessing Your Installation Site
The first step in planning is to thoroughly assess your installation site. This involves identifying the optimal location for your Dish Network satellite dish. Factors to consider include:
- Clear Line of Sight: The dish needs an unobstructed view of the southern sky (in the Northern Hemisphere) to receive signals from the satellites. Trees, buildings, and other obstructions can severely degrade or block the signal. Use a compass and consult Dish Network's coverage maps or their installation guide to pinpoint the correct direction.
- Mounting Location: Where will the dish be physically mounted? Common locations include the roof, a side wall, or a ground mount. Each has its pros and cons regarding accessibility, stability, and aesthetics. Roof mounts often offer the clearest line of sight but can be more challenging and dangerous to install. Wall mounts are generally easier to access but may be more susceptible to obstructions. Ground mounts require a stable foundation but are the most accessible for maintenance.
- Cable Path: Once the dish location is determined, you need to plan the path the coaxial cable will take from the dish to your receiver inside the home. Consider the shortest, most direct route that minimizes exposure to the elements and potential damage. Look for existing conduits, access points, or natural channels that can be utilized.
- Entry Point: Identify where the cable will enter your home. This could be through a drilled hole in a wall, an existing vent, or a window. The entry point should be sealed properly after installation to prevent water intrusion and drafts.
- Receiver Location: Where will your Dish Network receiver be placed? Ensure it's near a power outlet and an accessible location for your television.
Understanding Signal Strength Requirements
Dish Network's signal strength is paramount for a clear and uninterrupted viewing experience. The coaxial cable used (typically RG-6 quad-shield) has inherent signal loss over distance. Therefore, the length of your cable run directly impacts signal quality. For 2025, Dish Network generally recommends keeping cable runs as short as possible, ideally under 100 feet for optimal performance without signal boosters. Longer runs may require a signal amplifier, which adds complexity and cost. Understanding the specifications of your RG-6 cable, including its attenuation (dB loss per 100 feet), is crucial for planning. Always aim for a cable run that keeps the signal strength well within the acceptable range specified by Dish Network.
Considering Local Regulations and HOA Rules
Before drilling or mounting anything, it's essential to check local building codes and any Homeowners Association (HOA) rules. Some areas have restrictions on satellite dish placement, size, or how cables can be routed. Failure to comply can result in fines or the requirement to remove your installation. In 2025, many HOAs are becoming more stringent about external modifications to properties, so a quick check can save significant trouble.
Gathering Essential Tools and Materials
Having the right tools and materials readily available will streamline your Dish Network cable installation process, ensuring a professional and durable result. Investing in quality components upfront can prevent issues down the line. For 2025, the standard for satellite installations remains high, so ensure your materials meet current industry specifications.
Essential Tools for Installation
Here's a list of tools you'll likely need:
- Drill and Drill Bits: For creating holes for cable entry and mounting hardware. You'll need various sizes, including masonry bits if drilling into brick or concrete.
- Screwdrivers: Both Phillips and flathead, for mounting brackets and securing connections.
- Wire Strippers/Crimpers: Specifically for coaxial cable, to properly prepare the cable ends for F-connectors.
- Adjustable Wrench or Socket Set: For tightening nuts and bolts on dish mounts and brackets.
- Level: To ensure the satellite dish is mounted perfectly level for optimal alignment.
- Tape Measure: For measuring cable lengths and placement.
- Caulking Gun: For sealing entry points and outdoor cable connections.
- Safety Glasses: Always wear eye protection when drilling or working overhead.
- Ladder: A sturdy ladder is essential for roof or high wall installations. Ensure it's placed on stable ground.
- Stud Finder: To locate wall studs for secure mounting points.
- Fish Tape or Glow Rods: Useful for pulling cable through walls and ceilings.
- Utility Knife: For general cutting tasks.
- Pliers: Various types can be helpful for gripping and manipulating components.
Necessary Materials for Installation
The materials are just as crucial as the tools. For a robust 2025 installation, consider these:
- RG-6 Quad-Shield Coaxial Cable: This is the standard for satellite TV. Quad-shielding offers superior protection against interference. Purchase more than you think you'll need to account for turns and slack.
- F-Connectors: These screw onto the ends of the coaxial cable. Ensure they are designed for RG-6 cable. Compression or crimp-on connectors are recommended over older screw-on types for a more secure and weather-resistant connection.
- Weatherproof Boot/Sealant: For protecting outdoor F-connector connections from moisture.
- Cable Clips/Staples: For securing the cable neatly along walls, eaves, or conduits. Use UV-resistant clips for outdoor use.
- Mounting Hardware: This will depend on your chosen mounting location (e.g., lag bolts for wood, masonry anchors for brick). Ensure they are corrosion-resistant.
- Dish Network Satellite Dish and Receiver: Ensure these are the correct models for your subscription.
- Grounding Equipment: A grounding block and grounding wire are essential for lightning protection and safety.
- Weatherproof Junction Box (Optional): If you need to split the signal or make multiple connections outdoors, a weatherproof box is recommended.
Choosing the Right Coaxial Cable (RG-6)
In 2025, the choice of coaxial cable remains critical. RG-6 quad-shield cable is the industry standard for satellite and cable TV installations. Here's why:
- Quad-Shielding: It features four layers of shielding (two foil and two braided shields), which significantly reduces electromagnetic interference (EMI) and radio frequency interference (RFI). This is vital for maintaining a strong, clear signal, especially over longer distances or in areas with a lot of wireless activity.
- Center Conductor: RG-6 typically has a thicker copper center conductor than older RG-59 cable, which allows for less signal loss.
- Dielectric Insulator: The material surrounding the center conductor is designed to minimize signal degradation.
- Outer Jacket: Look for UV-resistant and outdoor-rated jackets if the cable will be exposed to sunlight and weather.
When purchasing RG-6 cable, ensure it's rated for outdoor use if applicable and has the necessary shielding (quad-shield is preferred). The length of your cable run will determine how much signal loss you can expect, so factor this into your planning. For runs exceeding 100-150 feet, consider using a higher quality RG-6 cable with lower attenuation or a signal amplifier.
Understanding Cable Routing Options
The way you route your Dish Network cable significantly impacts its durability, signal integrity, and the overall appearance of your installation. In 2025, homeowners are increasingly concerned with both functionality and aesthetics, making careful routing a priority. There are several common methods, each with its advantages and disadvantages.
Outdoor Cable Routing
Routing the cable on the exterior of your home is often the most straightforward approach, but it requires careful attention to weatherproofing and aesthetics.
- Along Eaves and Fascia Boards: This is a popular method as it keeps the cable relatively protected under the roof overhang. Use UV-resistant cable clips or staples to secure the cable neatly along the fascia or under the eaves. This minimizes direct exposure to rain and sun.
- Down Walls: When bringing the cable down from the roof or dish, route it along the wall. Again, use appropriate cable clips spaced every 1-2 feet to keep the cable taut and prevent sagging. Consider routing it along corners or in less visible areas.
- Through Existing Conduit or Channels: If your home has existing conduit for electrical wiring or other utilities, you might be able to use it for your satellite cable. This offers excellent protection but requires checking if the conduit is already occupied and if it leads to your desired interior location.
- Underground Burial: For a very clean look, especially if the dish is mounted on a ground pole, you can bury the cable. Use direct-burial rated RG-6 cable and bury it at a depth of at least 6 inches (check local codes for specific requirements). Always use a conduit for added protection, especially at entry and exit points. This method is more labor-intensive but offers the best protection against weather and physical damage.
Indoor Cable Routing
Once the cable enters your home, you'll need to route it to the receiver. This often involves navigating walls, ceilings, and floors.
- Through Walls: This is the most common and aesthetically pleasing method for indoor runs. It requires drilling holes and using tools like fish tape or glow rods to pull the cable through. Always aim to drill into wall cavities rather than directly through studs if possible.
- Through Ceilings and Attics: If you have attic access, you can often run the cable through the attic and then drop it down to the receiver location. This can be easier than running through walls, but ensure the cable is secured and not left dangling where it could be damaged.
- Through Floors: Less common, but sometimes necessary. This involves drilling through floor joists or finding access points from a basement or crawl space.
- Along Baseboards or Crown Molding: For shorter runs or when drilling is not feasible, you can discreetly run the cable along baseboards or behind crown molding, securing it with small, paintable cable clips.
Cable Entry and Exit Points
The points where the cable enters and exits your home are critical for preventing water damage and maintaining a professional finish. For 2025 installations, attention to detail here is key.
- Drilling Holes: When drilling a new hole, choose a location that is as inconspicuous as possible and away from existing electrical wiring. Drill from the outside in to prevent moisture from running down the hole into your wall. The hole should be slightly larger than the cable diameter to allow for easy passage and sealing.
- Sealing Entry Points: After the cable is run, thoroughly seal the entry point from the outside using weatherproof caulk or a specialized cable entry boot. This prevents water, insects, and drafts from entering your home.
- Window Entry: If drilling is not an option, a flat window cable pass-through can be used. These are thin cables designed to fit through a closed window, minimizing the need for drilling and sealing. However, they can be a point of weakness and may affect window insulation.
Comparison of Routing Methods
Here's a quick comparison to help you decide:
Method Pros Cons Best For Outdoor (Eaves/Walls) Relatively easy, good protection if done carefully Can be visually unappealing if not neat, requires weatherproofing Most common installations, accessible locations Underground Aesthetically superior, excellent protection Labor-intensive, requires trenching and conduit Ground-mounted dishes, long runs, pristine aesthetics Indoor (Walls/Ceilings) Cleanest look, protected from elements Requires drilling, tools like fish tape, potential for interior damage if not careful Connecting receiver to dish inside the house Window Entry No drilling required Potential security risk, insulation issues, less durable Temporary installations, when drilling is impossible Step-by-Step Guide to Running Dish Network Cable
This detailed guide will walk you through the process of running the coaxial cable from your Dish Network satellite dish to your indoor receiver. Following these steps carefully will ensure a safe, efficient, and professional installation. For 2025, adhering to best practices is crucial for optimal performance and longevity.
Step 1: Determine the Dish Location and Cable Path
As discussed in the planning section, finalize the exact location for your satellite dish and map out the most efficient and protected path for the coaxial cable to enter your home. Measure the approximate length of cable needed, adding at least 10-15% extra for slack and potential adjustments.
Step 2: Mount the Satellite Dish
Install the satellite dish according to the manufacturer's instructions. Ensure the mount is securely fastened to a stable surface (wall, roof, or ground pole) and that the dish is oriented correctly for signal acquisition. This step is typically done before running the cable, as it dictates the starting point.
Step 3: Prepare the Cable Entry Point
Identify the planned entry point into your home. If drilling a new hole, use a drill bit appropriate for the exterior material (wood, brick, siding). Drill from the outside in to prevent water from entering the wall cavity. The hole should be slightly larger than the coaxial cable. If using an existing entry point, ensure it's clean and ready.
Step 4: Run the Cable from the Dish to the Entry Point
This is where you'll physically route the cable. If running outdoors:
- Begin at the dish. Secure the end of the cable to the dish mount or LNB arm with a cable tie, leaving some slack.
- Carefully run the cable along your planned outdoor path (eaves, walls).
- Use UV-resistant cable clips or staples spaced every 1-2 feet to keep the cable taut and secure. Avoid kinking or sharply bending the cable.
- Ensure the cable is routed to your prepared entry point.
Step 5: Feed the Cable Through the Entry Point
Once the cable reaches the entry point, carefully feed it through the hole into your home. If the hole is tight, you may need to gently push the cable. If running through a wall cavity, you might need to use a fish tape or glow rods to guide the cable from the entry point to where it will emerge inside.
Step 6: Prepare the Cable Ends
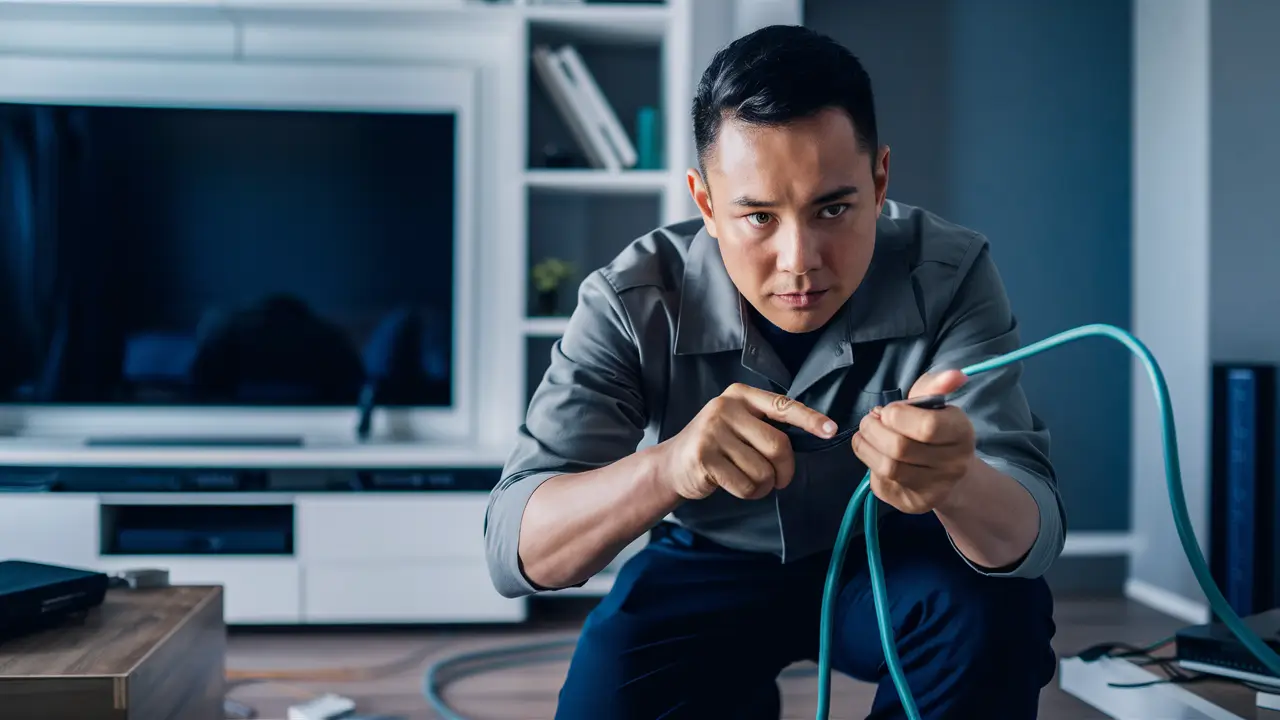
Now, you need to attach F-connectors to the cable ends. This is a critical step for signal integrity.
- Strip the Cable: Use a coaxial cable stripper tool. Follow the tool's instructions carefully to strip the outer jacket, expose the braided shield, and then fold the braided shield back over the jacket. Strip the dielectric insulator to expose the center conductor. Ensure you don't cut into the center conductor or the shield.
- Attach the F-Connector: Slide an RG-6 F-connector onto the exposed center conductor. The connector should screw on tightly. Ensure the dielectric insulator is flush with the end of the connector. The braided shield should be visible outside the connector base.
- Crimp or Compress: If using compression connectors, use a compression tool to permanently attach the connector to the cable. If using crimp-on connectors, use a crimping tool. For 2025, compression connectors are highly recommended for their superior durability and weather resistance.
- Repeat this process for both ends of the cable – one that connects to the dish (or a grounding block/splitter if applicable) and one that connects to the receiver.
Step 7: Install Outdoor Weatherproofing
The connection at the dish (or any outdoor junction) must be weatherproofed.
- Slide a weatherproof boot over the F-connector before attaching it to the LNB or grounding block.
- Once the connector is attached, slide the boot over the connector and seal it snugly. Some boots have adhesive or tape for a secure seal.
- Apply weatherproof silicone caulk around the cable entry point on the exterior of your home to create a watertight seal.
Step 8: Route the Cable Inside the Home
Once the cable is inside, run it from the entry point to your receiver location. Use cable clips to secure the cable along baseboards, walls, or through ceilings. Avoid running the cable parallel to electrical wires for extended distances, as this can cause interference. If you must cross electrical wires, do so at a 90-degree angle.
Step 9: Connect to the Receiver
At the receiver end, attach an F-connector to the cable as described in Step 6. Connect this end of the cable to the "Satellite In" or "LNB In" port on your Dish Network receiver.
Step 10: Grounding the Installation
This is a critical safety step. Connect a grounding wire from the dish mount (or a grounding block near the entry point) to a suitable grounding point, such as a grounded cold water pipe or a dedicated grounding rod. This protects your equipment and your home from lightning strikes. Consult Dish Network's installation manual or a qualified electrician for specific grounding requirements in your area.
Safely Drilling Through Walls and Structures
Drilling through walls and other structures is often necessary for running Dish Network cable, but it requires caution and the right technique to avoid damage and ensure safety. In 2025, homeowners are increasingly aware of the importance of structural integrity and avoiding electrical hazards.
Choosing the Right Drill Bit
The type of drill bit you use depends on the material you're drilling through:
- Wood: Standard twist drill bits or spade bits work well. For longer runs through studs, a long-reach auger bit can be very helpful.
- Drywall: Standard twist bits are sufficient.
- Brick or Concrete: You'll need a masonry drill bit and a hammer drill. These bits are designed with carbide tips to cut through hard materials.
- Metal: Use a metal drill bit, often made of high-speed steel (HSS).
Locating Obstructions Before Drilling
This is arguably the most crucial safety step. Before drilling into any wall, ceiling, or floor, you must attempt to locate hidden obstructions:
- Electrical Wires: Use a stud finder that can detect live electrical wiring. If you're unsure, err on the side of caution and avoid drilling in areas where wires are likely to be present. If you must drill near suspected wiring, turn off the power to that circuit at the breaker box first.
- Plumbing Pipes: Look for plumbing fixtures on either side of the wall you're drilling through. Check basement or crawl space areas for pipe runs.
- HVAC Ducts: These are typically larger than pipes and are usually made of metal.
- Studs and Joists: While not obstructions in the same sense, knowing the location of studs and joists is important for secure mounting and for determining where you can and cannot drill.
Tip: Always drill a small pilot hole first to check for obstructions before using a larger drill bit. If you encounter resistance or hit something unexpected, stop immediately.
Drilling Techniques for Different Materials
- Drywall and Wood: Start with a smaller pilot hole. Once you've confirmed no obstructions, use the appropriately sized drill bit for the cable. For walls, aim to drill into the stud bay (the space between studs) rather than directly through a stud, unless you're mounting something to the stud.
- Brick and Concrete: Use a hammer drill with a masonry bit. Start with a smaller bit to create a pilot hole. Wear safety glasses and a dust mask, as this process creates a lot of dust. Drill slowly and steadily, applying firm pressure. Ensure the hole is slightly larger than your cable to allow for expansion and sealing.
- Drilling from Outside In: Whenever possible, drill from the exterior of your home towards the interior. This helps prevent water from seeping into the wall cavity. Angle the drill slightly downwards towards the outside to encourage water runoff.
Sealing the Drilled Hole
After the cable has been run through the hole, it's vital to seal it properly to prevent water and pest intrusion.
- Caulking: Use a high-quality, exterior-grade, paintable silicone caulk. Apply a generous bead around the cable and the opening on the exterior side. Smooth it out to create a watertight seal.
- Foam Sealant: For larger holes, expanding foam sealant can be used, but it should be applied sparingly and then trimmed and sealed over with caulk.
- Cable Entry Boots: Specialized rubber or plastic boots are available that fit over the drilled hole and cable, providing a robust weatherproof seal.
Safety Precautions
- Wear Safety Glasses: Always protect your eyes from debris.
- Wear Gloves: Protect your hands from splinters and sharp edges.
- Turn Off Power: If drilling near electrical wiring, shut off the power at the breaker.
- Use a Stable Ladder: Ensure your ladder is on a level surface and properly secured.
- Be Aware of Surroundings: Ensure no one is in the path of your drill or potential falling debris.
- Know Your Limits: If you're uncomfortable with drilling or unsure about obstructions, it's best to hire a professional.
Securing and Protecting Your Cable
Properly securing and protecting your Dish Network coaxial cable is crucial for its longevity, signal integrity, and the overall safety and aesthetics of your installation. In 2025, with increased awareness of weather impacts and cable degradation, taking these steps is more important than ever.
Outdoor Cable Securing Techniques
When routing cable outside, protection from the elements and physical damage is paramount.
- Cable Clips/Staples: Use UV-resistant cable clips or staples designed for outdoor use. Space them every 1-2 feet to keep the cable taut and prevent sagging. This also minimizes wind resistance and potential damage.
- Avoid Sharp Bends: Coaxial cable can be damaged by sharp bends, which can degrade signal quality. Maintain a gentle curve (at least a 4-inch radius) when turning corners.
- Protect from Sunlight: Prolonged exposure to direct sunlight can degrade the cable's outer jacket over time. Routing under eaves or using conduit can help mitigate this.
- Guard Against Pests: Rodents can chew through cable jackets. If you're in an area with high rodent activity, consider running the cable through conduit, especially at ground level.
- Protect from Physical Damage: Avoid routing the cable where it can be stepped on, cut by lawn equipment, or hit by vehicles. If routing near a driveway or walkway, consider burying the cable in conduit.
Indoor Cable Securing Techniques
Even indoors, proper cable management prevents tripping hazards and keeps your home looking tidy.
- Cable Clips: Use small, discreet cable clips to secure the cable along baseboards, door frames, or behind furniture. Choose clips that match your wall color if you want them to be less visible.
- Cable Raceways/Conduits: For a cleaner look, especially for longer indoor runs or where the cable is visible, consider using paintable plastic cable raceways. These conceal the cable and provide a more finished appearance.
- Avoid Pinch Points: Ensure the cable is not pinched by doors, windows, or furniture, as this can damage the conductor and shielding.
- Maintain Clearance from Heat Sources: Do not run coaxial cable near heat vents, radiators, or other heat-generating appliances, as excessive heat can degrade the cable over time.
Weatherproofing Connections
Outdoor connections are particularly vulnerable to moisture, which can corrode the F-connector and lead to signal loss or complete failure. For 2025 installations, this is non-negotiable.
- Weatherproof Boots: Always use a weatherproof boot that slides over the F-connector. Ensure it's a tight fit and seals around the cable.
- Silicone Sealant/Caulk: Apply exterior-grade silicone caulk around the F-connector and the boot where it meets the cable and the LNB or grounding block. This creates a secondary barrier against moisture.
- Weatherproof Junction Boxes: If you need to split the signal outdoors or make multiple connections, use a purpose-built weatherproof junction box to house the connections.
- Protect F-Connectors: Ensure all outdoor F-connectors are properly tightened and sealed. Any exposed metal on the connector can corrode.
Grounding for Safety and Protection
Grounding is not just about securing the cable; it's a critical safety measure.
- Lightning Protection: A proper grounding system diverts electrical surges from lightning strikes away from your equipment and home, significantly reducing the risk of damage or fire.
- Signal Integrity: Proper grounding can also help reduce ground loop interference, which can affect signal quality.
- Follow Standards: Always follow Dish Network's recommended grounding procedures or consult local electrical codes. Typically, this involves running a dedicated grounding wire from the dish mount or a grounding block near the cable entry point to a verified earth ground (e.g., a cold water pipe or a grounding rod).
Using Quality Connectors and Materials
The quality of your materials directly impacts the durability and performance of your installation.
- RG-6 Quad-Shield Cable: As mentioned, this provides superior protection against interference.
- Compression or Crimp F-Connectors: These create a more robust and weather-resistant connection than older screw-on types. For 2025, compression connectors are the preferred choice for outdoor installations.
- UV-Resistant Clips: Essential for outdoor cable management to prevent degradation from sunlight.
By implementing these securing and protection strategies, you ensure your Dish Network cable run is not only functional but also durable, safe, and aesthetically pleasing for years to come.
Testing Your Dish Network Installation
Once the cable is run and connected, the crucial step of testing your Dish Network installation begins. This ensures everything is working correctly and that you have a strong, stable signal. For 2025, the emphasis is on verifying signal quality for high-definition and potentially 4K content.
Using the Dish Network Receiver's Diagnostic Tools
Your Dish Network receiver is equipped with built-in diagnostic tools that are invaluable for testing your installation.
- Signal Strength Meter: This is the primary tool. Access it through your receiver's menu (typically under "Settings," "System Info," or "Diagnostics"). It will display signal strength and quality percentages for each satellite transponder.
- Alignment Screen: Some receivers have an alignment screen that shows real-time signal changes as you adjust the dish. This is most useful during the initial dish alignment phase but can also be used to check for signal fluctuations after installation.
- Error Codes: Familiarize yourself with common error codes displayed by your receiver. These can often point to specific issues, such as no signal, weak signal, or connection problems.
Interpreting Signal Strength and Quality Readings
The numbers displayed on the signal meter are critical:
- Signal Strength: This indicates how much signal energy is being received. Higher is generally better, but it's the quality that truly matters.
- Signal Quality: This is the more important metric. It measures how clean the signal is, free from noise and interference. A high signal quality is essential for a stable picture, especially for HD and 4K channels.
Target Readings (General Guidelines for 2025):
- Minimum Signal Strength: Aim for at least 60-70% strength.
- Minimum Signal Quality: This is where you want to be high. Aim for 80-90% or higher for optimal performance. Some channels or transponders might be slightly lower, but consistently low quality across multiple channels indicates a problem.
If your signal strength or quality is consistently low, it indicates an issue with the dish alignment, cable connection, cable length, or potential obstructions.
Testing Individual Channels
After confirming good signal readings on the diagnostic screen, it's time to test actual channels.
- Tune to Various Channels: Cycle through a variety of channels, including local channels, popular national networks, and premium channels.
- Check for Picture Breakup: Look for pixelation, freezing, or blocks in the picture. These are signs of a weak or unstable signal.
- Listen for Audio Issues: Ensure the audio is clear and synchronized with the video.
- Test Different Times of Day: Sometimes, signal issues can be intermittent and may only appear under certain atmospheric conditions or at specific times.
Verifying All Connections
A weak signal can often be traced back to a faulty connection.
- F-Connectors: Ensure all F-connectors are properly attached, tight, and weatherproofed (if outdoors). Loose or corroded connectors are a common cause of signal problems.
- Cable Integrity: Check the entire length of the cable for any signs of damage, kinks, or cuts.
- Receiver Connection: Make sure the cable is securely plugged into the correct port on the receiver.
- Splitters/Switches (if used): If you're using any splitters or multiswitches, ensure they are correctly installed and functioning. Each splitter introduces some signal loss.
Troubleshooting Low Signal Issues
If your tests reveal low signal strength or quality, here's what to do:
- Re-check Dish Alignment: Even a slight misalignment can drastically reduce signal quality. Use the receiver's alignment screen and make fine adjustments to the dish position.
- Inspect Cable Connections: Ensure all F-connectors are properly stripped, attached, and tightened. Re-crimp or re-attach any suspect connectors.
- Check for Obstructions: Ensure no new obstructions (e.g., growing branches, new construction) have appeared in the line of sight to the satellites.
- Test Cable Length: If your cable run is very long (over 150 feet), signal loss might be unavoidable without a signal amplifier.
- Inspect Cable for Damage: Look for any physical damage to the cable jacket or shielding.
- Simplify the System: If you're using splitters, try bypassing them temporarily to see if signal improves.
By systematically testing your installation, you can identify and resolve any issues, ensuring you receive the best possible picture and sound from your Dish Network service.
Troubleshooting Common Cable Installation Issues
Even with careful planning and execution, you might encounter issues during or after your Dish Network cable installation. Knowing how to troubleshoot common problems can save you time and frustration. For 2025, many issues still stem from basic connection and alignment problems.
No Signal on Receiver
This is the most common and frustrating problem. If your receiver displays "No Signal" or a similar message:
- Check Cable Connections: Ensure the coaxial cable is securely connected to both the LNB on the dish and the receiver. Make sure the F-connectors are tight and properly seated.
- Verify Cable Path: Trace the cable from the dish to the receiver. Is it damaged? Is it disconnected anywhere?
- Check Dish Alignment: The dish might have shifted slightly. Realign it using the receiver's signal meter. Even a small shift can cause a complete loss of signal.
- Inspect LNB: The Low-Noise Block (LNB) on the dish could be faulty or damaged.
- Power Cycle the Receiver: Turn off the receiver, wait 30 seconds, and turn it back on. Sometimes, a simple reboot can resolve temporary glitches.
- Check for Obstructions: Has something new blocked the line of sight to the satellites?
Weak or Pixelated Signal (Low Signal Quality)
If you have a picture, but it's frequently breaking up, freezing, or showing pixelation, your signal quality is likely poor.
- Re-align the Dish: This is the most common fix. Use the receiver's signal meter and make very small, incremental adjustments to the dish's elevation and azimuth.
- Check F-Connector Quality: Poorly made or corroded F-connectors are a major culprit. Re-strip and re-attach the connectors, ensuring a clean, tight connection. Consider using compression connectors for outdoor use.
- Inspect Cable for Damage: Look for any kinks, cuts, or damage to the cable jacket or shielding. A damaged cable can introduce noise.
- Cable Length and Attenuation: If your cable run is very long (over 150 feet), signal loss may be inherent. Consider a shorter run, a higher quality cable, or a signal amplifier.
- Interference: While RG-6 quad-shield is good, strong nearby interference (e.g., from other satellite dishes, poorly shielded electronics) can sometimes affect signal quality. Ensure outdoor connections are well-sealed.
- Splitters: If you're using a splitter, it introduces signal loss. Try bypassing the splitter to see if the signal improves.
Water Intrusion at Cable Entry Point
If you notice water dripping into your home or dampness around the cable entry point, it needs immediate attention.
- Re-seal the Entry Point: Clean the area thoroughly and apply a generous amount of exterior-grade, paintable silicone caulk around the cable and the opening. Ensure the caulk creates a continuous, watertight seal.
- Check Cable Entry Boots: If you used a boot, ensure it's properly seated and sealed.
- Inspect Cable for Damage: Water can travel along the cable. Check the cable for any damage that might have allowed moisture ingress.
Dish Not Receiving Signal from All Satellites
Dish Network uses multiple satellites. If you can only get channels from one or two, but not others:
- Dish Alignment: The dish might be precisely aligned for one satellite but not others. Fine-tune the alignment, paying attention to the signal strength for all relevant satellites shown on your receiver's diagnostic screen.
- LNB Type: Ensure you have the correct LNB for your Dish Network system. Some LNBs are designed to receive signals from multiple satellites simultaneously.
- Multi-Switch/SWM Issues: If your system uses a SWM (Single Wire Multiswitch) or other multiswitches, these components could be faulty or improperly configured.
Intermittent Signal Drops
If your signal drops out occasionally, especially during certain weather conditions:
- Weather Impact: Heavy rain or snow can temporarily interfere with satellite signals. This is normal to some extent, but severe or frequent drops might indicate a borderline signal issue.
- Loose Connections: Vibrations from wind or temperature changes can cause loose connections to become intermittent. Re-tighten and re-seal all F-connectors.
- Cable Damage: A damaged cable might only fail under certain stress conditions.
Safety Concerns (e.g., Sparks, Smells)
If you experience any sparks, unusual smells, or hear popping sounds related to your installation:
- IMMEDIATELY Disconnect Power: Turn off the power to your receiver at the breaker box.
- Inspect for Electrical Issues: This could indicate a short circuit or electrical fault. Do not use the system until it has been inspected by a qualified electrician or Dish Network technician.
- Check Grounding: Ensure your grounding system is properly installed and connected.
For any serious electrical concerns or if you're unable to resolve an issue after trying these troubleshooting steps, it's always best to contact Dish Network support or a certified professional installer.
Dish Network Installation Best Practices and Tips
To ensure a professional, reliable, and long-lasting Dish Network installation, adhering to best practices and incorporating helpful tips can make a significant difference. These guidelines, relevant for 2025, focus on maximizing performance, safety, and ease of maintenance.
Prioritize Safety Above All Else
Satellite dish installation often involves working at heights and with tools. Never compromise on safety.
- Ladder Safety: Ensure your ladder is stable, on level ground, and extended to the correct height. Have someone spot you if possible.
- Weather Conditions: Avoid working on the roof or in precarious positions during rain, high winds, or lightning.
- Electrical Awareness: Be mindful of power lines and internal electrical wiring. If in doubt, turn off power at the breaker.
- Wear Protective Gear: Always wear safety glasses, gloves, and appropriate footwear.
Plan for the Long Term
Think beyond the immediate installation. Consider future needs and potential issues.
- Future Upgrades: Leave a little extra cable slack near the receiver and at the dish mount. This can be helpful for future upgrades or troubleshooting.
- Accessibility: If possible, route cables in a way that allows for easy access for future repairs or maintenance without major disruption.
- Weatherproofing: Invest in high-quality weatherproof connectors and sealants. A little extra effort here prevents costly water damage later.
Maximize Signal Quality
A strong, clean signal is the goal of any satellite installation.
- Use RG-6 Quad-Shield Cable: This is the standard for a reason. Don't cut corners on cable quality.
- Minimize Cable Length: The shorter the cable run, the less signal loss. Plan the most direct route possible.
- Proper F-Connector Installation: Ensure your F-connectors are correctly stripped, attached, and compressed/crimped. A poorly made connector is a common source of signal problems.
- Accurate Dish Alignment: Take your time during alignment. Use the receiver's signal meter and aim for the highest possible signal quality.
Maintain Aesthetics
A well-installed system should look as good as it performs.
- Neat Cable Routing: Use cable clips or raceways to keep cables tidy and out of sight. Avoid letting cables dangle loosely.
- Conceal Entry Points: Seal cable entry points with matching caulk or use discreet entry boots.
- Consider Dish Placement: Choose a location that offers the best signal while being as unobtrusive as possible.
Grounding is Essential
Don't skip this critical safety step.
- Proper Grounding: Ensure your dish and associated equipment are properly grounded according to manufacturer instructions and local codes. This protects against lightning strikes and electrical surges.
- Use Correct Materials: Use appropriate gauge grounding wire and ensure a solid connection to an earth ground.
Tools and Materials Checklist
Before you start, double-check that you have everything:
- RG-6 Quad-Shield Coaxial Cable (with extra length)
- RG-6 Compression or Crimp F-Connectors
- Weatherproof Boots and Sealant
- Cable Clips (UV-resistant for outdoor use)
- Drill with appropriate bits
- Wire Strippers/Crimpers
- Level, Tape Measure, Screwdrivers, Wrench
- Ladder
- Fish Tape (if needed for wall runs)
- Grounding Block and Wire
When to Call a Professional
While many installations can be done DIY, there are times when professional help is recommended:
- Roof Installations: If you're uncomfortable working on a steep roof or at significant heights.
- Complex Wiring: If your home has unusual construction or requires extensive interior wiring.
- Persistent Signal Issues: If you've tried troubleshooting and can't resolve signal problems.
- Electrical Concerns: If you suspect any electrical hazards.
By following these best practices and tips, you can ensure a successful Dish Network cable installation that provides reliable service and maintains the integrity and appearance of your home.
In conclusion, running cable for Dish Network is a project that demands careful planning, the right tools, and a methodical approach. By understanding your routing options, meticulously following step-by-step instructions, prioritizing safety, and implementing robust testing and troubleshooting, you can achieve a professional-grade installation. Remember to always use quality materials like RG-6 quad-shield cable and weatherproof all outdoor connections to ensure signal integrity and longevity. If you encounter significant challenges or feel uncomfortable with any aspect of the installation, don't hesitate to consult a professional Dish Network installer. A well-executed cable run is the foundation for a seamless satellite TV experience.


