-
Posted on: 07 Jan 2026
-
Setting up your DIRECTV Genie box can seem daunting, but this comprehensive guide breaks down the process into simple, actionable steps. We'll cover everything from unboxing to enjoying your first HD channel, ensuring a smooth and successful installation. Get ready to unlock the full potential of your home entertainment system.
Introduction to DIRECTV Genie Setup
Welcome to the world of DIRECTV's advanced home entertainment! The Genie HD DVR is the heart of many DIRECTV systems, offering unparalleled access to live TV, on-demand content, and a user-friendly interface. This guide is designed to walk you through the entire process of setting up your DIRECTV Genie box, from the moment you unbox it to the point where you're comfortably navigating channels and recording your favorite shows. We understand that technology can sometimes feel intimidating, which is why we've meticulously crafted these instructions to be clear, concise, and easy to follow, even for those who aren't tech-savvy. By the end of this guide, you'll be a pro at setting up your Genie box and ready to experience the full spectrum of what DIRECTV has to offer. We’ll cover all the essential steps, including identifying your equipment, choosing the optimal placement for your receiver, making the necessary connections, powering up the system, pairing your remote, and understanding basic signal checks. Our aim is to provide you with a comprehensive resource that not only helps you set up your Genie box but also empowers you to troubleshoot common issues and even explore some of the more advanced features available. In 2025, DIRECTV continues to innovate, and understanding the foundational setup is key to leveraging their latest offerings.
What You'll Need: Gathering Your Equipment
Before you begin the setup process for your DIRECTV Genie box, it's crucial to ensure you have all the necessary components. Having everything ready beforehand will make the installation much smoother and prevent interruptions. DIRECTV typically provides a comprehensive installation kit, but it's always wise to double-check. Here’s a breakdown of what you should expect in your DIRECTV Genie box setup kit, along with any additional items you might need:
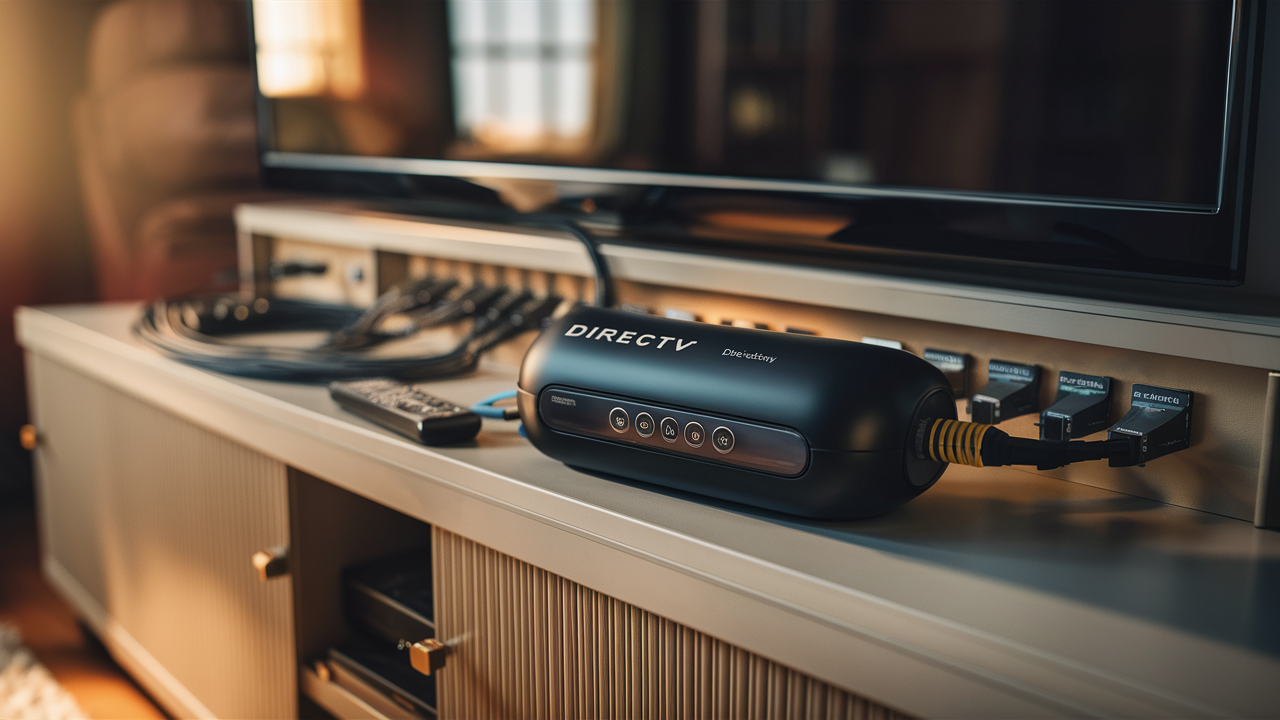
The DIRECTV Genie Box Itself
This is the central hub of your entertainment system. Depending on your package, you might receive a Genie HD DVR (like the HR44, HR54, or the latest Genie 2 HS17 model). These boxes are designed to receive satellite signals, decode them, and distribute them to your connected televisions. The Genie 2 HS17, for instance, is a server-based system that can support up to seven Genie clients, offering a truly whole-home viewing experience.
Remote Control
Your Genie remote is essential for navigating menus, changing channels, and controlling playback. Ensure it's the correct model for your Genie box (e.g., RC73 or newer). Most remotes come pre-programmed, but pairing is often a necessary step.
Power Cord
Every electronic device needs power. Your Genie box will come with a dedicated power cord. Make sure it’s the correct one and that it’s not damaged.
HDMI Cable
High-definition content requires an HDMI cable to transmit both video and audio signals from the Genie box to your television. Most modern TVs and Genie boxes utilize HDMI. If your TV is older, you might need to consider alternatives like component cables, though this will limit you to standard definition.
Ethernet Cable (Optional but Recommended)
While not always strictly necessary for basic setup, an Ethernet cable allows your Genie box to connect to your home network. This enables features like on-demand streaming, app access, and software updates. If you plan to utilize these features, ensure you have an Ethernet cable long enough to reach from your Genie box to your router or modem.
Screwdriver and Wall Mounts (If Applicable)
If your installation involves mounting the Genie box or its components, you might need a Phillips head screwdriver. Some installations may also include specific mounting hardware.
Television
Of course, you'll need a compatible television. Modern flat-screen TVs with HDMI ports are ideal for enjoying the HD capabilities of the Genie box.
Internet Connection (for advanced features)
As mentioned, a stable internet connection is required for on-demand content, app access, and software updates. Ensure your Wi-Fi is working or that your router is accessible for an Ethernet connection.
Tools for Satellite Dish Setup (If you are installing the dish yourself)
This guide primarily focuses on setting up the Genie box *after* the satellite dish has been installed and connected. If you are performing a full DIY installation, you will need tools for dish mounting, alignment, and cable running, which is a significantly more complex process and often best left to professional installers. DIRECTV's professional installation service ensures optimal signal reception.
It's a good practice to lay out all your components and check them against the packing list provided by DIRECTV. This proactive step can save you a lot of time and frustration during the setup process. If anything is missing or damaged, contact DIRECTV customer support immediately.
Choosing the Right Location for Your Genie Box
The placement of your DIRECTV Genie box is more important than you might think. While it doesn't directly affect satellite signal reception (that's the dish's job), its location impacts cable management, ventilation, remote control functionality, and overall user convenience. Here are key considerations for choosing the ideal spot:
Proximity to the Television
The most obvious factor is its closeness to the TV it will be connected to. The length of your HDMI cable will dictate how far the Genie box can be placed from the screen. Ideally, you want a neat setup where cables are not excessively long and taut. If you have a wall-mounted TV, consider placing the Genie box behind it using a VESA mount accessory, or in a nearby cabinet.
Ventilation
Like all electronic devices, Genie boxes generate heat. It's crucial to place them in a location that allows for adequate airflow. Avoid enclosed cabinets with no ventilation, stacking other electronics directly on top of it, or placing it in direct sunlight. Overheating can lead to performance issues and shorten the lifespan of the device. Ensure there's at least a few inches of space around the sides and back of the box.
Accessibility for Cables
Consider where the coaxial cable (from the satellite dish) and the HDMI cable (to the TV) will enter and exit. If you're routing cables through walls or furniture, choose a location that makes these connections as straightforward as possible. Planning this in advance can prevent messy cable tangles and ensure a clean aesthetic.
Remote Control Line of Sight
Most Genie remotes use infrared (IR) signals, meaning they need a clear line of sight to the Genie box's IR receiver. While some newer remotes can be paired to work via radio frequency (RF), it's still best practice to ensure the box isn't completely hidden behind thick materials or in a far-off, obstructed corner. If you encounter remote issues, obstructed line of sight is often a primary culprit.
Proximity to Your Router (for Ethernet connection)
If you plan to connect your Genie box to the internet via an Ethernet cable for on-demand services and app access, its proximity to your home router is a significant factor. If the distance is too great for a standard Ethernet cable, you might need to consider Wi-Fi connectivity (if your Genie model supports it) or a powerline adapter. In 2025, a robust internet connection is becoming increasingly vital for the full DIRECTV experience.
Aesthetics and Cable Management
Think about how the setup will look. Do you want the box visible, or hidden in a media console? Many users opt for media cabinets or shelves that can conceal the box while still allowing for ventilation and remote access. Cable management solutions like ties, sleeves, or clips can help keep everything tidy.
Once you've identified a suitable location, ensure the surface is stable and level. Avoid placing the Genie box on soft surfaces like carpets, which can further impede airflow.
Making the Physical Connections: A Step-by-Step Guide
This section details the crucial step of connecting your DIRECTV Genie box to your television and other essential components. Follow these steps carefully to ensure a successful setup. We'll assume the satellite dish is already installed and professionally connected to the coaxial cable outlet in your home.
Step 1: Connect the Coaxial Cable
Locate the coaxial cable that runs from your satellite dish to the wall outlet in the room where your Genie box will be placed. This cable is typically a thick, round cable with a screw-on connector (F-connector).
- Find the "SAT-IN" or "COAX IN" port on the back of your DIRECTV Genie box. It's usually labeled clearly.
- Screw the F-connector of the coaxial cable securely onto this port. Hand-tighten it firmly, but avoid over-tightening, which can damage the connector.
Step 2: Connect the Genie Box to Your Television
This connection transmits the video and audio signal from the Genie box to your TV.
- Locate the HDMI port on the back of your Genie box.
- Locate an available HDMI input port on your television. These are usually labeled "HDMI 1," "HDMI 2," etc.
- Connect one end of the HDMI cable to the HDMI output port on the Genie box and the other end to the chosen HDMI input port on your TV.
- Important Note: Remember which HDMI port you use on your TV (e.g., HDMI 2). You'll need to select this input source on your TV later.
Step 3: Connect to Your Home Network (Optional but Recommended)
For features like On Demand, streaming apps, and software updates, connecting to the internet is essential. You have two primary options:
- Ethernet Connection: If you have an Ethernet cable and your router is nearby, connect one end to the "ETHERNET" or "NETWORK" port on the back of your Genie box and the other end to an available LAN port on your router. This is the most stable and recommended connection method.
- Wi-Fi Connection: Some Genie models can connect wirelessly. This option will be configured during the on-screen setup process if an Ethernet cable is not detected. Ensure your Wi-Fi network name (SSID) and password are readily available.
Step 4: Connect Other Peripherals (If Applicable)
Some Genie models might have additional ports for specific setups, such as:
- USB Ports: Primarily used for service technician diagnostics or potentially future features.
- Optical Audio Out: For connecting to soundbars or audio receivers if you're not using HDMI for audio.
For a standard setup, only the coaxial and HDMI cables are strictly necessary for basic TV viewing.
Step 5: Connect the Power Cord
Once all other connections are secure, plug the power cord into the back of the Genie box and then into a nearby electrical outlet. Ensure the outlet is not controlled by a wall switch that could be accidentally turned off.
After completing these physical connections, your Genie box is ready for its initial power-on and software setup. Double-check that all cables are securely connected before proceeding to the next step.
Powering On and Initial Setup
With all the physical connections made, it's time to bring your DIRECTV Genie box to life. This stage involves powering on the device and following the on-screen prompts to complete the initial system configuration. This process typically takes between 15 to 30 minutes, so be patient.
Step 1: Power On the Genie Box and Television
Turn on your television first, and then power on your DIRECTV Genie box. The Genie box usually powers on automatically when plugged in, but some models may have a power button. You should see indicator lights on the front of the Genie box illuminate.
Step 2: Select the Correct TV Input
Using your TV's remote control, cycle through the input sources until you select the HDMI input you connected the Genie box to in the previous step (e.g., HDMI 1, HDMI 2). You should now see the DIRECTV welcome screen or a loading sequence on your TV.
Step 3: Follow the On-Screen Setup Wizard
The Genie box will guide you through a series of setup screens. These typically include:
- Welcome Screen: Acknowledge the welcome message.
- Language Selection: Choose your preferred language.
- Satellite Setup: The Genie box will attempt to detect the satellite signal. It will display signal strength for various transponders. If the signal is weak or absent, this may indicate an issue with the dish alignment or cable connection, which might require professional assistance.
- Network Setup:
- If you connected via Ethernet, the system will likely detect the network automatically.
- If you are using Wi-Fi, you will be prompted to select your Wi-Fi network from a list and enter your password. Ensure you have your Wi-Fi credentials ready.
- Software Download and Installation: The Genie box will download and install the latest software updates. This is a critical step for performance and feature access. Do not unplug the box during this process.
- System Test: The system may run a brief test to confirm all components are communicating correctly.
- Remote Setup: You will be prompted to pair your remote control. We cover this in detail in the next section.
Step 4: Confirmation and Channel Scan
Once the software is installed and the initial configuration is complete, the Genie box will perform a channel scan to find all available DIRECTV channels. This process can take several minutes.
Step 5: Initial Channel Display
After the scan, you should see the DIRECTV channel guide and be able to tune into channels. The system might prompt you to perform a quick interactive tutorial on using the remote and navigating the interface. Take advantage of this to familiarize yourself with the basic functions.
If you encounter any error messages or the setup process stalls, refer to the troubleshooting section or contact DIRECTV customer support. Patience is key during this initial setup, as it involves multiple downloads and configurations.
Pairing Your Genie Remote
The DIRECTV Genie remote is your primary tool for interacting with the Genie box. While many remotes come pre-paired, sometimes they lose their connection or you might be using a new remote. Pairing ensures your remote can communicate effectively with the Genie box. There are a few methods, but the most common is the on-screen guided process.
Method 1: On-Screen Guided Setup (Recommended)
This method is usually initiated during the initial Genie box setup process. If you skipped it or need to re-pair, you can typically access it through the Genie's settings menu:
- Press the MENU button on your Genie remote.
- Navigate to Settings & Help.
- Select Settings.
- Choose Remote & Equipment.
- Select Remote Setup.
- Follow the on-screen prompts. You'll likely be asked to point the remote at the Genie box and press a specific button combination (e.g., SELECT and FAST FORWARD simultaneously) or enter a code.
- The Genie box will confirm when the remote is successfully paired.
Method 2: Manual Pairing (If On-Screen Fails)
If the on-screen method doesn't work, you can try a manual pairing process. This usually involves putting the Genie box into pairing mode and then activating the remote.
- On the Genie box, locate the small red reset button, often found on the side or back. Press and hold this button for about 10 seconds until the lights on the front of the box flash. This puts the box into pairing mode.
- Immediately after, take your Genie remote. Press and hold the MUTE and ENTER buttons simultaneously for about 5 seconds.
- The lights on the remote should flash, indicating it's trying to pair.
- Wait for the Genie box to confirm the pairing. You might see a message on the TV screen.
Method 3: Radio Frequency (RF) Pairing
Modern Genie remotes (like the RC73 and newer) can operate in RF mode, which doesn't require a direct line of sight. If your remote is set to IR mode and you want to use RF:
- Ensure the remote is paired to the Genie box first (using Method 1 or 2).
- Point the remote at the Genie box.
- Press and hold the BACK ARROW and FORWARD ARROW buttons simultaneously for about 5 seconds.
- The LED indicator on the remote should flash green twice, indicating it has switched to RF mode.
To switch back to IR mode, repeat the process.
Troubleshooting Remote Pairing
- Batteries: Ensure your remote has fresh batteries. Low battery power is a common cause of pairing issues.
- Distance: For initial pairing, ensure the remote is within a few feet of the Genie box.
- Interference: Other wireless devices can sometimes interfere. Try to minimize potential interference during the pairing process.
- Reset: If all else fails, try resetting both the Genie box (unplug power for 30 seconds) and the remote (remove batteries for 30 seconds) and then attempt pairing again.
A successfully paired remote is crucial for a seamless DIRECTV experience. If you continue to have trouble, consult DIRECTV's support resources or contact their customer service.
Understanding Satellite Alignment and Signal Strength
While this guide focuses on setting up the Genie box itself, understanding satellite alignment and signal strength is fundamental to receiving DIRECTV service. The Genie box is essentially a receiver; its ability to function depends entirely on the quality of the signal it receives from the DIRECTV satellite dishes. Professional installers are trained to precisely align these dishes, but knowing how to check your signal strength can be helpful for troubleshooting.
How Satellite Alignment Works
DIRECTV uses a network of satellites orbiting the Earth. The satellite dish on your home is precisely angled to capture signals from these satellites. The alignment involves pointing the dish at the correct elevation, azimuth (compass direction), and polarization for the specific satellites serving your geographic location. Even a slight misalignment can significantly degrade or completely block the signal.
Checking Signal Strength on Your Genie Box
Your Genie box provides diagnostic tools to check the signal strength and quality. This is invaluable for identifying if a problem lies with the dish or cabling, rather than the receiver itself.
- Press the MENU button on your Genie remote.
- Navigate to Settings & Help.
- Select Settings.
- Choose System Info.
- Select Satellite.
On this screen, you'll typically see information about the signal strength and quality for each transponder (a specific frequency band used by the satellite). Look for:
- Signal Strength: This indicates how strong the signal is. Higher is better.
- Signal Quality: This indicates how clear the signal is, free from noise and interference. Higher is better.
Interpreting the Readings:
- Excellent Signal (90-100%): Ideal.
- Good Signal (70-89%): Generally acceptable, but can be prone to occasional pixelation or freezing during adverse weather.
- Fair Signal (50-69%): Likely to experience intermittent issues, especially in bad weather.
- Poor Signal (Below 50%): Unacceptable. Expect frequent outages, pixelation, or no picture at all.
Common Causes of Signal Loss
- Dish Misalignment: The dish can be knocked out of alignment by strong winds, heavy snow, or even animals.
- Obstructions: New trees, buildings, or other structures can block the line of sight between the dish and the satellite.
- Weather: Heavy rain, snow, or fog can temporarily interfere with satellite signals (known as "rain fade"). This is more noticeable with lower signal quality.
- Cable Damage: Damaged coaxial cables, connectors, or splitters can weaken the signal.
- LNB Issues: The Low-Noise Block downconverter (LNB) on the dish, which amplifies and converts the satellite signal, can fail.
When to Call a Professional
If your signal strength readings are consistently low across all transponders, or if you suspect physical damage to the dish or cabling, it's time to contact DIRECTV. Attempting to realign the dish yourself without proper knowledge and equipment can lead to further problems and is generally not recommended. DIRECTV technicians have specialized tools to ensure accurate alignment and diagnose complex issues. As of 2025, DIRECTV continues to emphasize professional installation and maintenance for optimal performance.
Understanding these signal diagnostics empowers you to communicate effectively with customer support and helps you determine if the issue requires a technician visit.
Common Troubleshooting Tips
Even with a perfect setup, you might occasionally encounter issues with your DIRECTV Genie box. Here are some common problems and their solutions, designed to get you back to enjoying your service quickly.
No Picture or "Searching for Satellite Signal" Message
This is the most common issue and usually points to a signal problem.
- Check Cables: Ensure the coaxial cable is securely connected to both the wall outlet and the Genie box. Check the HDMI cable connection to the TV.
- Check TV Input: Verify that your TV is set to the correct HDMI input source.
- Check Signal Strength: Use the diagnostic tools (as described in the previous section) to check signal strength. If it's low, the issue is likely with the dish or cabling.
- Reboot the Genie Box: Unplug the power cord from the back of the Genie box, wait 30 seconds, and plug it back in. This simple reboot can resolve many temporary glitches.
- Check for Weather: Severe weather can temporarily disrupt satellite signals. Wait for conditions to improve.
- Contact DIRECTV: If the problem persists after these steps, especially if signal strength is low, you may need to schedule a technician visit.
Pixelation or Freezing
This indicates a weak or intermittent signal.
- Check Signal Strength: Low signal quality is often the culprit. Investigate potential obstructions or dish misalignment.
- Reboot the Genie Box: A reboot can sometimes clear temporary signal interference.
- Check Weather: Rain fade can cause this.
- Inspect Cables: Look for any visible damage to coaxial cables or connectors.
Remote Not Working
If your remote isn't controlling the Genie box:
- Check Batteries: Replace the batteries with fresh ones.
- Check Line of Sight: Ensure there's a clear path between the remote and the Genie box (for IR mode).
- Re-pair the Remote: Follow the remote pairing instructions in the previous section.
- Check Remote Mode: Ensure the remote is in the correct mode (TV, SAT, etc.) by pressing the corresponding button.
- Reset the Remote: Remove the batteries for 30 seconds, then reinsert them.
Genie Box is Slow or Unresponsive
A sluggish Genie box can be frustrating.
- Reboot the Genie Box: This is often the quickest fix for performance issues.
- Check Internet Connection: If you're experiencing slowness when accessing On Demand or apps, check your home internet connection. A slow or unstable internet can impact these features.
- Check Storage Space (for DVR models): If your DVR is full, it can slow down. Delete old recordings you no longer need.
- Software Updates: Ensure your Genie box is running the latest software. Updates often include performance improvements.
On Demand or App Features Not Working
These features rely on your internet connection.
- Check Internet Connection: Verify your home internet is working. Try accessing other online services.
- Check Network Connection: Ensure the Genie box is properly connected to your network (Ethernet or Wi-Fi). Re-enter Wi-Fi credentials if necessary.
- Reboot Router and Genie Box: Rebooting your modem, router, and Genie box in that order can resolve network communication issues.
- Check DIRECTV Service Status: Occasionally, DIRECTV's On Demand servers might be down for maintenance.
Error Codes
DIRECTV Genie boxes display various error codes (e.g., 771 for signal loss, 711 for no access card). If you see an error code, note it down. DIRECTV's website and customer support have extensive databases explaining what each code means and the recommended steps. For instance, error code 771 is almost always a signal issue requiring checks on the dish and cabling.
When troubleshooting, it's always best to start with the simplest solutions first (like rebooting) before moving to more complex steps. Documenting the problem and the steps you've taken will also be helpful if you need to contact DIRECTV support.
Exploring Advanced Genie Features
The DIRECTV Genie system is more than just a satellite receiver; it's a sophisticated entertainment hub. Once you've mastered the basic setup, you can unlock a wealth of advanced features that enhance your viewing experience. As of 2025, DIRECTV continues to integrate new functionalities, but these core advanced features remain central to the Genie experience.
Whole-Home Viewing
This is perhaps the most celebrated feature of the Genie system. A single Genie HD DVR can serve multiple Genie Mini clients in other rooms. This means:
- Watch Anywhere: Start a show in the living room and finish it in the bedroom.
- Recordings Accessible: All recorded content on the main Genie DVR is available to watch on any connected Mini client.
- Live TV Everywhere: Tune into any live channel on any TV connected to a Genie client.
- Simultaneous Recordings: Higher-end Genie models (like the HS17 Genie 2) can support up to 7 simultaneous recordings, allowing you to capture almost anything without conflict.
Setting up Genie Mini clients is typically straightforward, involving connecting them to the main Genie box via Ethernet or a wireless video bridge (for wireless models) and then pairing them. Consult your Genie Mini setup guide for specific instructions.
DIRECTV On Demand and Streaming Apps
With an internet connection, your Genie box becomes a gateway to a vast library of movies, TV shows, and exclusive DIRECTV content through DIRECTV On Demand. Additionally, many Genie models allow you to access popular streaming apps directly from the interface:
- Access: Navigate to the "Apps" section or search for content within the DIRECTV guide.
- Login: You'll need to log in with your existing credentials for services like Netflix, Max, Prime Video, YouTube, and more.
- Unified Search: Some Genie interfaces offer a unified search function that looks for content across live TV, On Demand, and connected apps, saving you time.
Ensure your Genie box is connected to the internet (via Ethernet or Wi-Fi) to take advantage of these services.
Voice Control
Many newer Genie remotes feature voice command capabilities. This allows you to control your TV using spoken commands:
- Activation: Press and hold the microphone button on your remote.
- Commands: You can say things like "Search for movies starring Tom Hanks," "Change channel to ESPN," "Record 'The Tonight Show'," or "What's the weather?"
- Accuracy: Speak clearly and directly into the remote's microphone for best results.
Voice control significantly speeds up navigation and content discovery.
Interactive Features and Apps
Beyond streaming apps, DIRECTV offers various interactive features:
- DIRECTV Sports App: Get real-time scores, stats, and even watch additional games.
- Weather App: Check local and national weather forecasts.
- Games: Simple games are often available for quick entertainment.
- Interactive Program Guide (IPG): The guide itself is highly interactive, allowing you to set reminders, record shows, and access related content.
DVR Management and Recording Options
The Genie's DVR capabilities are extensive:
- Series Link: Set a "Series Link" to automatically record every new episode of a show. You can choose to record only new episodes or all episodes.
- Advanced Search: Search the guide by title, actor, channel, or time.
- Playlist Management: Organize, delete, and manage your recorded shows.
- Remote Recording: Use the DIRECTV app on your smartphone or tablet to set recordings even when you're away from home.
Parental Controls
You can set up parental controls to restrict access to certain channels or programs based on ratings.
- Setup: Access Parental Controls through the Settings menu.
- Locking: You can lock specific channels, rating levels (e.g., TV-MA, R-rated movies), or even specific shows.
- PIN Protection: A PIN is required to override locks, ensuring children cannot access restricted content.
Exploring these advanced features can transform your DIRECTV experience from simple channel surfing to a fully customized entertainment ecosystem. Take the time to experiment and discover what works best for your household.
Ongoing Maintenance and Updates
To ensure your DIRECTV Genie box continues to perform optimally and provide access to the latest features and security patches, regular maintenance and understanding software updates are crucial. Think of it like maintaining your computer or smartphone; a little attention goes a long way.
Automatic Software Updates
DIRECTV Genie boxes are designed to update their software automatically in the background. This typically happens overnight when the receiver is in standby mode and connected to the internet. These updates are essential for:
- Bug Fixes: Addressing any software glitches or errors that have been identified.
- Performance Enhancements: Improving the speed and responsiveness of the user interface.
- New Features: Rolling out new functionalities and improvements to existing ones.
- Security Patches: Protecting your system from potential vulnerabilities.
It's important *not* to unplug your Genie box during these update windows, as this can interrupt the process and potentially cause software corruption. If you notice unusual behavior after an update, a simple reboot (unplugging power for 30 seconds) often resolves it.
Keeping Your Genie Box Connected
As highlighted in previous sections, an internet connection is vital for automatic software updates, On Demand content, and streaming apps. If your Genie box is not connected to the internet, it will miss out on these critical updates, potentially leading to:
- Missing out on new features and improvements.
- Experiencing bugs that have already been fixed for connected users.
- Limited access to On Demand and app services.
Ensure your Ethernet connection is stable or your Wi-Fi signal is strong where the Genie box is located.
Physical Cleaning and Ventilation
Dust and debris can accumulate around electronic devices, hindering ventilation and potentially causing overheating. Periodically:
- Dust the Exterior: Gently wipe down the exterior of the Genie box with a soft, dry cloth.
- Check Vents: Ensure the ventilation slots on the sides and back of the box are clear of dust and obstructions. You can use a can of compressed air to blow out any trapped dust.
- Avoid Liquids: Never spray cleaning solutions directly onto the device.
Proper ventilation is key to the longevity of any electronic component.
Hard Drive Management (for DVR Models)
If you have a Genie DVR model, managing your recorded content is part of ongoing maintenance.
- Delete Unnecessary Recordings: Regularly review your playlist and delete shows you've watched and no longer need. This frees up space for new recordings and can help maintain system performance.
- Check Available Space: Your Genie box will usually display how much recording space is remaining. If it's getting low, it's time to clear some space.
Rebooting as a Regular Practice
While not strictly "maintenance" in the traditional sense, performing a periodic reboot of your Genie box (unplugging the power for 30 seconds) can be a good preventative measure. It clears the system's temporary memory and can resolve minor performance hiccups before they become noticeable problems. Many users find doing this once a month or so beneficial.
When to Seek Professional Help
Despite best efforts, some issues might require a DIRECTV technician. This includes:
- Persistent signal loss (Error Code 771).
- Hardware malfunctions (e.g., ports not working, unusual noises).
- Problems with Genie Mini clients that cannot be resolved through basic troubleshooting.
- Issues after a power surge or outage.
Regularly checking for updates and performing basic upkeep will ensure your DIRECTV Genie system remains a reliable and enjoyable part of your home entertainment for years to come.
Conclusion: Enjoying Your DIRECTV Experience
You've now navigated the comprehensive journey of setting up your DIRECTV Genie box, from understanding what you need to ensuring ongoing optimal performance. We've covered everything from the initial unboxing and physical connections to the finer points of remote pairing, signal diagnostics, troubleshooting common issues, and leveraging advanced features like whole-home viewing and integrated apps. By following these detailed steps, you've successfully transformed a collection of components into a powerful home entertainment hub. Remember that patience is key, especially during the initial software download and setup phases. Should you encounter any persistent problems, don't hesitate to utilize the troubleshooting tips provided or reach out to DIRECTV's dedicated support channels. With your Genie box properly configured, you're poised to enjoy a world of high-definition channels, on-demand entertainment, and seamless viewing across your home. Embrace the convenience, explore the vast content library, and make the most of your DIRECTV service. Your enhanced viewing experience awaits!