-
Posted on: 07 Jan 2026
-
Unlock the full potential of your satellite TV with a precise guide on how to set up a satellite dish for Galaxy 19. This comprehensive walkthrough ensures optimal signal reception for a seamless viewing experience, covering everything from equipment selection to final alignment.
Understanding Galaxy 19 and Its Significance
Galaxy 19, positioned at 97 degrees West longitude, is a vital satellite in the North American broadcast landscape. For many users, it serves as a primary source for a diverse range of free-to-air (FTA) television channels, including international programming, religious broadcasts, and niche content not readily available through mainstream providers. As of 2025-26, Galaxy 19 continues to be a popular choice for DIY satellite enthusiasts seeking to expand their channel selection without subscription fees. Understanding its orbital position and the type of signals it transmits is the foundational step in successfully setting up your satellite dish for optimal reception.
The satellite carries a multitude of transponders, each broadcasting a specific set of channels. The key to accessing these channels lies in precisely aiming your dish to capture the signals from these transponders. This requires not only the correct equipment but also a methodical approach to installation and alignment. The beauty of Galaxy 19 lies in its accessibility; with the right setup, you can tap into a world of content. This guide will demystify the process, ensuring you can achieve a strong, stable signal.
Essential Equipment Checklist
Before you begin the installation process, it's crucial to have all the necessary equipment ready. Gathering these items beforehand will streamline the setup and minimize frustration. Here’s a comprehensive checklist of what you'll need:
- Satellite Dish: The size of the dish is critical. For Galaxy 19, a dish ranging from 75cm to 1.2 meters is typically recommended, depending on your geographical location and desired signal strength. Larger dishes generally provide better reception, especially in areas with weaker signal footprints. For most of the continental US, a 90cm dish is a good balance between performance and cost.
- LNB (Low-Noise Block downconverter): This component receives the satellite signal and converts it to a frequency that your receiver can process. For Galaxy 19, a universal LNB is usually suitable. Ensure it's designed for Ku-band reception, as Galaxy 19 primarily operates in this band.
- Satellite Receiver (FTA Receiver): This device decodes the satellite signals and displays them on your TV. Ensure the receiver is compatible with the FTA channels broadcast by Galaxy 19. Many modern receivers can scan for and lock onto these signals.
- Coaxial Cable: You'll need high-quality RG-6 coaxial cable to connect the LNB to the satellite receiver. Ensure you have enough cable to reach from the dish location to your receiver, with a little extra for slack.
- F-Connectors: These are used to terminate the coaxial cable ends, allowing for a secure connection to the LNB and receiver.
- Mounting Hardware: This includes a sturdy pole or tripod for mounting the dish, along with brackets, U-bolts, and screws to secure the dish to the mount. The mount must be robust enough to withstand wind and weather.
- Satellite Finder or Signal Meter: This is an invaluable tool for aligning the dish. It provides an audible or visual indication of signal strength, making the alignment process significantly easier.
- Tools: You'll need a wrench set, screwdriver set, pliers, wire strippers, a drill (if mounting to a wall or roof), a level, and a compass.
- Ladder: For safe access to the mounting location.
- Weatherproof Tape: To seal cable connections against moisture.
Having a reliable satellite finder is highly recommended. While some receivers have built-in signal meters, an external device often provides more precise readings, especially during the initial alignment phase. For 2025-26, digital satellite finders are widely available and offer superior accuracy compared to older analog models.
Site Selection and Preparation
Choosing the right location for your satellite dish is paramount to achieving a strong and stable signal. The primary consideration is an unobstructed view of the southern sky, specifically in the direction of Galaxy 19 (97 degrees West longitude). Even minor obstructions, such as tree branches, buildings, or other structures, can significantly degrade or block the signal.
Key considerations for site selection:
- Clear Line of Sight: Use a compass to determine the direction of 97 degrees West. In North America, this generally means facing South, but the exact bearing will vary slightly depending on your latitude and longitude. You can use online tools or satellite tracking apps to find the precise azimuth and elevation angles for your location. Ensure there are no permanent obstructions in this path. Consider seasonal changes; trees that are clear in winter might become dense with leaves in summer.
- Mounting Stability: The dish must be mounted on a stable, secure surface that can support its weight and withstand wind forces. Options include:
- Ground Mount: A pole set in concrete offers the most stability. Ensure the pole is perfectly plumb (vertical) using a level.
- Roof Mount: Requires careful sealing to prevent leaks. Ensure the roof structure is strong enough.
- Wall Mount: A sturdy wall can be a good option, provided the bracket is securely attached to studs or masonry.
- Accessibility: Choose a location that allows for safe installation and future maintenance. Avoid areas that are difficult or dangerous to reach.
- Proximity to Receiver: While not as critical as line of sight, minimizing the length of coaxial cable run can help reduce signal loss.
Preparation steps:
- Clear the Area: Remove any debris, vegetation, or obstacles from the chosen mounting spot.
- Install the Mount: If using a ground mount, dig a hole and set the pole in concrete. Allow the concrete to cure completely before proceeding. For wall or roof mounts, use appropriate hardware and ensure a watertight seal.
- Check for Underground Utilities: If digging, always check for underground utility lines to avoid hazards.
- Orient the Mount: Ensure the mount is as level as possible. This will make the dish alignment process much easier.
As of 2025-26, many satellite installation services offer site surveys to help you identify the optimal location, especially in challenging environments. However, for a DIY setup, a thorough assessment of your surroundings is essential.
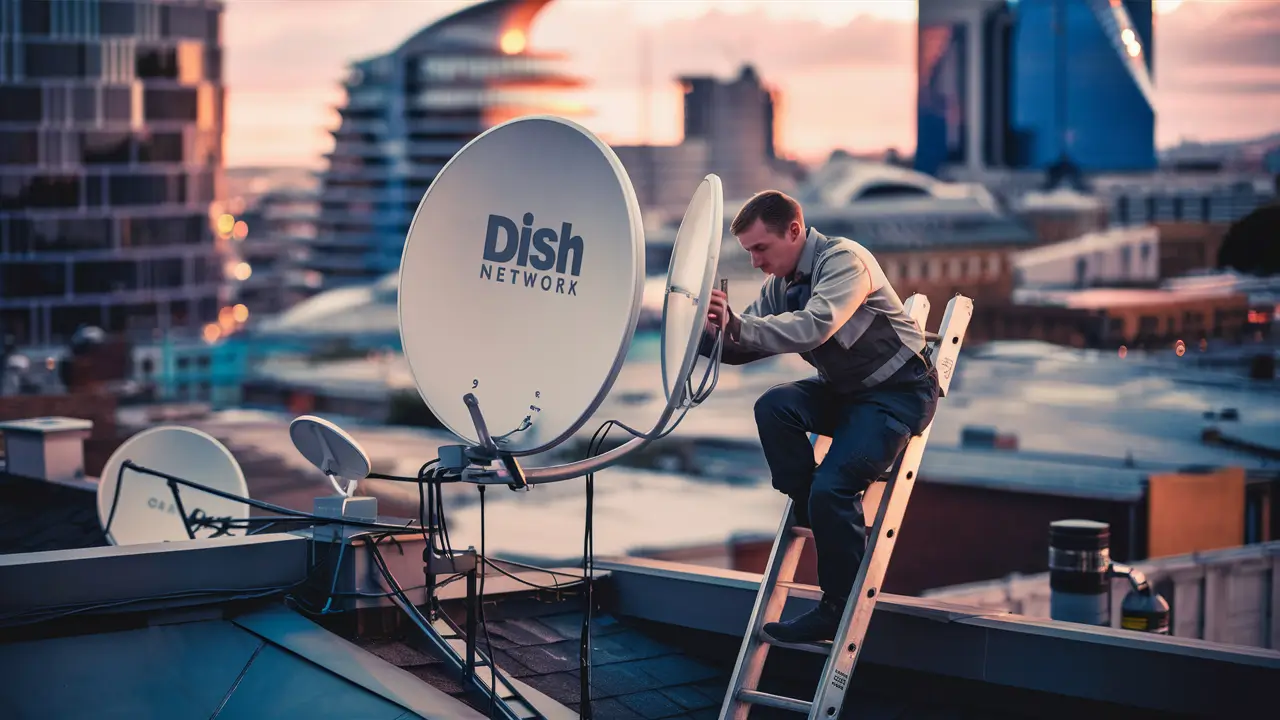
Dish Assembly and Mounting
Once your site is prepared and your equipment is gathered, it's time to assemble and mount the satellite dish. This stage requires precision and care to ensure the dish is securely fastened and oriented correctly.
Dish Assembly:
- Unpack and Identify Parts: Carefully unpack all components of the satellite dish and compare them against the manufacturer's instructions. Lay out all parts and hardware.
- Assemble the Reflector: Most satellite dishes consist of a parabolic reflector (the dish itself) and a support arm. Attach the reflector to the arm according to the manual. Ensure all bolts are tightened securely but avoid over-tightening, which could damage the dish.
- Attach the LNB Bracket: The bracket that holds the LNB is typically attached to the dish's support arm. Make sure it's oriented correctly as per the instructions.
Dish Mounting:
- Secure the Dish to the Mount: Attach the assembled dish to the pole or mounting bracket. Do not fully tighten the bolts yet, as you will need to adjust the dish's elevation and azimuth during the alignment process.
- Initial Orientation: Using your compass, roughly point the dish in the direction of Galaxy 19. For most locations in North America, this will be generally South-Southwest. Consult a satellite alignment tool or app for the precise azimuth (horizontal angle) for your location.
- Set Elevation: Adjust the dish's elevation (vertical angle) to match the required angle for Galaxy 19 at your latitude. The dish mount usually has an elevation scale. Again, consult a satellite alignment tool for the precise elevation.
Important Notes:
- Safety First: If working at heights, use a stable ladder and consider having a spotter. Wear appropriate safety gear.
- Weather Conditions: Avoid installing the dish during high winds, rain, or storms.
- Manufacturer's Instructions: Always refer to the specific assembly and mounting instructions provided by the dish manufacturer. Different models may have unique assembly steps.
The stability of the mount and the secure attachment of the dish are critical. A wobbly dish will make alignment impossible and can lead to signal loss or even damage during adverse weather. For 2025-26, advancements in dish materials have led to lighter yet more durable options, making DIY installation more manageable.
LNB Installation and Connection
The LNB is the crucial component that captures the faint signals from the satellite and converts them into a usable format for your receiver. Proper installation and connection of the LNB are vital for signal integrity.
LNB Installation:
- Attach the LNB to the Bracket: Slide the LNB into its designated holder on the dish's feed arm. The LNB should be positioned so that its "face" (the opening) is pointing directly towards the center of the dish reflector.
- Set LNB Skew (Polarization): Galaxy 19 transmits signals with a specific polarization. The LNB needs to be rotated (skewed) to match this. For Galaxy 19, the skew angle is typically around -10 to -15 degrees (clockwise when looking at the LNB from the front), but it's best to confirm this with a satellite alignment tool or by checking online resources for your specific region. Most LNBs have a scale for adjustment.
- Secure the LNB: Once the skew is set, tighten the LNB clamp to hold it firmly in place.
Connecting the Coaxial Cable:
- Prepare the Cable: Strip the end of the RG-6 coaxial cable according to the F-connector manufacturer's instructions. Ensure the center conductor is exposed and the shielding is intact.
- Attach the F-Connector: Screw the F-connector onto the prepared cable end. Ensure a tight, secure connection.
- Connect to the LNB: Screw the F-connector from the coaxial cable onto the port on the LNB.
- Weatherproof the Connection: Use weatherproof tape or a rubber boot to protect the connection from moisture and corrosion. This is a critical step for long-term reliability.
- Route the Cable: Carefully route the coaxial cable from the dish to your satellite receiver. Avoid sharp bends or kinks, which can degrade the signal. Secure the cable along its path to prevent it from flapping in the wind.
- Connect to Receiver: At the receiver end, attach another F-connector to the cable and connect it to the "LNB In" or "Satellite In" port on your receiver.
The LNB's skew setting is often overlooked but is crucial for optimal signal reception, especially for satellites like Galaxy 19 that carry a variety of channels. Incorrect skew can lead to weak signals or inability to lock onto certain transponders. For 2025-26, the quality of LNBs has improved, offering better noise figures and wider operating temperature ranges.
Receiver Setup and Configuration
With the dish physically installed and connected, the next step is to configure your satellite receiver to recognize and tune into Galaxy 19. This involves navigating the receiver's menu system.
Initial Receiver Setup:
- Connect to TV: Connect your satellite receiver to your television using an HDMI cable or other appropriate video output.
- Power On: Turn on both the TV and the satellite receiver.
- Initial On-Screen Setup: Most receivers will guide you through an initial setup process upon first use. Follow the on-screen prompts. This may include language selection, time zone, and basic TV settings.
Satellite and LNB Configuration:
- Access Satellite Settings: Navigate to the receiver's main menu and find the satellite or installation settings. This section is often labeled "Installation," "Setup," "System," or "Dish Setup."
- Select Satellite: You'll need to add or select Galaxy 19 from the list of available satellites. If it's not pre-programmed, you may need to manually enter its orbital position (97 degrees West).
- Configure LNB Settings: This is a critical step. You will need to specify the following for Galaxy 19:
- LNB Type: Select "Universal" if you are using a universal LNB.
- LNB Frequency (LOF): For a universal LNB, this is typically 9750 MHz (Low) and 10600 MHz (High). Some receivers allow you to set a single LOF if it's a dual-output LNB, but for Galaxy 19, it's often set to auto or a specific universal setting.
- DiSEqC: If you have multiple LNBs or a DiSEqC switch, you'll need to configure this. For a single dish setup pointing to Galaxy 19, DiSEqC is usually set to "None" or "22kHz Tone Off."
- Power: Ensure LNB power is set to "On."
- Transponder Settings: Most FTA receivers will automatically scan for transponders associated with the selected satellite. If not, you may need to manually input common transponder frequencies for Galaxy 19.
Channel Scan:
- Initiate Scan: Once the satellite and LNB settings are configured, initiate a channel scan. The receiver will search for all available channels on the selected satellite. This process can take several minutes.
- Save Channels: After the scan is complete, save the found channels.
Using the Receiver's Signal Meter:
Most receivers have a built-in signal meter that can be accessed during the alignment process. This meter displays signal strength and quality. You'll use this in conjunction with the satellite finder to fine-tune the dish's position. As of 2025-26, many FTA receivers feature improved signal meters with clearer graphical displays and faster refresh rates.
Dish Alignment Techniques
This is the most critical and often the most challenging part of the installation. Precise alignment is key to receiving a strong signal from Galaxy 19. You will use a combination of your satellite finder and the receiver's signal meter.
Using a Satellite Finder (Recommended):
- Connect the Finder: Connect the satellite finder between the LNB and the coaxial cable leading to the receiver. Ensure the receiver is powered on, as it provides power to the LNB and the finder.
- Initial Rough Alignment: With the dish loosely mounted, point it generally towards Galaxy 19 (South-Southwest for most of North America).
- Adjust Elevation: Slowly adjust the dish's vertical angle (elevation) up and down while listening to the satellite finder's tone. The tone will change in pitch as it detects signals. Find the position where the tone is highest or most consistent.
- Adjust Azimuth: Once you have the best elevation, slowly sweep the dish horizontally (azimuth) left and right. Listen for the strongest, most consistent tone from the satellite finder.
- Fine-Tuning: Make very small, incremental adjustments to both elevation and azimuth. Tighten the mounting bolts slightly as you find a strong signal.
- LNB Skew Adjustment: Once you have a good signal lock, you may need to fine-tune the LNB skew. Rotate the LNB slightly clockwise or counter-clockwise to find the position that gives you the highest signal quality reading.
Using the Receiver's Signal Meter:
- Access the Signal Meter: Navigate to your receiver's signal meter screen.
- Observe Strength and Quality: The meter will display two key metrics: Signal Strength (how much signal is being received) and Signal Quality (how clear the signal is). You want to maximize both, but Signal Quality is more important for a stable picture.
- Follow Similar Adjustment Steps: Use the receiver's signal meter to guide your adjustments, making small movements and observing the readings.
Tips for Successful Alignment:
- Patience is Key: This process can be time-consuming. Don't rush.
- Small Adjustments: Make tiny movements of the dish. A millimeter can make a difference.
- Lock Bolts Gradually: As you find a strong signal, tighten the bolts a little at a time, re-checking the signal after each tightening.
- Check Multiple Transponders: Once you lock onto one transponder, try scanning for channels or checking the signal on other known transponders for Galaxy 19 to ensure you have a robust lock.
- Use Online Tools: Websites like DishPointer.com can provide precise azimuth, elevation, and skew angles for your specific location.
For 2025-26, advanced satellite alignment apps for smartphones are available, often integrating with Bluetooth-enabled satellite finders for real-time feedback and visual guidance.
Troubleshooting Common Issues
Even with careful installation, you might encounter issues. Here are some common problems and their solutions:
No Signal or Weak Signal:
- Check Line of Sight: The most common cause is an obstruction. Re-check for trees, buildings, or other objects blocking the path.
- Verify Dish Alignment: The dish might be slightly misaligned. Re-align it carefully, focusing on maximizing signal quality.
- Check Cable Connections: Ensure all F-connectors are securely attached and weatherproofed. Loose or corroded connections can cause signal loss.
- Inspect Coaxial Cable: Look for damage, kinks, or cuts in the cable.
- Test the LNB: A faulty LNB can cause no signal. If possible, test with a known good LNB.
- Receiver Settings: Double-check that the correct satellite and LNB settings are entered into your receiver.
Pixelation or Freezing Picture:
- Signal Quality Issue: This usually indicates that the signal strength is sufficient, but the signal quality is poor. This often points to a slight misalignment, a faulty LNB, or an issue with the coaxial cable.
- Weather Interference: Heavy rain or snow can temporarily affect satellite signals, especially on lower-quality setups.
- Dish Wobbling: Ensure the dish is securely mounted and not moving in the wind.
Receiver Not Finding Channels:
- Incorrect Satellite/Transponder Data: Verify that Galaxy 19 is correctly selected and that the transponder list is up-to-date.
- Receiver Malfunction: Try resetting the receiver to factory defaults (backing up settings if possible) or test with a different receiver.
Intermittent Signal Loss:
- Loose Connections: Vibrations can loosen connections over time.
- Environmental Factors: Wind can cause the dish to move slightly. Ensure all bolts are tight.
- Cable Degradation: Older or damaged coaxial cables can be susceptible to interference.
For 2025-26, many advanced FTA receivers offer diagnostic tools that can help pinpoint specific issues, such as identifying which transponder is causing problems.
Advanced Tips for Optimal Reception
Once you have a working setup, you might want to optimize it further for the best possible signal reception. These advanced tips can make a difference, especially in areas with weaker signal footprints.
- Use a High-Quality LNB: Invest in a low-noise LNB with a good noise figure (e.g., 0.1 dB or lower). While slightly more expensive, it can significantly improve signal quality.
- Larger Dish Size: If you consistently struggle with weak signals, consider upgrading to a larger diameter dish. A 1.2-meter dish will offer considerably more gain than a 75cm dish.
- Proper Cable Management: Use high-quality RG-6 or even RG-11 coaxial cable for longer runs to minimize signal loss. Ensure all connections are perfectly made and weatherproofed.
- Grounding and Surge Protection: For safety and to protect your equipment from lightning strikes, ensure your satellite dish and mount are properly grounded. Consider using coaxial surge protectors.
- Minimize Cable Bends: Avoid tight bends in your coaxial cable, as these can reflect signals and degrade performance.
- Advanced LNB Skew Tuning: While initial skew is important, fine-tuning it with a signal meter can sometimes yield marginal improvements in signal quality.
- Check Satellite Footprint Maps: Understand the signal strength (often measured in dBW) across your region for Galaxy 19. This can help you anticipate potential challenges and determine if your equipment is adequately sized.
- Regular Maintenance: Periodically check your dish for any signs of damage, rust, or loose fittings. Clean the LNB face if it becomes dirty.
By implementing these advanced techniques, you can ensure your satellite dish setup for Galaxy 19 is as robust and reliable as possible. As of 2025-26, the availability of higher-gain LNBs and more precise alignment tools continues to push the boundaries of what's achievable in DIY satellite installations.
Galaxy 19 vs. Other Satellite Options
Galaxy 19 is a popular choice for FTA enthusiasts, but it's not the only satellite available. Understanding its position relative to other satellites can help you make informed decisions about your setup, especially if you're considering a multi-satellite installation.
Galaxy 19 (97°W):
- Pros: Excellent source of diverse FTA channels, including international programming, religious content, and niche channels. Widely accessible across North America.
- Cons: Primarily Ku-band, which can be more susceptible to heavy rain fade than C-band.
Other Notable Satellites for FTA in North America:
1. AMC-1 (103°W) & AMC-3 (87°W): These satellites offer a mix of FTA and some encrypted channels. They are often scanned alongside Galaxy 19 for additional content.
2. SES-2 (87°W) & SES-3 (103°W): These satellites have replaced some older AMC satellites and also carry a variety of programming, some of which is FTA.
3. DirecTV Satellites (e.g., 101°W, 110°W, 119°W): While primarily for DirecTV subscribers, these satellites can sometimes carry FTA channels, though they are often encrypted and require specific receivers.
4. Satellites for C-Band: For those seeking even more robust signals less affected by rain, C-band satellites (e.g., Telstar 18, Galaxy 16) can be an option. However, C-band requires a much larger dish (typically 6-10 feet) and a different type of LNB (C-band LNB).
Comparison Table (Simplified for FTA Focus):
Satellite Orbital Position Primary Band Typical FTA Content Dish Size (Typical) Galaxy 19 97°W Ku International, Religious, Niche 75cm - 1.2m AMC-1/SES-3 103°W Ku Mixed (some FTA) 75cm - 1.2m AMC-3/SES-2 87°W Ku Mixed (some FTA) 75cm - 1.2m Galaxy 16 99°W C/Ku Mixed (some FTA) C-Band: 6-10ft, Ku-Band: 75cm - 1.2m For users primarily interested in a wide variety of free international and niche channels, Galaxy 19 remains a top-tier choice. However, for those seeking redundancy or a broader channel selection, exploring adjacent satellites with a multi-satellite dish setup (requiring a motorized dish or multiple fixed dishes with a DiSEqC switch) can be a worthwhile endeavor. As of 2025-26, the landscape of FTA broadcasting is dynamic, with channel lineups on all satellites subject to change.
Conclusion
Successfully setting up a satellite dish for Galaxy 19 is an achievable goal with the right knowledge and approach. By meticulously following the steps outlined – from understanding the satellite's significance and gathering the essential equipment, to carefully selecting your site, assembling and mounting the dish, and precisely aligning it – you can unlock a world of diverse free-to-air content. Remember that patience and attention to detail, particularly during the alignment phase, are your greatest allies. Troubleshooting common issues and implementing advanced tips will further enhance your reception quality and ensure a stable viewing experience. Galaxy 19 continues to be a valuable resource for a wide array of programming, and with this guide, you are well-equipped to harness its full potential for your entertainment needs.


