-
Posted on: 07 Jan 2026
-
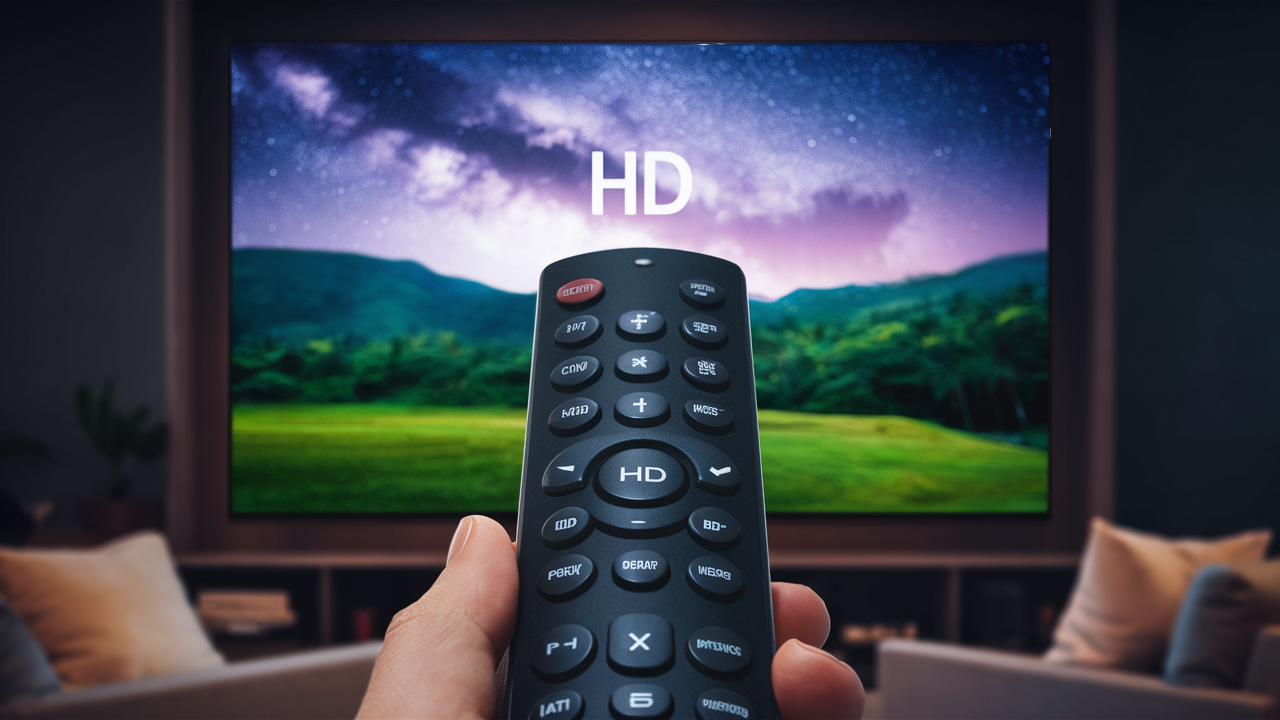
Struggling with a blurry picture on DIRECTV? This guide provides a clear, step-by-step solution to help you switch back to HD on DIRECTV effortlessly. We'll cover common issues and ensure you're enjoying crystal-clear visuals again in no time.
Understanding HD on DIRECTV
High Definition (HD) television offers a significantly sharper and more vibrant viewing experience compared to Standard Definition (SD). For DIRECTV subscribers, this means enjoying content with greater detail, richer colors, and a wider aspect ratio that fills your modern television screen. In 2025-26, HD is the standard for most broadcast content, and understanding how to access it is crucial for maximizing your entertainment. DIRECTV has been a pioneer in delivering HD programming, and their service is designed to provide seamless access. However, various factors can sometimes lead to a fallback to SD, prompting users to ask, "How do I switch back to HD on DIRECTV?" This section will lay the groundwork for understanding what HD means in the context of your DIRECTV service.
HD resolutions typically come in two main formats: 720p and 1080i. While 1080p (progressive scan) is the pinnacle of HD for many modern displays, DIRECTV primarily broadcasts in 1080i and 720p. The "p" in 1080p stands for progressive scan, meaning each frame is drawn line by line, resulting in smoother motion, especially during fast-paced action. The "i" in 1080i stands for interlaced, where each frame is drawn in two passes, one for odd lines and one for even lines. For most viewers, the difference between 1080i and 1080p might be subtle, but both are vastly superior to SD. Standard Definition, on the other hand, typically offers resolutions like 480i or 480p, which are noticeably less detailed and can appear pixelated or soft on larger HD screens.
DIRECTV's transition to HD has been comprehensive. By 2025-26, the vast majority of channels available on the DIRECTV platform are offered in HD. This includes popular networks like ESPN, HBO, CNN, Fox News, and countless others. The service also offers dedicated HD channels for many premium movie networks and sports packages. The key to enjoying this superior quality lies in ensuring your equipment, settings, and the specific channel you are watching are all configured for HD delivery. Understanding your DIRECTV receiver's capabilities and how it interacts with your television is the first step in troubleshooting any issues that might cause a display to revert to SD.
Common Reasons for SD Display
Several factors can cause your DIRECTV service to display in Standard Definition (SD) instead of High Definition (HD), even if you have an HD-capable television and subscription. Identifying the root cause is the first step in resolving the issue and returning to the crisp visuals of HD. These reasons can range from simple equipment configurations to external signal interference.
1. Incorrect Receiver Settings
Perhaps the most common culprit is a misconfiguration within the DIRECTV receiver's settings. The receiver acts as the bridge between the DIRECTV satellite signal and your television. If its video output settings are not optimized for HD, it will default to sending an SD signal. This can happen after a power outage, a receiver update, or if settings were inadvertently changed. Ensuring the receiver is set to output the highest possible resolution (typically 1080i or 720p) is paramount.
2. Channel Broadcast Format
While most channels are now broadcast in HD, there are still a few exceptions. Some niche channels, local affiliates in certain markets, or specific programming blocks might still be in SD. Additionally, during live events or breaking news, a broadcaster might temporarily switch to an SD feed if their HD equipment experiences issues or if they are prioritizing getting the content out quickly. It's also possible that you are inadvertently tuned to the SD version of a channel if both HD and SD feeds are available. For example, some channels have both a "channel number" and a "channel number HD" designation.
3. Equipment Limitations or Malfunctions
Your DIRECTV receiver and your television must both be HD-capable. Older receivers or televisions might not support HD resolutions. If you have an older model DIRECTV receiver, it might not be able to process or output HD signals. Similarly, if your television, while being an HD model, has a faulty HDMI port or internal component, it might struggle to receive and display an HD signal correctly. The cables connecting your receiver to your TV also play a role; damaged or low-quality HDMI cables can sometimes degrade the signal, leading to a fallback to SD or a distorted picture.
4. Signal Strength and Interference
While less common for causing a switch *from* HD *to* SD (more often it causes pixelation or freezing), severe signal degradation can sometimes force a receiver to downscale the resolution to maintain a stable picture. This could be due to weather conditions affecting the satellite dish, a misaligned dish, or obstructions. However, for a consistent SD display when HD should be present, this is usually not the primary cause unless it's a persistent, severe issue.
5. Subscription Package Issues
In rare cases, your subscription package might not include access to certain HD channels. While DIRECTV has made HD widely available across most packages, it's worth verifying that your current programming tier includes the HD versions of the channels you wish to watch. This is particularly relevant for premium channels or specialized sports packages.
6. Software Glitches or Updates
Like any electronic device, DIRECTV receivers can sometimes encounter temporary software glitches. These can occur after a software update or simply due to the complex nature of the system. A simple receiver reset can often resolve these transient issues.
Understanding these common reasons provides a solid foundation for troubleshooting. The next sections will delve into specific steps to address each of these potential problems, guiding you on how to actively switch back to HD.
Troubleshooting HD Settings
The most direct way to address your question, "How do I switch back to HD on DIRECTV?", often lies within the receiver's video output settings. Incorrectly configured settings are a frequent cause of SD display. This section will guide you through the process of checking and adjusting these critical settings on your DIRECTV receiver. The exact menu names and options might vary slightly depending on your specific DIRECTV receiver model (e.g., Genie, HR series), but the general navigation remains consistent.
Checking and Adjusting Video Output Resolution
The goal here is to ensure your receiver is set to output the highest resolution your television can support, which is typically 1080i or 720p.
- Access the Settings Menu: Press the MENU button on your DIRECTV remote.
- Navigate to Settings: Use the arrow keys to highlight Settings and press SELECT.
- Select Display: Within the Settings menu, look for an option like Display, Video, or Picture. Select it.
- Find Resolution Settings: You should see options related to video resolution or aspect ratio. Look for settings like "Video Resolution," "Picture Format," or "Output Resolution."
- Set to HD:
- If you see an option for "Auto," try selecting it first. The receiver should automatically detect your TV's capabilities and select the best HD format.
- If "Auto" doesn't work or you want to manually set it, choose 1080i or 720p. Most modern TVs handle 1080i well. If you experience issues with 1080i (e.g., black bars, distorted image), try 720p.
- Avoid selecting 480i or 480p unless your TV is not HD-capable or you are experiencing persistent problems with HD that cannot be resolved otherwise.
- Save Changes: After selecting your desired resolution, you will likely be prompted to Save or Confirm your changes. Press SELECT to confirm.
- Test the Settings: Your receiver may briefly display a test pattern or ask you to confirm if the picture is correct. Follow the on-screen prompts. If the picture is distorted or black, you may need to press BACK or CANCEL to revert to the previous settings and try a different resolution.
Aspect Ratio Settings
While resolution is key, the aspect ratio also impacts how HD content is displayed. Most HD content is in a 16:9 widescreen format.
- Look for an "Aspect Ratio" setting within the Display or Video menu.
- Ensure it is set to 16:9 (Widescreen) for optimal viewing of HD channels.
- Options like "Normal," "Zoom," or "Stretch" can sometimes crop or distort the image, even if the signal is in HD.
HDMI Connection Check
The HDMI cable is the standard for transmitting HD signals. Ensure it's securely plugged into both your receiver and your TV.
- Unplug and Replug: Turn off both your TV and receiver. Unplug the HDMI cable from both ends and then firmly plug it back in.
- Try a Different HDMI Port: Your TV might have multiple HDMI ports. Try connecting the cable to a different port on your television. Label your ports so you know which is which.
- Use a Certified HDMI Cable: For the best performance, especially for higher resolutions like 1080i, use a certified High-Speed HDMI cable. Older or damaged cables can cause signal issues. If you suspect your cable is faulty, try replacing it with a new, certified one.
Receiver Reset
Sometimes, a simple restart can clear temporary glitches that might be forcing an SD display.
- Power Cycle: Unplug the power cord from the back of your DIRECTV receiver.
- Wait: Wait for at least 30 seconds.
- Plug Back In: Plug the power cord back into the receiver.
- Allow Reboot: The receiver will take a few minutes to restart and re-establish its connection. Once it's fully booted up, check if the picture is now in HD.
By systematically checking and adjusting these settings, you can often resolve the issue of your DIRECTV service defaulting to SD and successfully switch back to HD.
Manual Switching to HD Channels
Even with your receiver settings correctly configured for HD output, you might sometimes find yourself on an SD channel feed. This can happen if a channel offers both an HD and an SD version, or if a temporary SD feed is being used. Knowing how to manually select the HD version of a channel is a key skill for any DIRECTV subscriber wanting the best picture quality. This process is straightforward and involves understanding DIRECTV's channel numbering system.
Understanding DIRECTV Channel Numbering for HD
DIRECTV typically assigns specific channel numbers for their HD broadcasts. While this has become more standardized over the years, there are a few common conventions:
- Adding "HD" to the Channel Name: Many channels will simply have their name followed by "HD" on the electronic program guide (EPG). For example, you might see "ESPN" and "ESPN HD."
- Dedicated HD Channel Numbers: Some channels have entirely separate numbers for their HD feeds. For instance, if the SD version is on channel 206, the HD version might be on channel 1206 or a similar higher number.
- Automatic Switching: In most cases, if your receiver is set to output HD and you tune to the primary channel number, the receiver is intelligent enough to automatically select the HD feed if available. However, this isn't always foolproof.
How to Find and Tune to HD Channels
- Use the DIRECTV Program Guide: Press the MENU button on your remote and select Guide.
- Look for HD Indicators: As you scroll through the guide, pay attention to the channel names. Look for any indication that a channel is available in HD. This is often displayed next to the channel name or within the program information.
- Check Channel Numbers:
- If you are currently watching a channel in SD and suspect an HD version exists, try tuning to a higher channel number in the same genre or network family. For example, if you're on CNN (SD), try tuning to 104 (CNN HD).
- For sports, if you're watching a game on a standard channel, check if there's a "channel HD" equivalent. For instance, if ESPN is on channel 206, ESPN2 HD might be on channel 1206.
- Accessing Channel Information: When you highlight a program in the guide, press the INFO button on your remote. This will bring up detailed information about the program, including the channel it's airing on and often whether it's in HD.
- Direct Tuning: If you know the specific HD channel number for a network (e.g., 101 for DIRECTV HD channels, 104 for CNN HD, 140 for HBO HD, 150 for Showtime HD, 160 for Cinemax HD, 180 for Starz HD, 200 for ESPN HD, 209 for Fox Sports 1 HD, 215 for NFL Network HD, 219 for NBA TV HD, 220 for MLB Network HD), you can simply enter that number directly using the number pad on your remote.
Example Scenario: Switching to an HD Sports Channel
Let's say you're trying to watch a football game, and the channel you're on looks fuzzy.
- You press MENU and select Guide.
- You browse the sports section and see "ESPN" listed on channel 206. You tune to it, but the picture is still not as sharp as you'd expect.
- You press INFO and see that channel 206 is indeed broadcasting in SD.
- You then look for "ESPN HD" in the guide, which might be listed on channel 1206.
- You tune to channel 1206, and the picture is now crisp and clear, indicating you are watching the HD feed.
Verifying HD Broadcasts
DIRECTV makes it easy to identify HD channels. On the on-screen guide, HD channels are typically marked with an "HD" icon. Furthermore, when you tune to an HD channel, your DIRECTV receiver will often display a brief notification on screen indicating that you are watching an HD broadcast. This confirmation is reassuring and helps you understand that your efforts to switch to HD have been successful.
By actively seeking out and tuning to the designated HD channels, you can ensure that you are always receiving the highest quality picture available from DIRECTV.
Optimizing Your Equipment for HD
Beyond receiver settings and channel selection, ensuring your entire home entertainment setup is optimized for High Definition (HD) is crucial for consistently enjoying the best possible picture quality on DIRECTV. This involves checking your television, your cables, and even your internet connection if you use any streaming features. In 2025-26, with HD being the standard, outdated equipment can be a significant bottleneck.
Television Settings
Your television itself plays a vital role in displaying HD content. While DIRECTV sends the HD signal, your TV interprets and renders it.
- Picture Mode: Most modern TVs have various picture modes (e.g., Cinema, Standard, Vivid, Game). For accurate HD viewing, modes like "Cinema," "Movie," or "Standard" are often recommended as they tend to provide more natural colors and sharpness without excessive processing that can introduce artifacts. "Vivid" modes can sometimes over-saturate colors, making the picture look unnatural.
- Sharpness Control: While it might be tempting to crank up the sharpness to make everything look "crisper," excessive sharpness can introduce artificial halos around objects and make the image appear harsh. Start with the sharpness setting at its default or a moderate level (often around 50 out of 100) and adjust slightly if needed.
- Aspect Ratio on TV: Ensure your TV's aspect ratio is set to 16:9 (Widescreen). If it's set to "Full," "Zoom," or "Wide," it might be stretching or cropping the 16:9 HD signal, leading to a distorted image. Some TVs have an "Original," "Just Scan," or "Screen Fit" option which is ideal for displaying content without overscan.
- Motion Smoothing (e.g., TruMotion, MotionFlow): These features aim to reduce motion blur by interpolating frames. While they can make fast action look smoother, they can also introduce an unnatural "soap opera effect" (SOE) and sometimes create artifacts. Experiment with these settings; many videophiles prefer to turn them off or set them to a very low level for a more cinematic look.
HDMI Cables and Connections
As mentioned previously, the HDMI cable is the backbone of your HD connection.
- Cable Quality: For 1080i and 720p signals, a standard High-Speed HDMI cable is usually sufficient. However, if you have a 4K TV and are using DIRECTV's 4K capabilities (though this guide focuses on HD), you would need an Ultra High-Speed HDMI cable. For HD, ensure your cable is not damaged, kinked, or frayed.
- Secure Connections: Always ensure the HDMI cable is firmly seated in the ports on both the DIRECTV receiver and your TV. Loose connections can cause intermittent signal loss, flickering, or a fallback to SD.
- Testing Cables: If you suspect a cable issue, the simplest solution is to swap it with a known-good HDMI cable. This is a low-cost troubleshooting step that can often resolve picture problems.
DIRECTV Receiver Model
The model of your DIRECTV receiver can impact its HD capabilities. Newer models like the Genie (HR44, HR54, HS17) are designed to handle HD and even 4K signals seamlessly. Older models might have limitations.
- Check Your Model: You can usually find your receiver model number on a sticker on the back or bottom of the unit.
- Receiver Age: If your receiver is more than 5-7 years old, it might be nearing the end of its optimal performance lifecycle for HD. DIRECTV often offers upgrade incentives. You can check your eligibility for an upgrade by contacting DIRECTV customer service or by visiting their website.
- Receiver Software: Ensure your receiver's software is up-to-date. DIRECTV receivers automatically download and install software updates. You can manually check for updates by going to MENU > Settings & Help > Settings > System > Software Update.
Internet Connection (for Streaming and On-Demand)
If you use DIRECTV's On Demand service or stream content through apps on your receiver or TV, a stable and reasonably fast internet connection is necessary for HD streaming.
- Speed Requirements: For HD streaming, DIRECTV generally recommends a minimum internet speed of 5 Mbps. For smoother playback and higher quality, 10-25 Mbps or more is ideal.
- Check Your Speed: You can test your internet speed using online speed test tools (e.g., Speedtest.net).
- Router Placement and Wi-Fi: If you're using Wi-Fi, ensure your router is placed centrally and has a clear line of sight to your receiver or streaming device. Consider using a wired Ethernet connection for the most stable HD streaming experience.
By ensuring all components of your setup – from the receiver to the TV and the connections between them – are optimized, you create the best possible environment for receiving and displaying DIRECTV's HD signals.
Advanced HD Troubleshooting
If you've gone through the basic troubleshooting steps for settings, channel selection, and equipment optimization, and you're still facing issues with your DIRECTV service displaying in Standard Definition (SD) instead of High Definition (HD), it's time to delve into some more advanced troubleshooting techniques. These steps address less common but still possible causes for persistent SD display.
Receiver Diagnostics
DIRECTV receivers have built-in diagnostic tools that can help identify hardware or signal issues.
- Access Diagnostics: The exact method can vary by receiver model, but generally, you can access diagnostics by pressing a sequence of buttons on the remote. For many Genie models, you can try pressing INFO, MENU, INFO, MENU. Another common method is to press MENU, then navigate to Settings & Help, then Settings, then System, and look for a Diagnostics or System Test option.
- Run Signal Test: Within the diagnostics menu, look for a "Signal Strength" or "Satellite Signal Test." This will check the quality of the signal coming from the satellite dish to your receiver.
- Interpret Results: The test will typically show signal strength and quality for each satellite transponder. For HD channels, you generally want to see signal strength in the 70s or 80s and signal quality in the high 80s or 90s. If these numbers are consistently low, especially for transponders that carry HD channels, it indicates a problem with your dish alignment, LNB, or cabling.
- Run Video Test: Some diagnostics menus may also include a video test to check the receiver's video output capabilities.
Checking for Satellites and Transponders
DIRECTV uses multiple satellites and numerous transponders (frequencies) to broadcast channels. HD channels are often broadcast on specific transponders. If a particular transponder is experiencing issues, it could affect a group of HD channels.
- Consult Online Resources: Websites like LyngSat or SatelliteReview often list DIRECTV's satellite orbital positions and the channels broadcast on each transponder. This can help you identify if the HD channels you're trying to watch are on transponders that are showing low signal quality in your diagnostics.
- Understand Satellite Alignment: DIRECTV uses satellites in the 101°, 103°, 110°, 119°, and 99° orbital slots (depending on your location and service). The alignment of your dish is critical for receiving signals from all these satellites.
Interference Issues
While less common for causing a consistent SD display, severe interference can sometimes degrade signal quality enough to force a fallback.
- Physical Obstructions: Ensure there are no new obstructions (trees growing, new buildings, etc.) between your satellite dish and the sky.
- Environmental Factors: Extremely heavy rain or snow can temporarily impact satellite signals, but this usually resolves itself once the weather clears.
- Radio Frequency (RF) Interference: In rare cases, strong RF interference from nearby equipment (e.g., certain types of wireless transmitters, poorly shielded electronics) could theoretically affect satellite reception, though this is highly unlikely to be the sole cause of an SD display.
Receiver Firmware/Software Issues
While receiver updates are usually beneficial, a corrupted update or a persistent bug in the firmware can sometimes cause unexpected behavior, including issues with HD output.
- Manual Software Update: As mentioned before, you can try manually initiating a software update via the receiver's menu.
- Receiver Reset (Full): In some cases, a more thorough reset might be necessary. This often involves unplugging the receiver, removing the access card (if applicable and accessible), waiting, and then plugging it back in. Consult your receiver's manual or DIRECTV support for the specific procedure for your model.
Testing with Different Receivers or TVs
If possible, testing your setup with different equipment can help isolate the problem.
- Swap Receivers: If you have another DIRECTV receiver (perhaps an older one you're not using), try connecting it to your TV and see if you can get an HD signal. This helps determine if the issue lies with your primary receiver.
- Test TV with Another Source: Connect a different HD source (like a Blu-ray player or gaming console) to your TV using the same HDMI cable and port. If those sources display in HD correctly, it points away from the TV and the cable, and more towards the DIRECTV receiver or signal.
Advanced troubleshooting requires a systematic approach and sometimes a bit of technical understanding. If these steps don't resolve your HD display issues, it's likely time to involve DIRECTV's professional support.
DIRECTV HD Channel Lineup
One of the primary benefits of DIRECTV service is its extensive High Definition (HD) channel lineup. As of 2025-26, the vast majority of popular networks and premium channels are available in HD, offering subscribers a superior viewing experience. Understanding which channels are available in HD and their corresponding channel numbers is essential for ensuring you're always tuned into the best possible picture quality. DIRECTV has made a significant investment in HD broadcasting, and their lineup reflects this commitment.
Key HD Channel Categories and Examples
DIRECTV offers HD versions of channels across all major categories, including news, sports, entertainment, movies, and local channels.
News Channels in HD
Stay informed with crystal-clear news broadcasts.
- CNN HD: Channel 104
- Fox News Channel HD: Channel 105
- MSNBC HD: Channel 107
- CNBC HD: Channel 108
- Bloomberg Television HD: Channel 114
- HLN HD: Channel 204
Sports Channels in HD
Experience the thrill of live sports in stunning HD.
- ESPN HD: Channel 206
- ESPN2 HD: Channel 209
- NFL Network HD: Channel 215
- NBA TV HD: Channel 219
- MLB Network HD: Channel 219
- NHL Network HD: Channel 219
- Fox Sports 1 (FS1) HD: Channel 219
- Fox Sports 2 (FS2) HD: Channel 219
- Golf Channel HD: Channel 219
- Outdoor Channel HD: Channel 606
- Sportsman Channel HD: Channel 605
- Big Ten Network HD: Channel 610
- SEC Network HD: Channel 611
- ACC Network HD: Channel 612
- Longhorn Network HD: Channel 677
Entertainment and Lifestyle Channels in HD
Enjoy your favorite shows, movies, and documentaries in high definition.
- USA Network HD: Channel 242
- Syfy HD: Channel 241
- TBS HD: Channel 247
- TNT HD: Channel 245
- Discovery Channel HD: Channel 278
- National Geographic HD: Channel 276
- History Channel HD: Channel 269
- HGTV HD: Channel 229
- Food Network HD: Channel 231
- Travel Channel HD: Channel 232
- AMC HD: Channel 254
- FX HD: Channel 257
- Comedy Central HD: Channel 249
- Bravo HD: Channel 237
- E! Entertainment HD: Channel 236
- MTV HD: Channel 331
- VH1 HD: Channel 335
Movie Channels in HD
Immerse yourself in cinematic experiences with these premium HD movie channels.
- HBO HD: Channel 501
- HBO 2 HD: Channel 502
- HBO Signature HD: Channel 503
- HBO Family HD: Channel 504
- HBO Comedy HD: Channel 505
- HBO West HD: Channel 506
- Cinemax HD: Channel 515
- Showtime HD: Channel 545
- The Movie Channel HD: Channel 549
- Starz HD: Channel 525
- Starz Cinema HD: Channel 527
- Starz Kids & Family HD: Channel 529
- Flix HD: Channel 519
- Encore HD: Channel 535
Local Channels in HD
Access local news, weather, and programming in HD.
The availability of local channels in HD depends on your specific geographic location and DIRECTV's ability to secure HD feeds from local affiliates. Generally, major network affiliates (ABC, CBS, NBC, FOX) are available in HD in most markets. You can check the specific channel numbers for your area by entering your zip code on the DIRECTV channel lineup page.
How to Verify HD Availability
- Electronic Program Guide (EPG): The most reliable way to check if a channel is available in HD is to use your DIRECTV receiver's program guide. HD channels are typically marked with an "HD" icon next to their name.
- DIRECTV Website: Visit the official DIRECTV website and use their channel lookup tool. You can enter your zip code to see a personalized channel lineup, including HD availability.
- On-Screen Notifications: When you tune to an HD channel, your receiver will often display a brief notification confirming that you are watching in HD.
By familiarizing yourself with this HD channel lineup and using the tools provided by DIRECTV, you can ensure you're always selecting the highest quality broadcast available, making your viewing experience as immersive and enjoyable as possible.
When to Contact DIRECTV Support
While this guide provides extensive troubleshooting steps to help you answer "How do I switch back to HD on DIRECTV?", there are times when the issue is beyond the scope of self-help. Recognizing when to escalate the problem to DIRECTV's professional support team is crucial for a timely resolution. If you've exhausted all the troubleshooting steps outlined above and are still experiencing persistent SD display or other picture quality issues, it's time to reach out.
Persistent Issues After Troubleshooting
If you have meticulously followed all the previous sections – checked receiver settings, confirmed channel numbers, optimized equipment, and even run diagnostics – and the problem remains, it suggests a more complex underlying issue. This could include:
- Receiver Malfunction: The receiver itself might have a hardware defect that prevents it from outputting HD signals correctly.
- Signal Problem Beyond Your Control: There might be an issue with the satellite signal infrastructure in your area, or a problem with the specific transponder carrying the HD channels you're trying to watch that DIRECTV needs to address.
- Account or Subscription Issues: Although less common for SD display, there could be an error on your account that limits HD access, especially for premium channels.
Signs You Should Contact Support Immediately
Certain symptoms warrant immediate contact with DIRECTV support:
- No Picture or Sound: If you have lost picture and sound entirely on all channels, this indicates a more significant system failure.
- Error Codes: If your receiver displays specific error codes (e.g., 771, 775, 920), these codes often point to signal or equipment issues that require professional diagnosis. You can usually find information about specific error codes on the DIRECTV website or by asking a support representative.
- Repeated Receiver Resets Required: If your receiver frequently freezes, becomes unresponsive, or requires constant rebooting, it might be failing.
- Inability to Access HD Channels at All: If you cannot get any channel to display in HD, even after verifying settings and channel numbers, there might be a systemic problem.
How to Prepare for Your Support Call
To make your call to DIRECTV support as efficient as possible, have the following information ready:
- Your Account Number: This helps the representative quickly access your service details.
- Receiver Model Number: As mentioned, this is usually found on a sticker on the back or bottom of your receiver.
- List of Troubleshooting Steps Performed: Briefly explain what you have already tried (e.g., "I've checked the video output settings, ensured I'm on HD channels like 104 for CNN HD, and confirmed my HDMI cable is secure"). This saves time and prevents the representative from asking you to repeat steps you've already completed.
- Specific Symptoms: Describe the problem clearly. For instance, "All channels are in SD, or only certain channels are in SD," "The picture is blurry on HD channels," or "I see an error code [X]."
- Time of Day the Issue Occurs: Does it happen all the time, or only at certain times?
Contacting DIRECTV Support
You can typically contact DIRECTV customer support through several channels:
- Phone: The primary customer service number is usually available on your bill or the DIRECTV website. Be prepared for potential wait times.
- Online Chat: Many customers find the online chat feature to be a convenient way to get support, especially for less complex issues.
- DIRECTV Website: The DIRECTV website has a comprehensive support section with FAQs, troubleshooting guides, and contact options.
When speaking with a support representative, remain calm and clearly articulate the problem and the steps you've taken. They may guide you through further diagnostic steps or schedule a technician visit if they determine that an on-site inspection is necessary.
Conclusion
Navigating the question, "How do I switch back to HD on DIRECTV?" involves a multi-faceted approach, from understanding your receiver's settings to verifying channel availability and optimizing your equipment. We've covered the common reasons for SD display, detailed how to adjust video output settings, and highlighted the importance of selecting the correct HD channel numbers. Furthermore, we've explored optimizing your TV and cables, and even delved into advanced troubleshooting and when to seek professional help.
By systematically applying the steps outlined in this guide, you should be well-equipped to resolve most issues preventing you from enjoying DIRECTV's high-definition broadcasts. Remember to regularly check your receiver settings, confirm you're tuned to the HD versions of channels (often indicated by an "HD" in the channel name or a higher channel number), and ensure your equipment is functioning optimally. If persistent problems arise, don't hesitate to leverage DIRECTV's customer support resources. Enjoying the crisp, vibrant picture quality of HD is a key part of the DIRECTV experience, and with the right knowledge, you can ensure you're always getting the best possible view.