-
Posted on: 07 Jan 2026
-
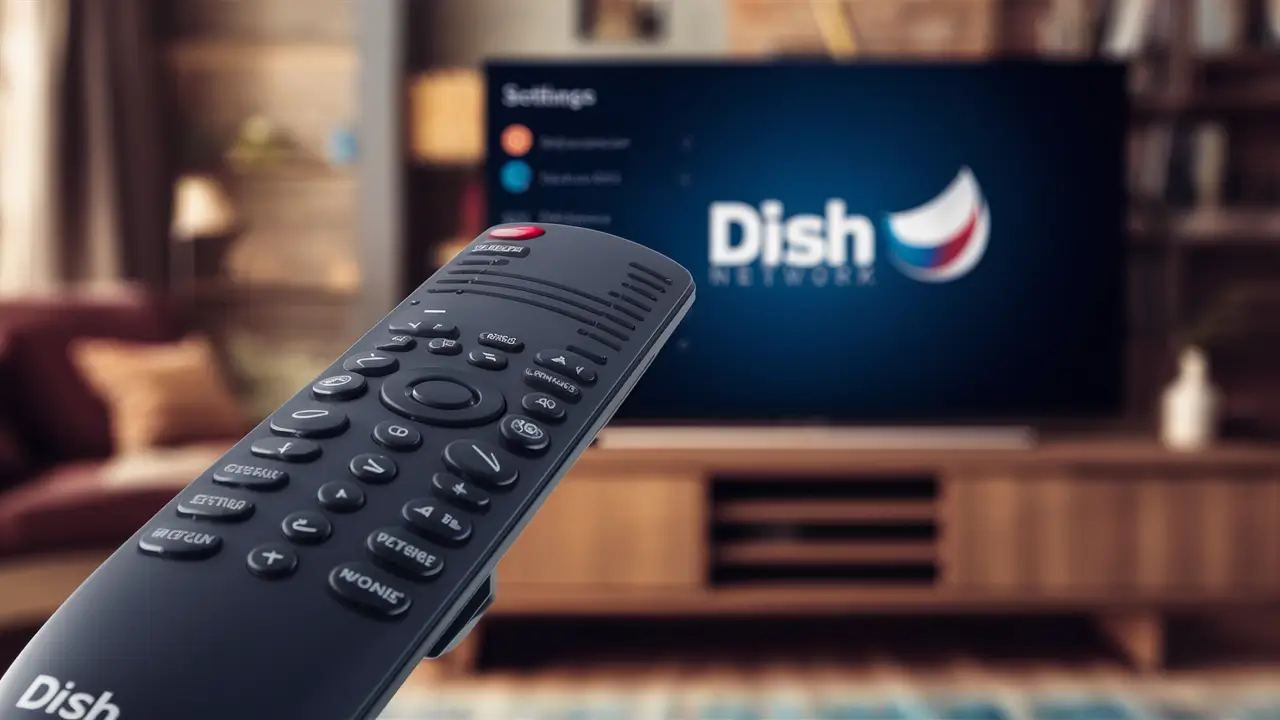
Unlock Seamless Entertainment: Your Guide to Syncing Your TV to Your DISH Network Remote
Struggling with multiple remotes? Learn exactly how to sync TV to DISH Network remote for a streamlined entertainment experience. This comprehensive guide provides step-by-step instructions, troubleshooting tips, and insights to ensure your DISH remote controls your TV effortlessly, enhancing your viewing convenience in 2025 and beyond.
Understanding Your DISH Network Remote and TV Compatibility
Before diving into the syncing process, it's crucial to understand the technology at play. DISH Network remotes are designed with versatility in mind, aiming to control not just your DISH receiver but also your television set. This universal control capability significantly reduces clutter and simplifies your home entertainment setup. By syncing your remote, you empower it to send commands like power on/off, volume adjustment, and even channel changes directly to your TV, bypassing the need for your TV's original remote for these basic functions.
How Universal Remotes Work
Universal remotes, including those provided by DISH Network, operate by sending infrared (IR) signals. These signals are specific codes that correspond to commands for different devices. When you press a button on your DISH remote, it sends a particular IR signal. For this to work with your TV, the remote must be programmed with the correct IR codes for your TV's brand and model. DISH remotes typically store a library of these codes, allowing them to be programmed for a vast array of televisions.
Types of DISH Network Remotes
DISH Network has evolved its remote technology over the years. The most common remotes you'll encounter are the Voice Remote and the older generation IR remotes. Newer Voice Remotes often feature Bluetooth capabilities for controlling the receiver and IR for TV control. Understanding which remote you have is the first step in the syncing process, as the exact steps might vary slightly.
- Voice Remotes: These are the most advanced, allowing voice commands for DISH features and typically incorporating IR for TV control.
- Standard IR Remotes: Older models that rely solely on infrared signals for both receiver and TV control.
TV Compatibility Considerations
Most modern televisions, manufactured within the last 15-20 years, are compatible with universal remotes. However, very old or highly specialized TVs might present challenges. DISH Network provides extensive code lists to cover a wide range of manufacturers. If you have a niche brand or an antique television, it's worth checking the DISH support website or contacting customer service to confirm compatibility before you begin.
In 2025, the vast majority of smart TVs and even standard HDTVs from brands like Samsung, LG, Sony, Vizio, TCL, and Hisense will be readily controllable by a DISH Network remote after proper syncing. The primary challenge is finding the correct code or sequence for your specific TV model.
The Role of Remote Codes
Remote codes are essentially numerical sequences that tell a remote control which signal to send to a specific device. Your DISH remote needs to be "told" which set of codes corresponds to your TV. This is achieved through either an automatic scan where the remote cycles through codes until it finds one that works, or by manually entering a specific code known to work for your TV brand.
As of 2025, DISH Network maintains an updated database of these codes, accessible through their remotes and online resources. The effectiveness of syncing largely depends on correctly identifying and inputting these codes.
Essential Preparations Before You Sync
Successfully syncing your DISH Network remote to your TV is often a straightforward process, but a little preparation can make it even smoother. Taking these steps beforehand will save you time and potential frustration.
Gather Necessary Information
Before you begin, have the following readily available:
- Your DISH Network Remote: Ensure it has fresh batteries. Low battery power can interfere with the syncing process.
- Your Television: Make sure it's powered on and in a visible location so you can observe its response to the remote's commands.
- Your TV's Brand Name: This is crucial. Look for the brand logo on the TV itself or its stand. Common brands include Samsung, LG, Sony, Vizio, TCL, Insignia, Sharp, Panasonic, and Toshiba.
- Your TV's Model Number (Optional but Recommended): While not always strictly necessary for basic syncing, knowing your TV's model number can be helpful if you encounter issues or if DISH provides specific instructions for your model. You can usually find this on the back of the TV or in its user manual.
- Your DISH Receiver: Ensure it's powered on and functioning normally.
Check Your Remote's Battery Level
This is a simple but critical step. A weak battery can lead to intermittent signal transmission, making it difficult for the remote to communicate effectively with your TV during the programming sequence. Replace the batteries with new ones if you suspect they might be low.
Ensure Clear Line of Sight
Infrared signals require a clear path between the remote and the device it's controlling. Make sure there are no obstructions between your DISH remote and your TV's IR receiver, which is usually located on the front bezel of the TV. Remove any decorative items or objects that might be blocking the signal.
Understand Your Remote's Buttons
Familiarize yourself with the buttons on your DISH remote that are relevant to programming. Typically, you'll be looking for buttons like 'Input', 'TV', 'Mode', 'Setup', or a combination thereof. The exact button names can vary slightly between DISH remote models.
Have Your TV's Original Remote Handy (Just in Case)
While the goal is to consolidate to one remote, it's wise to have your TV's original remote nearby. If the syncing process doesn't work, or if you accidentally disable a function, you might need it to revert changes or troubleshoot further. This is particularly important if your TV has advanced features that the DISH remote might not fully replicate.
Key Methods to Sync Your TV to Your DISH Network Remote
DISH Network offers two primary methods to program its remotes to control your television: the Automatic Code Scan and Manual Code Entry. Each method has its advantages, and the best approach often depends on your specific TV model and the DISH remote you possess. Understanding these methods will equip you to tackle the syncing process effectively.
Method 1: The Automatic Code Scan
This is often the simplest and most widely used method. The remote cycles through a list of pre-programmed codes for various TV brands until it finds one that successfully operates your television. It's user-friendly and requires minimal technical knowledge.
Method 2: Manual Code Entry
This method involves looking up a specific code for your TV brand and model and then manually entering it into your DISH remote. It can be faster if you know the correct code, and it's often the go-to solution when the automatic scan fails to find a working code.
Choosing the Right Method
For most users, starting with the Automatic Code Scan is recommended. It's less time-consuming than searching for codes manually and often yields successful results quickly. If the auto-scan proves unsuccessful after several attempts, or if you prefer a more direct approach and have access to a reliable list of codes, Manual Code Entry is the next logical step. Some advanced DISH remotes might also have specific instructions or modes for syncing, so always consult your remote's manual if available.
As of 2025, DISH Network continues to support both methods, ensuring broad compatibility with the latest television models. The success rate for both methods remains high, with the vast majority of users able to achieve full TV control with their DISH remote.
Method 1: The Automatic Code Scan (The Easiest Way)
The Automatic Code Scan is designed to be as user-friendly as possible. It's the first method you should try when syncing your DISH Network remote to your TV. This process involves putting your remote into a special programming mode and then pressing a button repeatedly, causing it to send out different IR codes. You'll be watching your TV for a specific reaction.
Step-by-Step Guide to Automatic Code Scan
Follow these steps precisely:
- Power On Your TV: Ensure your television is turned on.
- Power On Your DISH Receiver: Make sure your DISH receiver is also on and operational.
- Put the Remote in Programming Mode:
- Press and hold the 'TV' button (or the button representing your TV, like 'AUX' or 'VCR' on older remotes) and the 'OK' button simultaneously.
- Hold them down until the light at the top of the remote blinks twice or stays lit. This indicates the remote is now in programming mode.
- Initiate the Code Scan:
- Press and hold the 'Power' button on your DISH remote.
- Keep holding the 'Power' button. The remote will begin cycling through different power-off codes for various TV manufacturers.
- Continue holding the 'Power' button until your TV screen turns off. This could take anywhere from a few seconds to a couple of minutes, as the remote cycles through hundreds of codes.
- Confirm the Code:
- As soon as your TV screen turns off, release the 'Power' button immediately.
- Press the 'TV' button once to exit programming mode.
- Test the Remote:
- Now, try pressing the 'Power' button again to turn your TV back on.
- If the TV turns on, congratulations! The remote has found a working code.
- Test other functions like volume (using the 'Volume Up'/'Volume Down' buttons, which may need to be programmed separately if they don't work automatically) and channel up/down to ensure they are also controlled by the DISH remote.
What to Do If the First Scan Doesn't Work
If your TV doesn't turn off during the scan, or if it turns off but then won't turn back on, or if other functions don't work, you'll need to repeat the process. Sometimes, you might release the power button too early or too late. Try the scan again, paying close attention to the timing.
If repeating the process doesn't yield results, it's possible the remote cycled through all relevant codes for your TV brand without success. In this case, you'll need to move on to the Manual Code Entry method.
Important Notes for Auto-Scan
- Patience is Key: The scan can take time. Don't rush the process.
- Accurate Timing: Releasing the power button at the precise moment the TV turns off is critical.
- Multiple Attempts: It's not uncommon to need 2-3 attempts to get the timing right.
- Remote Model Variations: While the general principle is the same, the specific button presses to enter programming mode might differ slightly for your particular DISH remote model. Refer to your remote's user manual if you're unsure.
Method 2: Manual Code Entry (When Auto-Scan Fails)
When the automatic code scan doesn't find a compatible code for your TV, or if you prefer a more direct approach, manual code entry is the next best option. This method requires you to find a specific code for your TV brand and then input it into your DISH remote. DISH Network provides extensive lists of these codes, which can often be found on their website or in your DISH receiver's manual.
Finding the Correct TV Codes
There are several ways to obtain the correct codes for your TV:
- DISH Network Website: The most reliable source is DISH's official website. Navigate to their support or remote control section. They usually have a searchable database where you can enter your TV brand and model to get a list of compatible codes. As of 2025, this resource remains robust and frequently updated.
- DISH Receiver Manual: Your DISH receiver's user manual may contain a list of universal remote codes.
- TV Manufacturer Support: Sometimes, your TV manufacturer's website might list universal remote codes that work with their products.
- Online Forums and Communities: While less official, user forums dedicated to home entertainment can sometimes provide code suggestions, especially for less common TV models.
You will typically be provided with a list of 3-5 codes for your TV brand. It's best to try them in the order provided, as they are often listed from most to least likely to work.
Step-by-Step Guide to Manual Code Entry
Once you have a list of codes for your TV brand, follow these steps:
- Power On Your TV and DISH Receiver: Ensure both devices are on and functioning.
- Locate the 'Setup' Button: Find the 'Setup' button on your DISH remote. On some remotes, you might need to press and hold the 'Mode' button (like 'TV' or 'AUX') and the 'OK' button to access setup functions.
- Enter Programming Mode:
- Press and hold the 'TV' button (or the relevant device button) and the 'Setup' button simultaneously.
- Hold them until the light at the top of the remote blinks twice or stays lit, indicating it's in programming mode.
- Enter the First Code:
- Using the number pad on your remote, enter the first 4-digit code from your list for your TV brand.
- As you enter the digits, the light at the top of the remote should blink.
- After entering the fourth digit, the light should blink twice or stay lit, confirming the code has been accepted.
- Test the Code:
- Press the 'TV' button to exit programming mode.
- Try to power your TV off and on using the DISH remote's power button.
- Test other functions like volume and channel selection.
- Try the Next Code if Necessary:
- If the first code doesn't work (i.e., the TV doesn't respond, or only some functions work), repeat steps 3 and 4, but this time enter the second code from your list.
- Continue this process with each subsequent code on your list until you find one that successfully controls your TV's basic functions.
Important Notes for Manual Code Entry
- Code Accuracy: Ensure you are entering the code exactly as provided. Typos are common.
- Code Length: Most DISH remote codes are 4 digits, but some older systems or specific brands might use 3 or 5 digits. Always check the code list.
- Exit Programming Mode: After entering a code, it's crucial to exit programming mode correctly (usually by pressing the 'TV' button) before testing.
- Volume Control: Sometimes, a code might work for power and channels but not for volume. You might need to program the volume control separately. This often involves pressing the 'TV' button, then 'Volume Up' or 'Volume Down', and then pressing 'OK' or 'TV' again to lock it in. Consult your remote's manual for specific instructions on programming volume.
- Locking the Remote to TV: Once you find a code that works, ensure you press the 'TV' button to lock in that setting.
Manual code entry, while requiring a bit more effort in finding the codes, is a highly effective method for achieving full control over your television with your DISH Network remote.
Troubleshooting Common Syncing Issues
Even with the best instructions, syncing your DISH Network remote to your TV can sometimes present challenges. Fortunately, most common issues have straightforward solutions. Here's a look at frequent problems and how to resolve them.
Problem 1: Remote Not Entering Programming Mode
Symptom: The indicator light on the remote doesn't blink or stay lit when you press and hold the required buttons (e.g., 'TV' + 'OK' or 'TV' + 'Setup').
Solutions:
- Check Batteries: This is the most common culprit. Replace the batteries with fresh ones.
- Press Buttons Correctly: Ensure you are pressing and holding the correct buttons simultaneously. Refer to your remote's manual for the exact sequence for your model.
- Try Different Combinations: Some older remotes might use different button combinations. Experiment with other likely pairings like 'DISH' + 'OK' or 'MODE' + 'OK'.
- Remote Malfunction: In rare cases, the remote itself might be faulty. If other functions don't work either, consider contacting DISH for a replacement.
Problem 2: TV Doesn't Turn Off During Auto-Scan
Symptom: You hold the 'Power' button down during the auto-scan, but the TV remains on, and the remote eventually exits programming mode.
Solutions:
- Check TV Brand: Double-check that you've correctly identified your TV's brand. Ensure you're not trying to program for a different device.
- Check Line of Sight: Make sure nothing is obstructing the IR signal between the remote and the TV.
- Repeat the Scan: Sometimes, you might have missed the correct code due to timing. Repeat the entire auto-scan process, paying close attention to releasing the power button precisely when the TV turns off.
- Try Manual Entry: If the auto-scan consistently fails, it's time to try the manual code entry method. Find a reliable list of codes for your TV brand.
- Older TV Models: Very old or obscure TV models might not be supported by the DISH remote's code library.
Problem 3: TV Turns Off, But Won't Turn Back On (or Other Functions Don't Work)
Symptom: The auto-scan successfully turned off the TV, but when you press power again, it doesn't turn on, or volume/channel buttons are unresponsive.
Solutions:
- Timing of Button Release: You might have released the 'Power' button too early or too late. Try the auto-scan again, focusing on precise timing.
- Volume Programming: Volume control often needs separate programming. After finding a working code for power, follow specific instructions for programming volume. This usually involves pressing 'TV', then 'Volume Up' or 'Volume Down', and then 'OK' or 'TV' to confirm.
- Try a Different Code: If you used the auto-scan, the code found might only control power. You might need to try the auto-scan again or switch to manual entry to find a code that supports more functions.
- Remote Model Limitations: Some basic remotes might not support all functions of every TV. Check if your remote model is designed for full universal control.
Problem 4: Remote Controls Multiple Devices Incorrectly
Symptom: When you press a button (e.g., 'Power'), both your TV and your DISH receiver turn off or on.
Solutions:
- Correct Mode Button: Ensure you are pressing the 'TV' button (or the correct device button) before attempting to control the TV. If you press 'Power' without selecting the 'TV' mode, it might affect the DISH receiver.
- Re-Sync the Remote: Clear the current programming and re-sync the remote to your TV using either the auto-scan or manual entry method. Ensure you exit programming mode correctly by pressing the 'TV' button.
- Check Volume Lock: If volume is locked to the TV, it should only affect the TV. If it affects the receiver, you may need to re-program the volume lock.
Problem 5: Remote is Unresponsive to Any Commands
Symptom: No buttons on the remote are working, even for controlling the DISH receiver.
Solutions:
- Batteries: Again, check and replace batteries.
- Reset the Remote: Some remotes can be reset by removing the batteries for a minute and then reinserting them.
- Firmware Issue (Rare): In very rare cases, the remote's internal software might have an issue. Contacting DISH support is the best course of action here.
By systematically addressing these common issues, you can significantly increase your chances of successfully syncing your DISH Network remote to your TV and enjoying a more convenient entertainment experience. As of 2025, DISH continues to refine its remote technology, but these troubleshooting steps remain relevant.
Leveraging Advanced Remote Features
Once you've successfully synced your DISH Network remote to your TV, you've already achieved a significant convenience. However, many DISH remotes, especially newer models, offer advanced features that can further enhance your viewing experience. Understanding and utilizing these can make your entertainment setup even more intuitive and powerful.
Voice Control Integration
Modern DISH remotes often include voice command capabilities. While primarily used for navigating DISH menus, searching for content, and controlling receiver functions, some voice remotes can also be programmed to perform basic TV commands via voice, such as "Turn off TV" or "Adjust volume."
- How it Works: This typically relies on the remote sending IR signals for TV commands, similar to button presses. The voice recognition software translates your spoken command into the appropriate IR signal.
- Activation: To use voice commands for your TV, you usually need to ensure the remote is synced for TV control first. Then, press and hold the voice button (often marked with a microphone icon) and speak your command clearly.
- Limitations: Voice control for TVs via a DISH remote might be limited to basic functions. Complex commands or accessing specific TV settings might still require your TV's original remote.
Programming Volume Control
While power and channel control might work automatically after syncing, volume control sometimes requires a separate step. This is because the remote needs to know whether to send volume commands to the TV or the DISH receiver.
- Locking Volume to TV: To ensure your DISH remote controls your TV's volume, you'll need to "lock" the volume function to the TV. The exact method varies by remote model, but it often involves pressing the 'TV' button, then 'Volume Up' or 'Volume Down', and then 'OK' or 'TV' again to confirm. Consult your remote's manual for precise instructions.
- Benefits: Once locked, the volume buttons on your DISH remote will exclusively adjust your TV's sound, allowing you to control both channels and audio with a single device.
Input/Source Selection
Some DISH remotes can be programmed to cycle through your TV's input sources (e.g., HDMI 1, HDMI 2, AV). This is particularly useful if you frequently switch between your DISH receiver, a game console, a Blu-ray player, or other devices connected to your TV.
- How to Program: This feature might be automatically enabled with certain codes, or it might require a specific programming sequence. Check your remote's manual or DISH's support website for instructions on programming the 'Input' or 'Source' button.
- Convenience: Being able to switch inputs directly from your DISH remote eliminates the need to find your TV's original remote for this function.
Customizable Buttons (Limited)
While not as common as on high-end universal remotes, some advanced DISH remotes might offer limited customization options for certain buttons. This could involve assigning specific functions or macros to less-used buttons.
- Check Manual: Refer to your specific remote's user manual to see if any button customization is supported.
- Macros: A macro is a sequence of commands executed with a single button press. For example, you might be able to program a button to turn on the TV, then switch to the correct input, and then turn on your DISH receiver.
Remote Finder Feature
Certain DISH models come with a "Remote Finder" feature. If you misplace your remote, you can activate this feature from the DISH receiver, and the remote will emit a sound or light up to help you locate it. This is a lifesaver for busy households.
- Activation: Typically, you press a dedicated button on the front of the DISH receiver.
- Compatibility: This feature is usually available on higher-end DISH receivers and their corresponding remotes.
Exploring these advanced features can transform your DISH Network remote from a simple channel changer into a central command hub for your entire home entertainment system. As of 2025, DISH continues to integrate more sophisticated functionalities into its remotes, making them increasingly versatile.
The Benefits of a Synced DISH Network Remote
Syncing your DISH Network remote to your TV is more than just a technical step; it's a gateway to a significantly improved home entertainment experience. The convenience and efficiency gained are substantial, making it a worthwhile endeavor for any DISH subscriber. Let's explore the key advantages.
Simplified Control and Reduced Clutter
This is the most obvious and immediate benefit. Instead of juggling multiple remotes – one for your TV, one for your DISH receiver, and potentially others for soundbars or Blu-ray players – you can consolidate control into a single, familiar device. This means less searching for the right remote and a cleaner coffee table.
As of 2025, with the proliferation of smart devices and complex entertainment systems, simplifying control is more important than ever. A single remote reduces the learning curve for guests and makes everyday use of your entertainment system far more intuitive.
Enhanced Viewing Experience
With your DISH remote controlling your TV's power and volume, you can seamlessly switch between channels on your DISH service and adjust the sound without interruption. This creates a fluid viewing experience, allowing you to focus on your content rather than the mechanics of controlling your devices.
Imagine turning on your TV and DISH receiver with a single button press, then immediately adjusting the volume as a commercial starts. This level of integration is what makes syncing so valuable.
Faster Channel Surfing and Navigation
When your DISH remote controls both your receiver and TV, channel surfing becomes more efficient. You can use the channel up/down buttons on your DISH remote, and they will directly affect the channel displayed on your TV, without needing to switch remotes or inputs.
This is particularly beneficial for live sports, news, or any situation where rapid channel switching is common. The DISH remote's layout is optimized for these actions.
Accessibility for All Users
For individuals who may find managing multiple complex remotes challenging, a single, well-programmed remote simplifies operation significantly. This enhances accessibility for children, the elderly, or anyone who prefers a straightforward interface. The familiar DISH remote interface becomes the primary control point.
Potential for Advanced Features
As discussed in the advanced features section, a synced remote can unlock capabilities like voice control for TV functions, input switching, and potentially even macros. These features add layers of convenience and power to your entertainment setup, making it more responsive to your needs.
Cost Savings (Potentially)
While not the primary driver, if your TV's original remote is lost or damaged, syncing your DISH remote can serve as a cost-effective alternative for basic TV functions, saving you the expense of purchasing a replacement TV remote.
Future-Proofing Your Setup
As technology evolves, DISH Network continues to update its remotes and software. By keeping your remote synced and updated, you ensure your entertainment system is ready to take advantage of new features and integrations as they become available. This is especially relevant in 2025, where smart home integration is becoming increasingly sophisticated.
In summary, syncing your DISH Network remote to your TV is a simple yet powerful step that consolidates control, enhances usability, and ultimately leads to a more enjoyable and less complicated home entertainment experience. It’s a fundamental aspect of modern TV setup.
Conclusion: Enjoying Your Unified Entertainment Experience
Mastering how to sync TV to DISH Network remote is a fundamental step towards a streamlined and enjoyable home entertainment setup. By following the step-by-step guides for both automatic code scanning and manual code entry, you can efficiently program your DISH remote to control your television's essential functions, from power and volume to channel selection. Remember to prepare by gathering your TV's brand and ensuring fresh batteries in your remote, and don't hesitate to consult DISH's support resources if you encounter any issues.
The benefits are clear: reduced clutter, simplified operation, and a more fluid viewing experience. As technology advances, features like voice control and input switching on newer DISH remotes further enhance this convenience. By investing a few minutes into this syncing process, you unlock a more integrated and user-friendly entertainment system that will serve you well throughout 2025 and beyond. Enjoy the simplicity and power of a single remote!


