-
Posted on: 07 Jan 2026
-
Discovering what to do with an old DIRECTV box can be a common dilemma. Instead of letting it gather dust, this guide reveals surprisingly practical and creative uses for your retired satellite receiver, offering value beyond its original purpose and helping you declutter responsibly.
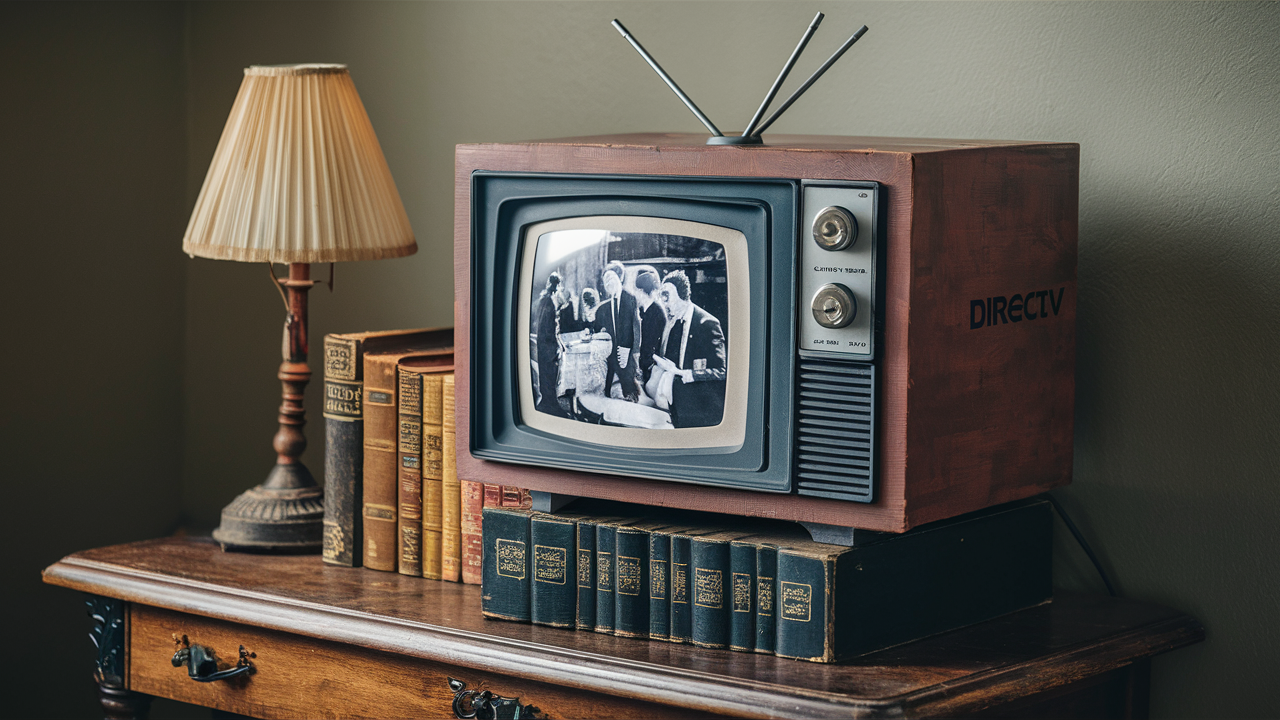
Repurposing Your Old DIRECTV Box: Beyond Television
When your DIRECTV service is upgraded, canceled, or you simply move on to streaming services, you're often left with a box that seems to have outlived its primary function. However, the modern DIRECTV receiver, while designed for satellite signal reception, contains components that can be repurposed or at least handled in a way that minimizes waste. The initial thought might be to simply discard it, but a deeper look reveals several avenues for giving this piece of technology a second life, whether through creative DIY projects, educational exploration, or responsible recycling. In 2025 and 2026, with an increasing focus on sustainability and reducing electronic waste, finding such alternative uses is more relevant than ever. Many consumers are seeking ways to avoid contributing to landfill overflow, and understanding the potential of old electronics is a key part of this movement. This section will explore the various possibilities, from practical applications to more niche uses, setting the stage for a comprehensive understanding of your options.
The Myth of Direct Reusability: Why It's Not a Simple Plug-and-Play
It's crucial to address a common misconception upfront: an old DIRECTV box, in its original form, cannot be easily repurposed as a general media player or a replacement for modern streaming devices. These boxes are highly specialized, designed to receive and decode specific satellite signals encrypted by DIRECTV. Their internal hardware and software are locked down, making them incompatible with standard internet streaming protocols or general-purpose computing. You cannot simply plug it into your Wi-Fi and expect to access Netflix or Hulu. This limitation is due to proprietary technology, digital rights management (DRM), and the specific hardware architecture. Therefore, any repurposing efforts will likely involve either dismantling the box for its individual components or exploring very specific, often technical, modifications that are beyond the scope of a typical user.
Potential for Component Salvage
While the complete unit might be limited, the individual components within an old DIRECTV box can sometimes be salvaged for use in other electronic projects. This is where the true DIY potential lies for electronics enthusiasts. Common components that might be of interest include:
- Power Supply Unit (PSU): Many older electronics contain robust power supplies that can be adapted for various low-voltage projects. These can provide stable power for microcontrollers, LED lighting systems, or other custom circuits. However, extracting and repurposing a PSU requires a good understanding of electronics and safety precautions.
- Hard Drive (in DVR models): If your DIRECTV box is a DVR model, it likely contains a standard SATA hard drive. These drives can often be removed, formatted, and used as external storage for computers or as part of a Network Attached Storage (NAS) system. The capacity might be modest by today's standards (e.g., 500GB to 1TB), but it's still perfectly usable for backups or media storage.
- Cooling Fans: Small fans used for internal cooling can be repurposed for ventilation in small enclosures, computer cases, or even DIY terrariums.
- Internal Wiring and Connectors: Various wires, cables, and connectors can be useful for prototyping or repairing other electronic devices.
- IR Receivers: The infrared receiver component, used to pick up remote control signals, could potentially be integrated into custom home automation projects.
It's important to note that salvaging components requires technical knowledge and appropriate tools. Mishandling internal parts can be dangerous, especially concerning power supplies. Always ensure the device is unplugged and discharged before attempting to open it.
Educational Value: Learning About Electronics
For students, hobbyists, or anyone curious about how electronics work, an old DIRECTV box can serve as an excellent educational tool. Carefully dismantling the unit under supervision can provide hands-on experience with circuit boards, different types of chips, connectors, and the general layout of electronic devices. Understanding the purpose of various components, tracing connections, and identifying integrated circuits can be a valuable learning process. This hands-on approach to understanding technology is increasingly important in an era dominated by abstract software interfaces. It allows for a tangible connection to the physical world of computing and electronics.
Furthermore, researching the specific models and chips used within the box can lead to further learning about:
- Microprocessors and their architecture.
- Digital signal processing (DSP) techniques used for satellite signal decoding.
- Power management systems.
- Interface standards like HDMI, USB, and SATA.
This exploration can spark an interest in electronics engineering, computer science, or related fields.
Understanding Your Old DIRECTV Box: What's Inside?
Before you can even consider repurposing or dismantling your old DIRECTV box, it's essential to understand what you're dealing with. DIRECTV has offered various models over the years, each with different capabilities and internal components. Knowing the specific model number is the first step to researching its potential. These boxes are essentially specialized computers designed for a single purpose: receiving and decoding satellite television signals.
Identifying Your DIRECTV Receiver Model
The model number is typically found on a sticker on the bottom or back of the device. Common DIRECTV receiver series include:
- Standard Receivers (e.g., HR24, R22): These are older models, often with built-in DVR functionality.
- Genie Clients (e.g., C31, C41, C51, C61): These are smaller, client boxes that connect to a main Genie DVR. They have fewer internal components and are less likely to be useful for component salvage.
- Genie DVRs (e.g., HR34, HR44, HR54): These are the primary DVR units that manage recordings and distribute content to Genie clients. They contain hard drives and more complex circuitry.
- 4K Genie Mini (e.g., C61K): Designed for 4K content, these are also client devices.
The presence of a hard drive is a key differentiator. If your box has DVR capabilities, it almost certainly has a hard drive that can be removed. Non-DVR models are essentially just tuners and decoders, offering fewer salvageable parts.
Internal Components and Their Functions
A typical DIRECTV receiver, especially a DVR model, contains several key internal components:
- Motherboard: This is the central hub, containing the main processor, memory, and various chips for signal processing, network connectivity, and controlling other components.
- Tuner Module: This component is responsible for receiving the satellite signal from the LNB (Low-Noise Block) on your satellite dish.
- Demodulator and Decoder: These chips process the raw satellite signal, converting it into a format that can be displayed on a TV and decoding the encrypted video and audio streams.
- Hard Drive (in DVRs): A standard SATA hard drive used for storing recorded programs. Capacities vary, but older models might have 500GB or 1TB drives.
- Power Supply Unit (PSU): Converts AC power from the wall outlet into the various DC voltages required by the internal components.
- Cooling Fan: To prevent overheating of the internal electronics.
- IR Receiver: To detect signals from the remote control.
- Various Connectors: Including SATA ports for the hard drive, power connectors, and potentially USB ports (though often non-functional for general use).
Understanding these components helps in identifying what might be salvageable and what is specific to the satellite receiver's function.
The Role of the Hard Drive in DVR Models
For DVR models, the hard drive is arguably the most valuable component for repurposing. These drives are typically standard 3.5-inch SATA drives, similar to those found in desktop computers. DIRECTV uses these drives to store recorded television programs. The data on these drives is formatted in a proprietary way, meaning you can't simply plug it into a computer and expect to play back DIRECTV recordings directly.
However, the drive itself is a functional piece of hardware. Once removed, it can be:
- Formatted: Using a computer, you can erase the proprietary DIRECTV formatting and reformat the drive with standard file systems like NTFS (for Windows), HFS+ or APFS (for macOS), or ext4 (for Linux).
- Used as External Storage: With a SATA-to-USB adapter or an external hard drive enclosure, the drive can be used as an external storage device for your computer.
- Used in a NAS: It can be incorporated into a Network Attached Storage (NAS) device for centralized file storage and sharing within your home network.
The process of removing a hard drive usually involves opening the receiver's casing and disconnecting the SATA data and power cables. Again, safety is paramount, and you should ensure the unit is unplugged and has had time to discharge any residual power.
Creative DIY Projects for Your DIRECTV Box
Once you've assessed your old DIRECTV box and identified potentially useful components, you can embark on various DIY projects. These projects range from practical applications of salvaged parts to more experimental endeavors for the truly adventurous hobbyist. Remember that many of these projects require basic electronics knowledge, tools, and a commitment to safety.
Project 1: External Hard Drive Conversion (for DVR Models)
This is one of the most straightforward and practical repurposing projects. The goal is to take the hard drive from a DIRECTV DVR and turn it into a usable external storage device.
Materials Needed:
- Your old DIRECTV DVR box
- Screwdriver set (Phillips head, potentially Torx)
- SATA-to-USB adapter or an external hard drive enclosure
- Computer (Windows, macOS, or Linux)
- Optional: Anti-static wrist strap
Steps:
- Safety First: Ensure the DIRECTV box is unplugged from the power outlet and has been disconnected for at least 15-30 minutes to allow any internal capacitors to discharge.
- Open the Case: Carefully remove the screws on the back and sides of the DIRECTV box to access the internal components. Keep track of the screws, as they may vary in size.
- Locate the Hard Drive: Identify the 3.5-inch hard drive. It will be connected to the motherboard via SATA data and power cables.
- Disconnect the Drive: Gently disconnect the SATA data cable (a thin, flat cable) and the SATA power cable (a wider cable) from the hard drive.
- Remove the Drive: The hard drive is usually secured by screws. Carefully remove these screws and lift the hard drive out of its bay.
- Connect to Computer:
- Using a SATA-to-USB adapter: Connect the adapter to the hard drive's SATA ports and then plug the USB end into your computer.
- Using an external enclosure: Place the hard drive into the enclosure according to its instructions and connect the enclosure to your computer via USB.
- Format the Drive: Your computer will likely detect the drive but may not be able to read the DIRECTV formatting. You will need to format it.
- Windows: Open Disk Management (search for "Disk Management"). Find the drive, right-click on its partition, and select "Delete Volume." Then, right-click on the unallocated space and select "New Simple Volume." Follow the prompts to format it with NTFS.
- macOS: Open Disk Utility. Select the drive, click "Erase," choose a format (e.g., ExFAT for compatibility with both Mac and Windows), and click "Erase."
- Linux: Use tools like `fdisk` or `gparted` to partition and format the drive (e.g., with `mkfs.ext4`).
- Use as External Storage: Once formatted, the drive will function as a standard external hard drive.
This project is highly recommended for its practicality, especially given the increasing need for data storage in 2025-26. You can use this drive for backing up important files, storing media libraries, or expanding your computer's storage capacity.
Project 2: Building a DIY Power Supply Unit (Advanced)
This project is for experienced electronics hobbyists who understand power electronics and safety protocols. The goal is to extract the internal power supply unit (PSU) and adapt it to provide regulated DC voltage for other projects.
Disclaimer:
Working with power supplies can be dangerous and carries a risk of electric shock, fire, or damage to components if not done correctly. This project is not recommended for beginners. Always consult with an experienced electronics professional if you are unsure.
Steps (Conceptual Overview):
- Identify PSU Output Voltages: Carefully examine the PSU for labels indicating the output voltages (e.g., +3.3V, +5V, +12V) and their maximum current ratings.
- Safely Extract the PSU: With the box unplugged and discharged, carefully disconnect the PSU from the motherboard and the main power input.
- Isolate and Modify: This is the most complex part. You'll need to identify which pins are for AC input, ground, and each DC output. You might need to modify the PSU's control circuitry to enable it to turn on without the rest of the receiver's motherboard. This often involves shorting specific pins.
- Add Load: A PSU usually requires a load to operate stably. You might need to connect a suitable resistor or another low-power device to ensure stable voltage output.
- Test Carefully: Use a multimeter to test each output voltage under no-load and then with a small load. Ensure voltages are stable and within acceptable tolerances.
- Enclose Safely: The modified PSU must be housed in a safe, insulated enclosure to prevent accidental contact.
This project can yield a versatile, often robust, power source for various DIY electronics projects, from powering LED strips to microcontrollers like Arduino or Raspberry Pi. The availability of multiple voltage rails (+5V and +12V are common) makes it quite useful.
Project 3: Salvaging Components for a "Junk Drawer" Electronics Kit
Even if you don't have a specific project in mind, salvaging small components can create a valuable "junk drawer" kit for future tinkering. This is a great way to learn about different electronic parts.
Components to Look For:
- Resistors and Capacitors: These are fundamental electronic components. While their exact values might be hard to determine without desoldering and testing, they can be useful for practice.
- LEDs: Many devices use indicator LEDs.
- Small Switches: If present, these can be reused.
- Connectors: USB ports, Ethernet ports, audio/video jacks can be desoldered and used for prototyping or repairs.
- Screws and Fasteners: Useful for general repairs.
- Heat Sinks: Small aluminum or copper pieces used to dissipate heat from chips.
Process:
- Disassemble Carefully: Open the box and identify smaller components on the motherboard.
- Desolder (Optional but Recommended): For cleaner extraction, use a desoldering iron or pump to remove components from the circuit board. If you don't have these tools, you can carefully try to cut the component leads with wire cutters, leaving enough to work with.
- Organize: Store salvaged components in small containers, labeled if possible.
This collection of parts can be invaluable for quick repairs, educational experiments, or when you need a specific component for a project and don't want to buy a whole new pack.
Technical Considerations and Limitations
While repurposing an old DIRECTV box offers exciting possibilities, it's crucial to be aware of the technical limitations and challenges involved. These devices are not general-purpose computers, and their design is highly specialized for satellite signal reception.
Proprietary Software and Firmware
The biggest hurdle is the proprietary software and firmware that runs on DIRECTV boxes. This software is designed to interact exclusively with DIRECTV's satellite infrastructure and is heavily protected. You cannot easily install new operating systems or applications onto the existing hardware. The bootloader is locked, and the hardware is configured for specific tasks, making it incompatible with standard computing tasks like web browsing or running typical media playback software.
Attempts to modify the firmware are complex, often require specialized knowledge, and can permanently brick the device. For the average user, trying to unlock the full potential of the internal processor or other advanced chips is generally not feasible.
Limited Connectivity and Ports
DIRECTV boxes typically have a limited set of ports, primarily focused on their intended function:
- Satellite In: For the LNB connection.
- HDMI Out: For video and audio to the TV.
- Coaxial Out (RF Out): For older TV connections.
- Ethernet Port: Often used for system updates or internet connectivity for on-demand features, but not typically for general network access in a user-defined way.
- USB Ports: These are often disabled or used only for DIRECTV-specific functions (like firmware updates or connecting specific accessories) and cannot be used to connect standard USB peripherals like keyboards or external drives directly for general computer use.
- SATA Ports (Internal): Found in DVR models, these are for the internal hard drive.
The lack of standard input/output ports like multiple USB ports, audio jacks, or display outputs limits their integration into more complex DIY projects without significant modification.
Power Consumption and Efficiency
Electronic devices, even when older, can consume a surprising amount of power. While a DIRECTV box might not draw as much as a full desktop computer, its power supply is designed to run continuously to be ready for scheduled recordings or updates. If you plan to repurpose components, especially the power supply, consider its efficiency and the power requirements of your new project. For small, low-power projects, a dedicated, more efficient power adapter might be a better choice than salvaging a large PSU.
Safety Precautions for Component Salvage
As mentioned earlier, safety is paramount. Here are some key precautions:
- Always unplug the device: Never work on a plugged-in device.
- Discharge capacitors: Power supplies and other components can store electrical charges even after unplugging. Allow ample time for discharge or learn how to safely discharge them.
- Use insulated tools: When working with internal electronics, use tools with insulated handles.
- Wear safety glasses: Protect your eyes from any flying debris or components.
- Work in a well-lit, organized area: This reduces the risk of accidents.
- Ground yourself: Use an anti-static wrist strap to prevent electrostatic discharge (ESD) from damaging sensitive components.
By understanding these limitations and taking appropriate safety measures, you can make informed decisions about what you can realistically achieve with your old DIRECTV box.
Responsible Disposal and Recycling
If repurposing or component salvage isn't feasible or desired, the next most important step is responsible disposal. Electronic waste (e-waste) is a growing environmental concern, and simply throwing old electronics in the trash can lead to harmful chemicals leaching into the environment. Fortunately, there are several ways to ensure your old DIRECTV box is disposed of responsibly.
Why Responsible Disposal Matters
Electronic devices contain valuable materials that can be recycled, such as precious metals and plastics. However, they also contain hazardous substances like lead, mercury, and cadmium. Improper disposal can:
- Contaminate soil and groundwater.
- Harm human health through exposure to toxic materials.
- Waste valuable, finite resources that could be reused.
In 2025-26, environmental regulations and consumer awareness regarding e-waste are at an all-time high, making responsible disposal more critical than ever.
DIRECTV's Return Policy and Recycling Programs
When you upgrade or cancel your DIRECTV service, you are often required to return the equipment. DIRECTV has established programs for handling returned equipment. This usually involves:
- Shipping Labels: They often provide prepaid shipping labels for you to send the equipment back.
- Drop-off Locations: In some cases, you might be able to drop off equipment at specific locations.
Check your DIRECTV account or contact their customer service to understand their current equipment return policy. They are equipped to refurbish usable equipment or ensure the proper recycling of non-functional units. This is often the simplest and most environmentally sound option if DIRECTV requires the return of their hardware.
Local E-Waste Recycling Centers
If DIRECTV does not require the return of your equipment, or if you have a box that was never leased, you can take it to a local e-waste recycling center. These facilities are specifically designed to:
- Dismantle electronics safely.
- Separate materials for recycling.
- Dispose of hazardous components in an environmentally sound manner.
How to find one:
- Online Search: Use search terms like "e-waste recycling near me," "electronics recycling [your city/state]," or "computer recycling."
- Local Government Websites: Your city or county's waste management or environmental services department often lists approved recycling locations.
- Retailer Take-Back Programs: Some electronics retailers offer recycling services for old devices.
Many e-waste recycling centers accept a wide range of electronics, including satellite receivers.
Donation Options (Limited)
While less common for specialized equipment like satellite receivers, some organizations might accept older, functional electronics for refurbishment and donation to underserved communities or schools. However, given the specialized nature of DIRECTV boxes, this is less likely unless the organization specifically requests such items for a particular program. It's always worth checking with local charities or community centers, but prioritize dedicated e-waste recycling if the box is not functional or if the organization doesn't have a specific use for it.
What NOT to Do
- Do not put it in your regular trash bin: This leads to landfill issues and potential environmental harm.
- Do not burn it: Burning electronics releases toxic fumes.
- Do not leave it on the curb for bulk trash pickup unless specifically designated for e-waste collection: This can still lead to improper disposal.
By choosing one of these responsible disposal methods, you contribute to a more sustainable future and ensure that your old technology doesn't become an environmental burden.
The Evolving Landscape of Satellite TV and Your Old Hardware
The world of television entertainment is in constant flux. Streaming services have dramatically reshaped how we consume content, leading many to question the future of traditional cable and satellite television. Understanding this evolution helps contextualize why you might have an old DIRECTV box and what its long-term relevance, or lack thereof, might be.
The Rise of Streaming Services
As of 2025-26, streaming services like Netflix, Hulu, Disney+, Amazon Prime Video, and countless others have become the dominant force in home entertainment. Their appeal lies in:
- On-Demand Content: Watch what you want, when you want.
- Flexibility: Access content across multiple devices (smart TVs, phones, tablets, computers).
- Customization: Curated recommendations and personalized viewing experiences.
- Cost-Effectiveness (potentially): While subscription fatigue is real, individual streaming plans can be cheaper than comprehensive cable/satellite packages.
This shift has led to a significant decline in traditional pay-TV subscriptions. Many households are "cutting the cord" or "cord-shaving" (reducing their cable/satellite package). This trend directly impacts the demand for satellite receivers like those from DIRECTV.
DIRECTV's Adaptation and Future Outlook
DIRECTV, like other satellite and cable providers, has not been immune to these changes. While they still maintain a substantial subscriber base, particularly in areas where broadband internet is less reliable, they are adapting:
- Bundling with Internet: Offering packages that combine satellite TV with internet services.
- Streaming Options: Developing their own streaming apps or services that allow access to content without a traditional satellite dish.
- Focus on Niche Markets: Catering to specific demographics or regions where satellite remains a strong option.
However, the overall trajectory suggests a gradual decline in the reliance on physical satellite dishes and receivers for the general population. This means that older DIRECTV boxes are increasingly becoming obsolete for their primary function.
The Legacy of Old Hardware
The proliferation of older electronic devices, including DIRECTV boxes, presents a challenge. As technology advances rapidly, older models become outdated and unsupported. For DIRECTV, this means older receivers may no longer be able to access the latest features, software updates, or even broadcast signals as technology evolves.
For consumers, this reinforces the importance of considering the lifecycle of their electronics. When you receive a new device, it's wise to think about its eventual end-of-life and plan for responsible disposal or repurposing. The "what can you do with an old DIRECTV box?" question is a symptom of this broader technological cycle.
Innovations in Receiver Technology (and why they don't apply to old boxes)
Modern receivers, whether for satellite, cable, or terrestrial broadcast, are becoming more integrated with internet connectivity. They often feature:
- Built-in streaming apps.
- Voice control.
- Advanced DVR capabilities with cloud storage.
- Seamless integration with smart home ecosystems.
These advancements highlight the fundamental differences between your old DIRECTV box and current technology. The hardware and software are simply not designed to perform these modern functions. This reinforces the idea that repurposing your old box is more about salvaging components or using it as an educational tool, rather than trying to turn it into a modern smart device.
In conclusion, while the era of dedicated satellite receivers might be waning for many, understanding the potential of your old DIRECTV box—whether for creative reuse, educational purposes, or responsible recycling—is a practical and environmentally conscious approach to managing your technology.
Final Thoughts on Your Old DIRECTV Box:
Your old DIRECTV box, though a relic of a past entertainment era, is far from useless. Whether you're an electronics hobbyist eager to salvage components for new projects, a parent looking for an educational tool for your child, or simply an environmentally conscious individual seeking responsible disposal methods, there are viable pathways forward. From transforming a DVR's hard drive into valuable external storage to ensuring the unit is properly recycled, you can give your retired technology a new purpose. By understanding the capabilities and limitations of your device, and by prioritizing sustainable practices, you can effectively manage your old DIRECTV equipment, contributing to a clutter-free home and a healthier planet.